Posted on

Stop Losing Clubs: Golf Label Text That Survives Four Seasons

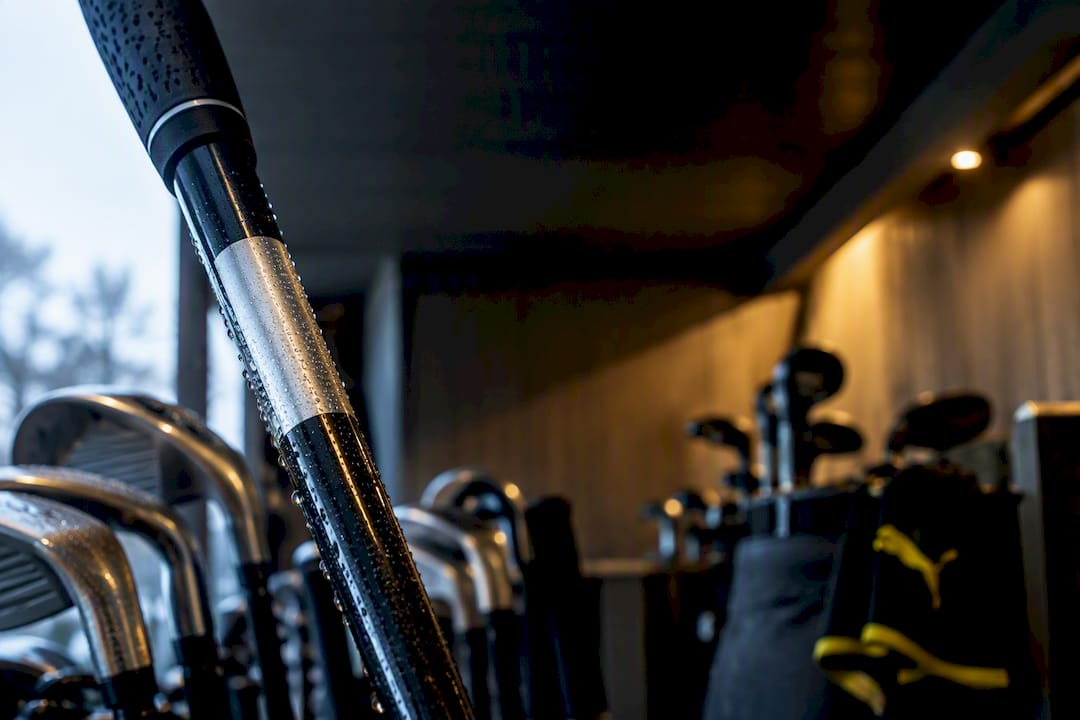
Golf club label resisting outdoor moisture

The best golf label text leads with one primary identifier, a surname or set number, followed by a single readable backup line: a phone number, email, or QR code. Keep shaft labels to one or two short lines; bag tags can carry more, including a logo or event name. Legibility and a durable substrate matter more than decorative wording every time.


TL;DR:

  • Most durable golf labels use laminated vinyl or metallized polyester with overlamination to resist UV fading and surface wear for at least four seasons.
  • Shaft labels should stay below the grip, about 0.5 to 1 inch tall, with high contrast and simple font sizes to ensure readability during quick club exchanges.
  • Pair QR codes with clear, high-contrast contact information to improve scanning reliability, and test with various phones before final ordering.
  • Proper placement and size are critical; bag tags should be around 2 to 3 inches, with full contact details, while cart signs focus on large, minimal text for quick distant reading.
  • Ordering a real-size mockup and checking legibility at arm’s length before production helps prevent design mistakes that can render labels unreadable.

Golf Blab
Make Your Clubs Unmistakably Yours
Golf Blab offers personalized golf club labels that combine distinctive style with practical function on the course.

Explore Golf Blab

Table of Contents

What Golf Label Text Should Include (Shaft Labels, Bag Tags, Cart Signs)

Every golf label carries a job, and that job changes depending on where it lives on your equipment. A shaft label gets glanced at from a foot away during a club swap. A bag tag gets read up close, often by a stranger trying to return a lost bag. A cart sign gets scanned from across a staging area by a volunteer juggling fifty other assignments at once. Different label formats demand different information density and placement, and treating them the same is the most common design mistake golfers make.

Think of the hierarchy in three tiers:

  • Primary identifier: surname or set number, big and unmistakable
  • Secondary contact: a phone number, email, or short QR landing link
  • Tertiary detail: event name, team designation, or a small logo mark

Shaft labels should stay stripped down: high contrast, minimal characters, nothing decorative competing for attention. Bag tags have room to breathe, so a full name alongside a phone number and even a tournament logo works well. Cart signs need the opposite instinct entirely, just a group number or last name rendered large enough to read at a walking pace across a parking lot.

Font Size, Contrast, and Layout Rules for Legible Labels

Small labels punish small mistakes. Text set below roughly the equivalent of 26 pixels on a standard shaft label frequently blurs into illegibility once printed and viewed at arm’s length, especially on a moving cart or in bright sun glare. The fix is not clever design, it’s restraint.

Contrast decides whether text survives a quick glance. Dark lettering on a light background, or the reverse, consistently outperforms subtle color pairings that look elegant on a screen but vanish outdoors. Skip gradients and low-contrast pastel combinations entirely.

Layout follows the same logic:

  • Set your primary identifier on a single line whenever the character count allows it
  • Avoid script or decorative fonts for anything functional; save flourish for a logo or accent, never for the name itself
  • Proof every design at 100% scale before ordering, never at a zoomed-in view that hides real-world sizing problems

Pro Tip: Print a paper mockup at actual size and tape it to the shaft or bag before you finalize the order. What reads clearly on a monitor can shrink into a smear once it’s on the actual surface.

Design tools that enforce minimum type sizes and show a true-to-scale preview catch these problems before they become printing mistakes like clipped text or washed-out contrast, which is worth checking for whenever you’re comparing label printing services.

Which Materials Keep Golf Labels From Fading or Peeling?

Golf equipment lives outside. It bakes in July heat, gets soaked in April rain, and rides in a trunk through winter storage. The material behind your text determines whether that identifier survives a single season or several.

Metallized polyester and laminated vinyl are the two substrates that show up again and again in durable golf label construction, and for good reason: both resist moisture intrusion and hold color under UV exposure far better than uncoated paper stock or basic vinyl decals. Mylar-style laminates add another layer of physical toughness against the scuffs a bag takes on cart paths and airline conveyor belts.

A few things separate a label that lasts from one that peels by August:

  • Overlamination shields printed ink from UV fading and surface abrasion
  • Adhesive cure time matters more than most golfers realize; a bond that hasn’t fully set will lift under heavy handling within weeks
  • Placement and care extend life further, keeping labels away from grip friction points and wiping them down rather than scrubbing

Weatherproof, fade-resistant, laminated thermal transfer labels represent the commercial standard golfers should be comparing against. Golf Blab builds its own labels around materials designed to hold up across four full golf seasons, which is the kind of real-world benchmark worth asking about from any supplier.

Where to Place Golf Labels and What Size Works Best

Placement is where good label text either performs or gets ignored. Get the position and dimensions right, and even a simple two-line identifier does its job for years.

  1. Shaft labels belong below the grip and above the club’s midpoint, never touching the tape or overlapping the swing zone. A range of roughly 0.5 to 1 inch tall keeps text legible without interfering with hand placement.
  2. Bag tags attach through a grommet or zip-tie loop, sized around 2 to 3 inches across so a full name, phone number, and small logo can all sit without crowding.
  3. Cart signs run larger, often 4 inches or more, with text reduced to the bare minimum, a group number or last name only, since the goal is a split-second read from a distance.

For a closer look at exact application steps, Golf Blab’s guide to labeling clubs walks through hand placement and surface prep in more depth.

Should You Add a QR Code to Your Golf Label?

QR codes solve a real problem: cramming a phone number, email, and message into a space smaller than a postage stamp. But a QR code is only as useful as the phone scanning it, and course conditions, wet fingers, bright glare, low battery, work against a clean scan more often than golfers expect.

That’s why QR codes should never stand alone; pair one with a readable name or phone number as a permanent fallback. A few habits keep this reliable:

  • Size the QR code at least half an inch square so cameras can lock focus quickly
  • Keep contrast high, black on white performs best, and test scans across two or three different phone models before finalizing an order
  • Encode a simple contact landing page rather than a personal email or home address, protecting your privacy if the club ever ends up with a stranger

Golf Label Text Ideas That Stay Readable and Tasteful

Good label copy is short enough to read in a second and personal enough to feel like yours. A surname alone often does more work than a full name. A set number paired with initials handles a full bag without repeating the same six letters fourteen times. A short nickname with a single digit adds personality without clutter.

  • “Marini · #4” for individual club identification within a set
  • “J. Alvarez” as a clean, professional bag tag standard
  • “Team Ridgeview 2026” for tournament-specific gear
  • A short phone digit string as a minimal backup contact line

Logos and colored accents earn their place during team play or tournament weeks, but reflective or metallic finishes can glare under midday sun and actually hurt legibility. Etiquette matters here too: keep the primary identifier calm and easy to read, and save the personality for accents rather than the text a stranger needs to read fast.

How to Order and Proof Your Golf Label Text

Ordering a custom label is simple once you know what to check before you click “confirm.” Skipping any of these steps is how golfers end up with a beautiful design that’s unreadable from three feet away.

  1. Choose your label type first, shaft label, bag tag, or cart sign, since each has different size constraints and text limits.
  2. Enter your text using the hierarchy above: primary identifier, one backup line, optional logo or event name.
  3. Request a real-size mockup or downloadable proof. Templates and printable previews exist precisely so you can catch sizing problems before production, not after the label’s already on your clubs.
  4. Check legibility at arm’s length, not zoomed in on a screen, before approving anything.
  5. Confirm substrate, overlamination, and adhesive cure time with whichever supplier you’re using; these details separate a label that lasts a season from one that lasts four.
  6. Save your roster or template if you’re ordering for a whole team or event, and sort labels by name or number before they ship to avoid a scramble on distribution day.

The Label Mistakes That Ruin Otherwise Good Gear

The single biggest mistake is cramming too much onto too little surface. A shaft label with a full name, phone number, and slogan crammed into an inch of space doesn’t read as personalized, it reads as noise. Discipline beats decoration every time on a surface this small.

Unreadable fonts come next. Script fonts, condensed display type, and anything with thin serifs might look sharp in a design preview, but they degrade fast once printed small and viewed from a distance or through a scratched laminate. Stick to clean sans-serif lettering for anything functional.

Low contrast is the quiet killer. A gold script on a white background looks premium on a monitor and disappears entirely in direct sunlight. Test every color pairing the way it’ll actually be seen, outdoors, at midday, from a few feet away.

Skipping the proof stage causes more return requests than any other single decision. A digital preview at 100% zoom is not the same as a physical mockup taped to a shaft. Order a sample when a supplier offers one.

Finally, golfers sometimes treat cart signs like bag tags, packing in full names and contact details that nobody has time to read during a quick cart assignment. Match the text density to the viewing distance and urgency of each format, not the other way around.

The Label Mistakes That Ruin Otherwise Good Gear — overview diagram

When Should You Replace a Golf Label?

Even the most durable label eventually needs a refresh, and knowing the signs saves you from carrying illegible gear for months. Watch for edge lifting first, the earliest sign that adhesive has started to fail, usually appearing at corners where handling friction is highest. Fading text, especially in reds and blues, tends to show up after repeated UV exposure well before the label physically peels.

A well-built label using metallized polyester or laminated vinyl with proper overlamination should realistically hold up across four full golf seasons under normal play conditions. That’s a meaningful benchmark, since cheaper adhesive-only labels often show visible wear within a single summer.

A few habits stretch that lifespan further. Wipe labels down with a damp cloth rather than scrubbing them with cleaning solvents, which can break down laminate seals over time. Store clubs somewhere temperature-stable during winter rather than a hot trunk or unheated garage, since repeated temperature swings accelerate adhesive breakdown. Check labels each spring before the season starts, and replace anything showing curling edges or faded text before it becomes unreadable mid-round.

Four-step golf label care checklist

Replacing a label is far cheaper than losing a club to a stranger who can’t read who it belongs to. Treat that seasonal check as routine as regripping.

An Editorial Perspective on Getting Golf Label Text Right

Most golfers overthink the creative part and underthink the durability part, and that’s backward. The identifier matters less than whether it survives the season. Golf Blab’s custom club labels are built around that priority, pairing personalized style with materials engineered to outlast four seasons of real play, which is the standard every label should be judged against.

— Michael Marini

Order Custom Golf Club Labels Built to Last

Golf Blab’s Custom Golf Club Labels are the direct answer to everything covered above: a $29.99 label built for readability and four full seasons of outdoor wear, without the guesswork of piecing together a generic template from a print shop. Ordering takes three steps.

Rounding out your bag with matching gear is simple too. Pair your labels with the Golf Blab Under Armor Golf Hat or the Adidas Space Dyed Polo for a coordinated look at your next event, or browse the full Golf Blab shop for gift cards and bundled options.

Sources

FAQ

What Text Should I Put on a Golf Club Label?

Lead with a surname or set number, then add one backup line, a phone number, email, or QR code. Keep it to one or two short lines so the text stays readable at a glance, especially on shaft labels where space is tightest.

How Long Do Golf Labels Actually Last Outdoors?

Quality labels built from metallized polyester or laminated vinyl with proper overlamination typically hold up well against sun, rain, and handling. Golf Blab’s labels are built to last four full golf seasons under normal play conditions.

Should I Use a QR Code Instead of Printed Text?

A QR code saves space and works well for sharing contact details digitally, but it should always be paired with readable backup text like a name or phone number. Relying on a QR code alone risks a lost club going unreturned if a scan fails.

What Size Should a Shaft Label Be?

Most shaft labels work best between 0.5 and 1 inch tall, positioned below the grip where it won’t interfere with your swing. Text should stay large enough to read clearly at arm’s length, never squeezed below a legible minimum size.

How Much Do Custom Golf Club Labels Cost?

Golf Blab’s Custom Golf Club Labels are priced at $29.99 one-time, covering personalized text, proofing, and durable materials built for multi-season wear.
Posted on

Golfers Stop Ruining Shafts: Remove Club Labels in 4 Safe Steps

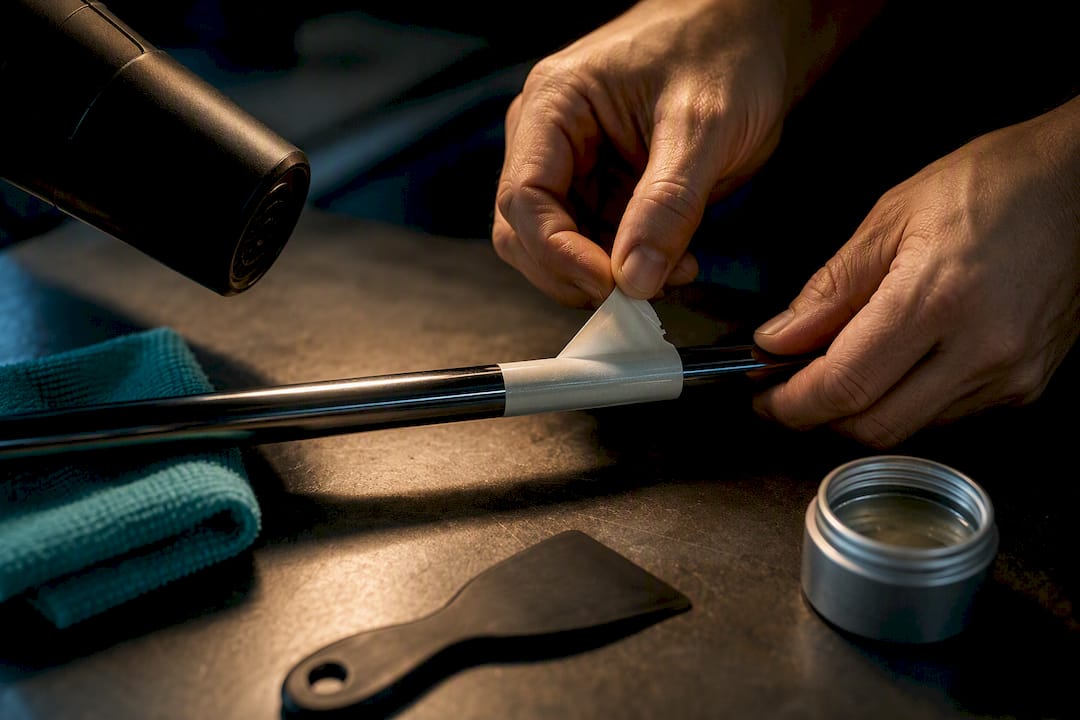
Hands safely removing label from golf shaft

Heat the sticker with a hair dryer, peel it low-and-slow from one corner, then dissolve what’s left with a citrus remover like Goo Gone or a splash of isopropyl alcohol. That sequence works safely on both steel and graphite shafts, though graphite demands lower heat and a lighter hand near the ferrule. Skip acetone and metal blades entirely, and you’ll walk away with a clean shaft and an intact finish.


TL;DR:

  • Using a hair dryer on low or medium heat for 30 to 60 seconds softens the sticker’s adhesive, making peeling safer and reducing finish damage.
  • A plastic scraper or an old credit card should be used gently at a low angle to lift the sticker without scratching the shaft surface.
  • Citrus-based removers like Goo Gone are effective for most residues, but stubborn adhesive may require stronger solvents like WD-40 or isopropyl alcohol, applied carefully.
  • Graphite shafts require lower heat and milder solvents, while steel shafts tolerate slightly more aggressive cleaning, but metal blades and acetone must be avoided.
  • Proper cleaning, including thorough washing and drying, preserves the shaft finish and creates a better surface for new labels or grips that last longer.

Golf Blab
Personalize Your Cleaned Clubs
Give your freshly cleaned shafts a distinctive finish with personalized golf club labels from Golf Blab.

Table of Contents

How Do You Remove Stickers From Golf Clubs Safely?

The short version deserves a longer explanation, mostly because so many golfers reach for the wrong tool first. A butter knife feels efficient. A splash of nail polish remover feels like a shortcut. Both are how a $200 driver shaft ends up with a scarred clear coat and a warranty claim nobody wants to file.

Removing golf club stickers correctly is less about brute force and more about patience layered on top of the right chemistry. Heat softens the adhesive bond. A plastic edge lifts the label without scoring the surface underneath. A solvent finishes the job by breaking down whatever glue residue clings on after the sticker itself is gone. Every credible source on golf club label removal, from equipment forums to gear publications, converges on this same three-stage logic, and for good reason: it respects the materials instead of fighting them.

This matters more than it sounds like it should. A shaft isn’t just a stick that swings a clubhead. It’s the one part of the club your hands feel on every single swing, and any residue, tackiness, or dulled finish left behind changes that feel in small but noticeable ways. Getting the removal right the first time means you’re not troubleshooting a sticky grip zone three rounds later.

How Do You Remove Stickers From Golf Clubs Safely? — overview diagram

What Tools and Supplies Do You Need on Hand?

Gather everything before you start. Stopping mid-project to hunt for a scraper while a sticker cools back down defeats the purpose of the heat step.

Tools:

  • A hair dryer, set to low or medium heat (no heat gun, which runs far too hot for shaft finishes)
  • A plastic scraper or an old, expired credit card for lifting edges
  • Microfiber cloths, at least two, for wiping and buffing
  • Cotton swabs for tight spots near the ferrule or hosel

Solvent options, each with its own trade-off:

  • Goo Gone or another citrus-based remover, for speed and general safety on finished surfaces
  • WD-40, for stubborn adhesive that laughs at citrus removers
  • Isopropyl alcohol, for a clean, film-free finish
  • Plain cooking oil, for delicate or unknown finishes where you’d rather go slow than risk a reaction

Keep acetone, steel wool, and anything metal-bladed out of reach. Abrasive tools and acetone are the two most common causes of avoidable shaft damage, and there’s no upside to the risk when gentler options work just as well given a little more time.

Pro Tip: Dab any new solvent on a hidden section of the shaft, like the part that sits inside the grip, and wait five minutes before treating a visible area. Some clear coats react unpredictably, and you’d rather find that out somewhere nobody will ever see.

The Step-by-Step Method: Heat, Lift, Solvent, Clean

This is the sequence to follow, in order, without skipping steps to save time.

  1. Apply heat. Hold the hair dryer four to six inches from the sticker on low or medium heat for 30 to 60 seconds. Touch the label periodically; once it feels warm and slightly pliable rather than stiff, it’s ready.
  2. Start the peel. Work a plastic scraper or old credit card under one corner at the lowest angle you can manage, almost parallel to the shaft. Pull slowly rather than yanking, reheating for another 15 to 20 seconds if the label starts to resist or tear.
  3. Apply solvent to the residue. Once the sticker itself is off, you’re usually left with a tacky adhesive ghost. Dab a small amount of your chosen solvent onto a cloth, not directly onto the shaft, and press it against the residue for 30 seconds before rubbing in small circles.
  4. Rinse and dry. Wipe the treated area with a damp cloth to lift dissolved adhesive and any solvent film, then dry it completely with a fresh microfiber cloth.

That final drying step isn’t a formality. Leftover moisture or oily film changes how the shaft feels in your hands on the next swing, and it can attract dust and grip debris that re-creates the sticky problem you just solved.

Pro Tip: Work in short sections rather than trying to heat and peel an entire label at once. A three-inch decal comes off far more cleanly in two passes than in one rushed pull.

The Step-by-Step Method: Heat, Lift, Solvent, Clean — overview diagram

Which Solvent Should You Use for Adhesive Residue?

Not every solvent behaves the same way, and picking the wrong one for the job either wastes your time or introduces risk you didn’t need to take.

  • Goo Gone (citrus-based remover): It’s a fast, generally safe first choice for finished shaft surfaces, and most golfers keep a bottle around for exactly this reason. Keep it off rubber grips, where citrus oils can soften and degrade the material over repeated use.
  • WD-40: It penetrates adhesive bonds aggressively and often clears residue that citrus removers can’t touch. The trade-off is an oily film that has to be washed off afterward, or you’ll end up with a slick spot exactly where your hands need grip.
  • Isopropyl alcohol: This is the best finishing pass. It evaporates cleanly without leaving film, which makes it the right tool for the last wipe-down rather than the first attack on stubborn glue.
  • Cooking oil or peanut butter: Slower, but genuinely gentle. If you’re working on a finish you don’t fully trust, or you’re out of commercial solvents, a light coating left to sit for several minutes can loosen adhesive without any chemical risk.

The escalation only goes one direction: start mild, move to something stronger only if the gentler option genuinely fails after a fair attempt. Jumping straight to the strongest solvent on the shelf is how minor residue turns into a bigger cleanup problem, and it’s rarely necessary. If a solvent hasn’t budged the residue after two honest attempts, that’s the signal to stop and reconsider your method rather than reach for something harsher.

Does Shaft Material Change How You Should Clean It?

Graphite and steel don’t tolerate the same treatment, and treating them identically is where most avoidable damage happens.

  • Graphite shafts: Use lower heat settings and shorter bursts than you would on steel. Acetone and high heat both risk damaging the clear coat and the epoxy bond at the ferrule, so avoid soaking that area even with milder solvents.
  • Steel or chrome shafts: More forgiving of heat and general handling, but still no metal scrapers or abrasive pads. Chrome scratches more easily than its tough appearance suggests.
  • Grips: Keep citrus removers and alcohol away from rubber grip material, since both can dry it out or cause swelling over repeated exposure. Heat and mechanical peeling alone usually handle any sticker or tag near the grip.
  • Clubhead finishes and painted areas: Always test a new solvent on a hidden spot first. Painted logos and cosmetic finishes react differently than bare shaft surfaces, and a five-minute test saves a permanent mistake.

What About Stubborn Residue, Lead Tape, or Hosel Labels?

Some jobs don’t fit the standard sequence cleanly, and it helps to know the edge cases before you improvise something risky.

  • Hardened, baked-on residue: A Magic Eraser can work as a cautious last resort. The melamine foam lifts adhesive through gentle micro-abrasion, but press lightly, since heavier pressure can dull a high-gloss finish over repeated passes.
  • Delicate or unknown finishes: A long soak with cooking oil, left for one to two hours, softens even stubborn adhesive without any chemical risk. It takes patience, not effort.
  • Old adhesive near the hosel: Clean around lead tape and hosel labels with short solvent applications rather than a long soak, since pooled solvent can seep into places you don’t want it.
  • When to call a technician: If a finish looks cloudy, bubbled, or discolored after any of these methods, stop immediately. That’s a job for a club tech, not another round of solvent.

What Do You Do When Something Goes Wrong?

Most problems here have a quick, low-risk fix.

  • Sticker tears mid-peel: Reheat the remaining piece for another 15 to 20 seconds and restart the peel from a fresh corner rather than fighting the torn edge.
  • Residue won’t fully lift: Repeat the solvent application, or switch from citrus remover to isopropyl alcohol for a stronger finishing pass.
  • Finish looks dull or hazy after cleaning: Stop treatment immediately, test the reaction on a hidden spot, and consult a professional repair resource if the haze doesn’t buff out with a dry microfiber cloth.
  • Nothing’s working after two full attempts: That’s the point to hand it to a technician rather than escalate to acetone or abrasive pads out of frustration.

Pro Tip: If you’re genuinely unsure whether a stain is finish damage or just leftover solvent film, let the shaft sit dry for ten minutes before judging it. Film often looks worse wet than it actually is.

How Do You Clean Up and Restore the Club’s Finish?

The last stage is easy to rush, and rushing it is exactly how a great cleanup job turns into a slippery grip on your next range session.

  • Wash any area treated with WD-40 or cooking oil in warm, soapy water, since oil-based solvents leave a film that affects both feel and safety if left untreated.
  • Follow with a light isopropyl alcohol wipe for a final degrease if any tackiness remains.
  • Buff the whole shaft with a dry microfiber cloth and inspect closely under good light for scratches or dulled spots.
  • Store clubs somewhere dry to prevent rust on steel shafts and to keep dust from settling into any leftover tackiness. A quick look at broader club care routines pays off well beyond this one cleanup.

Why Careful Label Removal Matters More Than Golfers Think

Most golfers treat sticker removal as an afterthought, something to handle in thirty seconds with whatever’s nearby. That instinct is exactly backward. A shaft’s finish is a thin, permanent layer, and every scrape from a metal blade or every splash of acetone leaves a mark you’ll be looking at for the life of the club. The methods that actually work, heat, patience, and the right solvent, take maybe five extra minutes compared to brute force. That’s a trade worth making every time.

Golf Blab builds its educational content around exactly this kind of practical, no-nonsense equipment care, alongside resources on how to grip a golf club and other maintenance fundamentals that keep your set performing the way it should. Once a shaft is clean, it’s also the ideal moment to think about what goes on next, since a fresh surface is what makes a custom label sit flat and last through a full season instead of peeling at the edges within weeks.

Get the cleaning right, and everything you add to that shaft afterward, label, grip, or fresh coat of care, has a better surface to hold onto.

— Michael Marini

Give Your Freshly Cleaned Clubs a Label That Actually Lasts

A shaft stripped of old sticker residue is the best possible surface for something new, and that’s exactly where Custom Golf Club Labels from Golf Blab come in. Unlike a factory decal that peels and fades within a season, these labels are built for golfers who want their identity on the shaft without sacrificing the clean finish underneath. Priced at $29.99 one-off, they’re a straightforward way to mark your bag, your set, or a gift with something that outlasts a single round. Pair them with a Golf Blab Under Armor Golf Hat or a Golf Blab Adidas Sport Polo for the full setup, or browse the Golf Blab shop for gift cards and gear. Once your shafts are clean, check the materials and place your order while the surface is prepped and ready.

Sources

These sources back the methods covered above, each focused on a different piece of the process. Golf covers citrus-based solvent safety and grip precautions. CaddieHQ details the gentle-to-strong escalation approach. Golf Hire Ireland outlines the heat-and-peel timing. GolfWRX forum discussions reflect real technician and hobbyist consensus on tools to trust and tools to avoid.

FAQ

How Do I Remove Labels From Golf Club Shafts?

Heat the label with a hair dryer for 30 to 60 seconds, then peel it slowly at a low angle using a plastic scraper. Follow with a citrus-based remover or isopropyl alcohol to clear any leftover adhesive, then wash and dry the shaft completely.

Does WD-40 Remove Sticker Residue?

Yes, WD-40 penetrates and dissolves adhesive bonds effectively, often clearing residue that gentler solvents can’t. It leaves an oily film behind, so a wash with warm soapy water afterward is necessary to restore proper grip feel.

Should I Take the Stickers Off My Golf Clubs?

That’s a personal call, though many golfers remove factory stickers to clean up the shaft’s appearance or make room for a custom label. If you do, use the heat-and-peel method rather than scraping with anything metal to keep the finish intact.

Will Dawn Dish Soap Remove Sticker Residue?

Warm water mixed with a mild dish soap works well as a gentle first attempt on light residue, and it’s a safe starting point before reaching for stronger solvents. For stubborn adhesive that soap alone won’t touch, move up to isopropyl alcohol or a citrus-based remover.

Posted on

Film Golf Swings Coaches Can Use: Phone Setup in 1 Minute

Golfer filmed during a complete swing

The quickest reliable setup is a small tripod placed down-the-line at hip height, eight to twelve feet from the ball, recording at 120 fps slow motion. A phone clamp on your bag or cart works nearly as well if you’re moving between holes. Third-party apps add polish, like automatic clip tagging or overlay lines, but they’re optional. The tripod and the angle are what actually matter.


TL;DR:

  • Using a small tripod placed 8 to 12 feet behind the ball and recording at 120 fps provides the clearest, most useful slow-motion golf swing footage.
  • The best camera angles for analysis are down-the-line to assess swing path and club plane, and face-on to evaluate balance and sequencing.
  • Locking exposure, focus, horizon level, and framing before recording ensures professional-quality clips that are easy to analyze later.
  • Phone mounts such as compact tripods or clamp mounts suited to your typical practice or course routine will prevent shaky footage and save setup time.
  • Most effective analysis occurs when filming consistently, reviewing clips against proper reference points, and bringing footage to a professional for interpretation.

Golf Blab
Build Better Golf Skills
Explore Golf Blab’s targeted instructional content for practical guidance that supports improvement for novice and experienced golfers.

Explore Golf Blab

Table of Contents

Best Phone Mounts for Filming a Golf Swing

The right mount depends on where you golf, not how much you want to spend. A weekend range warrior has different needs than someone who films every shot on the course, and buying the wrong gear leads to shaky, unusable footage no matter how good your phone’s camera is.

Compact tabletop tripods are the workhorse choice for most golfers. They’re small enough for a golf bag pocket, sturdy enough to survive wind on an open range, and cheap enough that losing one doesn’t sting. Look for adjustable legs so you can level the phone on uneven turf.

Compact tripod stabilizing phone on turf

Flexible tripods (the GorillaPod style, with bendable legs) solve a problem tabletop models can’t: uneven ground. You can wrap the legs around a golf cart rail, a fence post, or a bag stand instead of relying on flat ground that rarely exists on a range or fairway.

Monopods and selfie sticks trade stability for reach. They’re useful for grabbing a quick face-on angle from a distance you couldn’t otherwise reach, but they wobble in wind and aren’t built for hands-free recording, so they’re better as a backup than a primary mount.

Clamps and phone clips attach directly to a cart rail, fence, or umbrella stand. These are the best option for golfers who film every round rather than dedicated practice sessions, since you’re not carrying or setting up separate gear.

Golf-specific bag and cart mounts are purpose-built for this exact job. They usually include a rotating head so you can switch between down-the-line and face-on without repositioning the whole rig.

Spike or stake mounts push into turf and give you a fixed point at ground level, which some instructors prefer for capturing ball position and lower body movement.

Buying guidance breaks down simply:

  • Mostly practice at the range? A compact tripod covers you completely and stores flat in your bag.
  • Film mostly on-course? A clamp or golf-specific cart mount saves setup time between shots.
  • Only film occasionally? Skip the purchase. Field hacks (covered below) work fine for infrequent use.
  • Want one mount for everything? A flexible tripod adapts to nearly any surface, which makes it the most versatile single purchase.

Before buying, check the mount’s clamp width against your phone. Wider phones and thick protective cases can jam narrower clamps, and most cheap mounts max out around 3.5 inches. A quick-release plate is worth the extra few dollars if you plan to swap the phone on and off often, since twisting a screw mount on and off every hole gets old fast.

What Are the Best Camera Angles for Golf Swing Video?

Two angles cover nearly everything a coach or a self-analysis app needs to see, and instructors generally ask for both rather than picking one.

Down-the-line places the camera directly behind the ball, aimed straight down the target line. This angle reveals swing plane, club path, and how far the club drifts inside or outside on the backswing, details that are nearly invisible from any other position.

Face-on places the camera directly in front of you, perpendicular to the target line. This angle shows spine tilt, weight shift, and head movement, the pieces that matter most for balance and sequencing.

Here’s how to set up both quickly:

  1. Down-the-line first. Place the tripod about 8 to 12 feet behind the ball, with the lens roughly waist height. Frame the shot so your full body and the clubhead are visible at the top of the backswing, with a little headroom above your hands.
  2. Face-on second. Move the tripod to a spot even with the ball, 8 to 12 feet away, lens between waist and chest height depending on your own height. Center the frame so you’re not clipped on either side during full extension.
  3. Check the grid before either swing. Turn on your phone’s grid lines and align the horizon with a horizontal line, and align your body’s centerline with a vertical one. A tilted horizon makes swing-plane analysis unreliable even when everything else is right.
  4. Take one test swing and scrub through it. Confirm the clubhead never leaves the frame at the top of the backswing or through impact. This is the single most common framing mistake, and it ruins otherwise good footage.

If you only have time for one angle, coaches still generally want to see both, so a 30-second reset to grab the second view is worth the extra minute. Recreational golfers often default to face-on because it “looks” like the swing, but down-the-line is usually the more diagnostic angle for club path issues.

Which Phone Camera Settings Actually Matter?

Frame rate is the setting that determines whether your footage is actually analyzable or just a blurry approximation of your swing. 120 fps is the practical sweet spot for most modern phones, giving you enough slow-motion detail to see impact clearly without the massive file sizes that come with higher rates.

Pro Tip: If your phone supports 240 fps, save it for isolated impact review rather than full swings. The extra detail is nice, but the file sizes add up fast, and 120 fps captures everything most self-analysis needs.

Beyond frame rate, a short list of settings separates usable footage from wasted footage:

  • Shoot in landscape orientation, always. Vertical video crops out exactly the parts of your swing a coach needs to see.
  • Lock exposure and focus (AE/AF Lock) before you swing. Without it, the camera will hunt for focus mid-swing as lighting shifts, softening the exact frames that matter most.
  • Turn on grid lines for level framing and consistent camera placement across sessions.
  • Avoid digital zoom. Move the tripod closer instead. Digital zoom degrades footage quality precisely when you need clarity most.
  • Disable HDR for swing recording. HDR processing can introduce a slight lag between frames that muddies slow-motion playback.
  • Save clips as .mp4 or .mov, whichever your phone defaults to; both are compatible with essentially every swing analysis app.

Regular-speed video is fine for quick sharing with a buddy or posting online, but slow motion is what makes frame-by-frame analysis possible. If storage space is tight, delete swings you’ve already reviewed rather than downgrading your frame rate. A few gigabytes of swing clips is a small price for footage you can actually use.

Which Apps Help You Analyze a Recorded Swing?

Not every golf app does the same job, and picking the wrong type wastes the good footage you just captured. Four categories cover most of what’s available.

Instant slow-motion recorders simply capture and immediately replay your swing in slow motion, no analysis layer involved. Apps like Golf Swing Cam fall into this group, offering fast replay and basic editing without much complexity.

Automatic swing detectors watch continuously and clip each strike on their own, which matters if you’re filming solo at the range and don’t want to run back and forth to press record. GolfRec and similar apps advertise this feature, though device compatibility requirements can be strict, so check your phone’s model and iOS version before relying on it.

AI analysis platforms go a step further, offering frame-by-frame feedback pulled directly from your video. Tools like SwingSnap position themselves as an always-available coach for practice sessions between lessons.

Frame-by-frame editors let you manually scrub, pause, and draw over your own footage, which suits golfers who already know what they’re looking for and just need the tools to isolate it.

When comparing apps, prioritize:

  • Automatic clip saving so you’re not manually trimming every swing
  • Pause and replay at specific frames, especially impact
  • Drawing overlays for swing plane or spine angle
  • Side-by-side comparison against a pro swing or your own past clips
  • Sharing or streaming options if you’re sending clips to a coach

Pricing ranges from free with ads to subscription models and one-time unlocks for advanced features. Test the free tier before paying, since basic recording and replay covers most golfers’ actual needs.

Stabilizing Your Phone Without a Tripod

Not every session calls for hauling a tripod, and a surprising number of usable clips come from gear you already have in your bag.

Wedging your phone into a bag divider at the right angle creates a surprisingly stable base, especially for a quick down-the-line check between range balls. A folded towel or headcover under the phone adds extra grip and levels out an uneven surface. Clamping the phone to a cart rail or a nearby fence rail works well on the course, where you’re moving hole to hole and don’t want to fuss with tripod legs. An alignment stick clipped to a cheap phone clamp is another field-tested trick, letting you push one end into the turf like a stake.

A few habits matter regardless of which hack you use:

  • Check the horizon against the grid lines before every swing, not just the first one
  • Keep the phone as far from the swing path as your framing allows, reducing vibration from footsteps or club contact
  • Recheck the mount after every few swings; clamps loosen and towels shift

Pro Tip: A hack is fine for occasional range sessions, but if you film every round or every practice day, the twenty minutes you’ll save over a season by owning a real tripod pays for itself.

A One-Minute Pre-Check Before You Hit Record

Run this before every session, not just the first swing of the day:

  1. Stability check. Give the mount a light tap. If it wobbles, fix it before recording.
  2. Orientation check. Confirm landscape mode.
  3. Framing check. Full body and clubhead visible at the top of the backswing.
  4. Exposure and focus locked. Tap and hold on your body to lock AE/AF.
  5. Frame rate set. 120 fps for most sessions, 240 fps only if you’re isolating impact.
  6. Test swing and scrub review. Take one practice swing, then check the top-of-backswing frame for clipping.

Name and save clips by date and angle (like “0912_DTL” and “0912_FO”) so you can compare sessions later without scrolling through dozens of identically named videos. Common problems are easy to fix once you know to look for them: sun behind the camera washes out the golfer, a tilted horizon throws off plane analysis, and a frame that’s too tight clips the clubhead at the exact moment it matters most.

How Golf Blab Helps You Turn Footage Into Real Improvement

Filming a swing is only half the job. The harder part is knowing what you’re actually looking at once the clip is saved, and that’s where most self-taught analysis stalls out. Golf Blab’s educational library breaks down the full golf swing sequence step by step, giving you a reference point for comparing your own down-the-line footage against proper sequencing.

The value of filming in the first place is well established. Recording your swing consistently turns vague feelings about your swing into footage you can actually measure against yourself over time, and video analysis more broadly has become one of the more accessible tools available to golfers who can’t get to a coach every week.

Author Michael Marini covers this ground from the practical side: gear that works, angles that reveal something useful, and settings that don’t sabotage good footage before it even reaches an app. Partnerships with professional golfers reflect the same instructional focus that shapes this kind of guidance.

Once you’ve got clips worth studying, Play Golf with a Tour Pro gives you a direct next step: bring your footage to someone qualified to interpret it rather than guessing alone.

Should You Mute Audio or Capture Sound When Filming Your Swing?

Audio rarely matters for swing analysis, and it can actually work against you. Wind noise, cart chatter, and course announcements clutter the track and add nothing to what a coach or an app needs to evaluate. Muting your phone’s microphone before recording, or simply ignoring the audio track entirely during review, keeps your focus on the visual mechanics where it belongs.

There’s one exception worth knowing. Impact sound, the distinct crack or click of contact, can help you time your review scrubbing even without watching closely. Some golfers use that sound cue to quickly locate the impact frame when reviewing a long session of clips, rather than scrubbing through video by eye. If you plan to use audio this way, keep the microphone on but don’t rely on verbal notes during the swing itself. Talking while swinging is a distraction for you and adds nothing useful to the file.

If you’re sharing clips with a coach or posting to a group chat for feedback, muting the final file is usually the cleaner choice. Wind and background noise on a course carry surprisingly well on phone microphones, and stripping the audio makes for a cleaner, more professional-looking clip without changing anything about the swing analysis itself. Most video editing apps let you mute a clip in a single tap after recording, so there’s no need to think about it in the moment.

How Do You Keep Your Phone from Dying Mid-Session?

A dead phone halfway through a range session is one of the more avoidable frustrations in golf. Slow-motion video at 120 fps drains battery faster than nearly anything else your phone does, combining sustained camera use with intensive processing.

A few habits stretch a charge considerably further. Lower your screen brightness before you start recording, since the display is often a bigger drain than the camera sensor itself. Close background apps, especially anything using GPS or streaming data, before you head to the range. Turn on low-power or battery-saver mode between swings if your phone supports quick toggling, and switch it off only when you’re actively recording.

For longer sessions, a compact power bank in your bag solves the problem outright. A small 5,000 to 10,000 mAh battery pack, the kind that fits easily in a side pocket, can fully recharge most phones once or twice over and weighs less than a sleeve of golf balls. Look for one with a USB-C or Lightning cable already attached, since fumbling for a separate cord between shots defeats the convenience.

If you’re filming an entire round rather than a single practice session, consider recording only test swings at the range and saving full battery for a handful of key holes on course. Filming every single swing for eighteen holes at 120 fps will strain even a phone at full charge by the back nine, and you rarely need that much footage anyway. A handful of well-framed swings beats fifty unreviewed ones.

What Actually Moves the Needle When You Film Your Swing

Most advice on this topic obsesses over gear, and that’s backwards. A $15 tabletop tripod and a phone from three years ago will produce perfectly analyzable footage if the angle, distance, and settings are right. The gear conversation gets outsized attention because it’s easy to shop for and hard to get wrong, while the actual skill, framing a swing so the clubhead never leaves the shot and the horizon stays level, gets skipped entirely.

The bigger gap is what happens after the recording stops. Golfers film dozens of swings and rarely study any of them against a real reference point, which turns a genuinely useful habit into a pile of unwatched clips. Footage without structure is just video. The reader who benefits most isn’t the one with the fanciest mount; it’s the one who reviews consistently, compares against a real sequence, and eventually brings the footage to someone who can read it properly.

Prioritize the one-minute pre-check over any specific piece of gear. Consistency in framing beats a nicer tripod every time.

— Michael Marini

Ready to Turn Your Swing Video Into Real Feedback?

A good tripod and the right camera settings get you analyzable footage. What most golfers are missing isn’t more clips, it’s someone qualified to actually read them. Play Golf with a Tour Pro gives you exactly that for a session: a direct opportunity where your filmed swing gets real, expert eyes on it instead of another round of guessing alone.

If you’re building your setup at the same time, Golf Blab’s shop covers the practical side too, from personalized club labels to gear that makes practice feel like it belongs to you. Shopping for a golfer who films every round? E-gift cards at $25 one-off cover lessons or merchandise without guessing sizes or preferences.

Record your next session, study it against a real reference, and book your tour pro session while the swing is still fresh in your mind.

Sources

FAQ

What Is the Best Phone Holder for Filming Golf Swings?

A compact tabletop tripod is a versatile and practical choice for many golfers, being portable, stable, and affordable enough to keep in a bag pocket permanently. If you film on-course rather than at the range, a clamp mount for a cart rail or fence saves setup time between holes.

How Do I Film My Golf Swing Using Only My Phone?

Set your phone to landscape orientation, lock exposure and focus, and turn on grid lines for level framing. Place it down-the-line, 8 to 12 feet behind the ball at hip height, and record at 120 fps for footage detailed enough to review frame by frame.

What Is the Best App for Filming Golf Swings?

It depends on what you need: instant slow-motion apps like Golf Swing Cam suit quick replay, while automatic detectors like GolfRec work well for solo range sessions. Check device compatibility before committing to an automatic-detection app, since requirements vary by phone model.

What Is the Best Camera to Record Golf Swings?

You don’t need a dedicated camera. Modern phone cameras are more than adequate for coaching-level analysis when paired with a stable mount and the right settings, and phone slow-motion at 120 fps captures the detail most golfers and coaches actually need.

Do I Need Two Camera Angles or Just One?

Down-the-line and face-on each reveal different mechanics, and coaches typically want to see both. If you only have time for one, down-the-line usually offers more diagnostic value for swing path issues, but grabbing a quick face-on clip afterward takes less than a minute.