Posted on

The Common Golf Mistakes Costing You Strokes Every Round

Golfer adjusting swing posture on tee box

Most recreational golfers lose strokes to the same handful of errors: a faulty grip and setup, an early clubface fault in the takeaway, a swing that sways instead of turns, rushed tempo, poor ball position, over-lofted short-game club selection, unknown carry distances, and mental lapses that skip the pre-shot routine entirely. Every one of these has a coach-backed fix and a drill you can rehearse this week. Below, you’ll find corrections built on Shot Scope data, insight from Golf Monthly and Golf.com instructors, and a four-week practice plan you can start tomorrow.

  • Grip, pressure, and stance flaws that cause slices
  • Takeaway faults: fanning the face or dragging too far inside
  • Sway instead of rotation, killing your low point
  • Tension and rushed tempo that produce thin or topped shots
  • Ball position errors that prevent compression
  • Over-clubbing around the green instead of chipping and running
  • Guessing carry distances instead of knowing them
  • Skipping the pre-shot routine and compounding mistakes with hero shots

Jump to the four-week practice plan once you’ve spotted your pattern below.

Key Takeaways

Fixing common golf mistakes works best when you isolate one fault per week, drill it with immediate feedback, and track results using a simple E/S/M scorecard system.

Point Details
Start with grip and setup Correct hand placement and alignment before working on any other swing fault.
Fix the takeaway first A fanned face or overly inside path causes most slices and hooks downstream.
Learn real carry distances Track actual yardages from range sessions instead of guessing on the course.
Choose lower-lofted short shots Chip-and-run options often outperform lofted wedges around the green.
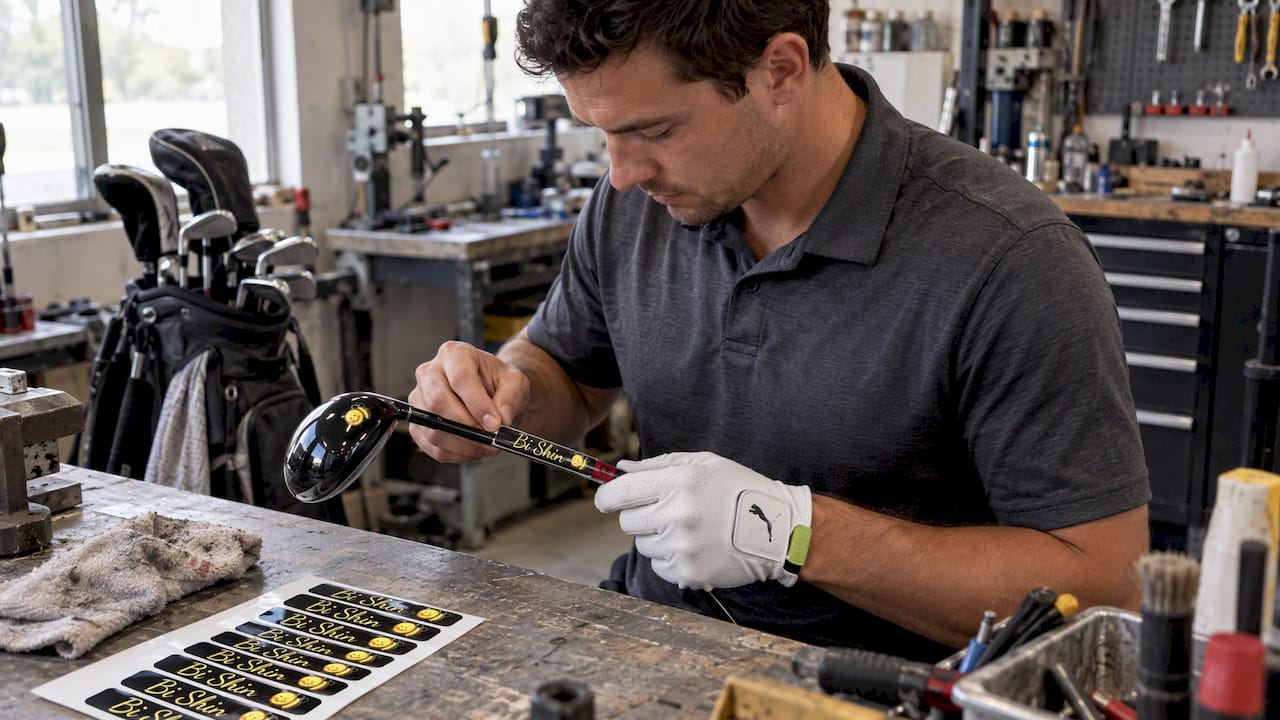
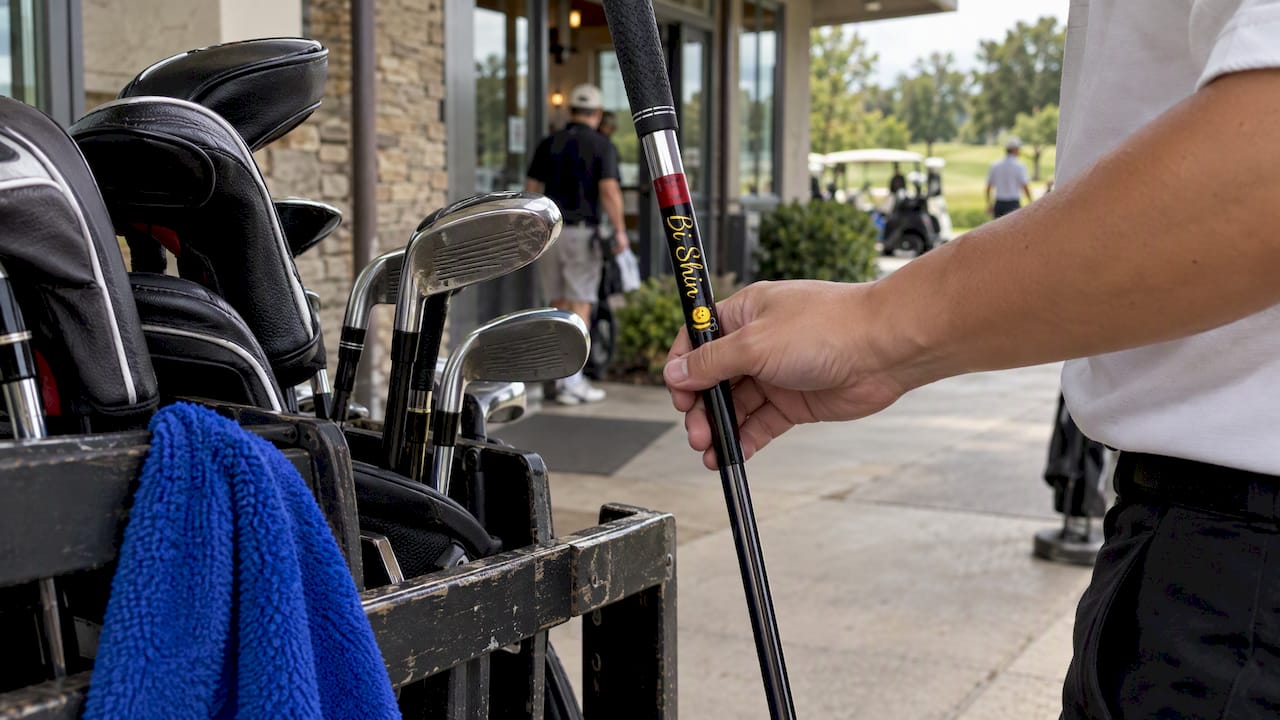
Support practice with personalized gear Golf Blab’s Custom Golf Club Labels and E-Gift Cards reinforce practice milestones and make thoughtful gifts.

Table of Contents

Common Golf Mistakes in Grip and Setup

A weak or overly strong grip changes your clubface angle before you ever start the swing, and it’s the single most common cause of the slice that haunts recreational golfers. Squeeze the handle too hard and you lose wrist hinge and clubhead speed; grip too loose and the club twists open at impact. Both problems show up as inconsistent launch, weak contact, and shots that curve when you least expect it.

Run through this checklist before every practice session:

  • Set the club in your fingers, not your palm, with the V formed by thumb and forefinger pointing toward your trail shoulder.
  • Keep grip pressure around a 4 out of 10. Firm enough to control the club, loose enough to hinge naturally.
  • Position the ball off your lead heel for driver, moving progressively back toward center for shorter irons.
  • Align your feet, hips, and shoulders parallel to your target line, not aimed directly at it.

Pro Tip: Lay an alignment stick on the ground pointing at your target, then place a second stick parallel to it along your toe line. Step away and check from behind: if your feet aren’t parallel to the target stick, you’ve found your miss before you ever swing.

Takeaway and Swing Path: Golf Swing Errors That Start Every Miss

Two takeaway faults account for a disproportionate share of bad shots: fanning the clubface open as you move it away from the ball, and dragging the club too far to the inside during the first foot of the swing. Both create predictable, repeatable misses, which is actually good news. A fanned face tends to produce a slice or a weak push. An overly inside takeaway often forces a compensating move later in the swing that leads to a smothered hook or a fat strike. Both faults are among the most common swing mistakes instructors see week after week.

Fixing either one starts with actually seeing your swing, not guessing at it.

  1. Record your takeaway on your phone from a face-on angle and check whether the clubhead stays outside your hands through the first 18 inches.
  2. Compare that frame to a mirror check at home: the clubface should look square to slightly toe-down, never wide open toward the sky.
  3. Practice one-hand takeaways (trail hand only) to chest height, feeling the club stay connected to your body’s rotation rather than getting yanked inside or flipped open.
  4. Repeat the takeaway to chest height 15 to 20 times without hitting a ball, then add contact once the path feels automatic.

Weight Shift and Balance Errors During the Swing

Swaying your hips laterally away from the target on the backswing, instead of rotating around a stable base, is one of the most common golfing errors among mid- and high-handicap players. Sway pushes your low point behind the ball, which produces fat shots when you catch the ground first and thin shots when your body lifts to compensate. Real power and consistency come from coiling against a braced trail leg, then shifting your weight forward into a firm lead leg through impact.

Focus on these cues during your next range session:

  • Feel your trail hip turn behind you on the backswing rather than slide sideways.
  • Keep roughly 80% of your weight on your lead side by the time the club reaches impact.
  • Finish in a balanced position with your belt buckle facing the target and your trail foot up on its toe.

Try the step-drill: start with your feet together, take a small step toward the target as you start your downswing, and swing through. It forces the forward weight transfer your body needs to feel before it becomes automatic.

Tempo, Tension, and Swing Speed Control

Rushing the transition from backswing to downswing, combined with a white-knuckle grip, is a quiet killer of good contact. Tension in your hands and forearms slows your release and produces thin or topped shots even when your mechanics are otherwise sound.

Pro Tip: Count “one” on your backswing and “two” on your downswing, out loud if you have to. A roughly 3:1 ratio between backswing and downswing time is what most smooth, repeating swings share, and forcing the count breaks the rushed pattern instantly.

  • Check your grip pressure at address, then again at the top of the backswing. If it climbed, you’re gripping for control instead of trusting your setup.
  • Save maximum speed for the driver, where a longer swing arc rewards it. With irons and wedges, prioritize tempo and center-face contact over trying to swing harder.

Ball Position and Compression: Fixing Flipping and Scooping Ball Mistakes

Bad ball position sets up nearly every “flip” you see at impact, where the hands try to scoop the ball into the air instead of letting the loft of the club do that work. Play the ball too far forward and you’ll catch it on the upswing with an open face. Play it too far back and you’ll deloft the club and drive it low and left.

Use these general reference points, adjusting slightly for your own swing:

  • Driver: off the inside of your lead heel.
  • Mid irons: roughly two ball-widths inside the lead heel, trending toward center.
  • Wedges and short irons: center of your stance, promoting a descending strike.

Compression shows up in your divots and in the sound of contact. A ball-then-turf divot pointing at the target and a crisp, low-pitched strike both signal good compression. A shallow scuff or no divot at all usually means you’re scooping. Practice hitting three balls in a row focusing only on taking a shallow divot after the ball. Once that feels repeatable, add a normal swing tempo back in.

Short Game Mistakes: Club Selection Around the Green

Amateurs consistently reach for the highest-lofted wedge in the bag when a lower-lofted club or even a putter would produce a far more reliable result. Shot Scope data cited by Golf Monthly found only a 21% up-and-down success rate with lofted wedges around the green, a number that climbs when players choose a chip-and-run with less loft instead. More loft means more margin for error in theory, but in practice it means more ways to catch the shot thin or heavy.

Use simple distance windows to guide your choice:

  1. Inside 10 feet of the green edge with no obstacle: putt it, even from the fringe or light rough.
  2. Ten to 30 feet with a clear runway: chip with an 8 or 9 iron, letting the ball release toward the hole.
  3. Beyond 30 feet or over a bunker: pitch with a gap or sand wedge, focusing on landing spot rather than the hole itself.

Build the feel with a three-station drill: hit five chip-and-run shots landing 3 yards onto the green, then 10 yards, then 20 yards, tracking how far each one rolls out before you move on.

Course Management and Distance Control

Guessing at yardages instead of knowing them is one of the clearest gaps between low and high handicappers. Single-figure players consistently emphasize learning true carry distance, not the career-best number you hit once with a following wind. Most recreational golfers overestimate their carry by at least half a club, which is exactly why so many approach shots come up short of the green.

Build real numbers through a few range sessions where you actually track outcomes:

  • Hit 10 balls with each iron and note where the majority land, not your longest one.
  • Write those numbers down and carry them in your bag or phone.
  • When in doubt on the course, take one more club and swing smoothly rather than forcing a smaller club to its absolute maximum.
  • Factor in wind and temperature: cold air and a headwind both shrink your effective distance more than most players expect.

Pro Tip: Play to the middle of the green, not the flag, unless the pin is tucked and you have full confidence in your number. The middle of the green forgives more mistakes than any other target on the course.

Mental Errors: Skipping the Pre-Shot Routine

Rushed decisions and skipped routines cause more wasted strokes than most golfers realize, and they’re the easiest mistakes to fix because they don’t require any swing change at all. Coaches classify errors into three types: Execution (you hit it fat), Strategic (you picked the wrong shot), and Mental (you rushed or lost focus). Marking an E, S, or M next to each bad shot on your scorecard reveals, by the end of 18 holes, whether your problems are mechanical, tactical, or between your ears.

  • Pick your target and club before you step to the ball.
  • Take one practice swing that matches the shot you’re about to hit.
  • Address the ball, take one final look at the target, and go. No re-gripping or second-guessing.
  • After a genuine mistake, take the smart recovery shot rather than the hero shot. Coaches note that a low-percentage recovery attempt usually compounds one bad shot into two.
  • Tally your E/S/M marks after the round to see which category needs the next week of practice.

Four-Week Practice Plan to Fix These Mistakes

Fixing every fault at once is how most self-directed practice sessions fail. Instead, target one or two of the highest-impact errors per week, in the order they tend to show up in a real swing sequence.

  1. Week 1: Grip, setup, and takeaway. Two sessions of 30 minutes. Alignment-stick checks plus one-hand takeaway drills, 20 reps per session.
  2. Week 2: Weight transfer and balance. Step-drill and finish-position holds, 15 reps each session, filmed from face-on.
  3. Week 3: Tempo and contact. Count-drill tempo work paired with the compression drill, alternating in sets of five balls.
  4. Week 4: Short game and course management. Three-station chip-and-run drill plus a nine-hole round where you track carry distances and mark E/S/M on every shot.

Daily reps matter more than session length. A compression drill done for 10 minutes every day beats one hour once a week. Golf Blab’s learning center breaks several of these drills down further with video walkthroughs, and pairing a milestone, like completing all four weeks, with a small reward can help the habit stick.

Physical Conditioning and Flexibility Mistakes Affecting the Swing

Limited hip and thoracic spine rotation forces compensations that look like swing flaws but are actually mobility problems in disguise. A golfer who can’t rotate their trail hip fully on the backswing will often sway instead, not because they don’t understand the correct motion but because their body physically won’t allow the turn. This is one of the more overlooked common golfing errors, because it gets diagnosed as a swing fault when the real fix is a stretching routine.

Golfer stretching hips outdoors before playing

Tight hamstrings and hip flexors, common in golfers who spend most of the day seated, restrict the hip turn needed for a full backswing and a complete follow-through. Weak core strength shows up as a loss of posture through impact, where the spine angle set at address collapses as the club approaches the ball. Skipping a warm-up before a round compounds all of this. Cold muscles resist rotation, so the first few holes often produce the worst swings of the day, purely because the body hasn’t loosened up yet.

A few minutes of dynamic stretching before you tee off, focused on hip rotation and shoulder turn, addresses more of your early-round misses than a swing thought ever will. Simple exercises like standing trunk rotations with a club across your shoulders, or hip circles before you leave the parking lot, cost nothing and take less time than a bucket of range balls. Building general rotational mobility two or three times a week off the course pays off in a swing that can actually execute the mechanics you’ve been practicing.

Playing clubs that don’t match your swing speed is a quiet source of mishits that no amount of practice will fully correct. A shaft that’s too stiff for your swing speed produces a low, weak ball flight because you can’t load and release it properly. A shaft that’s too flexible for a faster swing does the opposite, ballooning shots too high and costing distance and control. Off-the-rack clubs are built around average specifications, and plenty of recreational golfers fall well outside that average in height, swing speed, or posture.

Diagram comparing shaft flex and fitting effects

Improper lie angle is another overlooked equipment-related mistake. If your clubs are too upright or too flat for your setup, the toe or heel of the club digs into the ground at impact, pushing your shots offline no matter how clean your swing path is. Grip size matters too. Grips that are too thin encourage overly active hands through impact, while grips that are too thick can restrict the wrist hinge you need for full power.

A basic fitting session, even a simple one at a local shop rather than a full launch-monitor workup, can identify whether your current shaft flex and lie angle match your swing. It’s a one-time investment that prevents you from practicing the wrong compensations into your swing for years. Custom touches matter for confidence too. A set of Custom Golf Club Labels won’t fix a mismatched shaft, but knowing your equipment is dialed in, and personalized to you, is part of what makes a golfer trust the club in their hands.

What to Fix First as a Beginner

Fix your grip and setup before anything else. Every other fault on this list gets harder to diagnose when your foundation is wrong, and Golf Blab’s instructional resources are built around that same sequence. Track your mistakes with the E/S/M method for a full round before you decide what to work on next, and give the four-week plan a real chance before switching drills.

Practice Gear and Gifts That Support the Fixes Above

Working through a structured practice plan is easier when your equipment feels like your own. Custom Golf Club Labels let you mark distances, personal reminders, or a milestone date directly on your clubs, a small detail that keeps your carry-distance work and setup cues visible every time you address the ball. For golfers who’d rather hand off the decision, Golf Blab E-Gift Cards make it simple to gift a training session, apparel, or personalized labels to a beginner working through their own list of swing faults. Both options tie directly into the habits this article covers, whether that’s rewarding a completed four-week plan or setting a new golfer up with gear built around real practice, not guesswork about what they need. Visit the product pages above to see current options and pricing.

Sources

Posted on

LPGA Practice Routines for Golfers Who Want Real Transfer

Golfer mid-swing at practice range

An LPGA-style practice routine is a five-phase, time-blocked session, warmup, short game, technical work, performance transfer, and a speed finish, structured so what you groove on the range actually shows up on the scorecard. The LPGA Learning Center’s video demos and GolfDigest’s tour pro checklist both point to the same architecture, and PracticeCaddie’s practice-plan framework backs it with the same time-blocked logic. You can run the whole thing in an hour.

Here’s the 60-minute skeleton to copy today:

  1. Warmup (10 minutes): short putts and wedge feel shots to loosen up.
  2. Pitching and wedges (10 minutes): 5 to 10 balls, dialing in distance control.
  3. Technical work (15 to 18 minutes): one swing thought, drills, alignment checks.
  4. Performance transfer (15 minutes): target games, random clubs, on-course simulation.
  5. Speed ramp-up (5 to 10 minutes): 5 to 10 driver swings at full speed to finish sharp.
  • Putt first, hit last with the driver, and never skip the transfer phase.

Key Takeaways

LPGA-style practice works because it sequences warmup, technical work, and performance transfer in a fixed order, then tracks results with a log.

Point Details
Follow the five-phase order Warmup, wedges, technical work, transfer, and a speed finish, always in that sequence.
Budget technical time carefully Cap technical drilling around 30% of session length, then shift to random practice.
Prioritize short game Shots inside 100 yards drive roughly 60% of amateur scoring, so weight practice there.
Log every session Record makes, misses, and one note per drill to build a real improvement roadmap.
Personalize your setup with Golf Blab Custom Golf Club Labels and Play Golf with a Tour Pro sessions support faster feedback and better-organized practice.

Table of Contents

Why LPGA Practice Routines Actually Produce Results

Pros separate two kinds of work, and mixing them up is the single biggest reason amateur practice stalls out. Blocked practice, hitting the same shot repeatedly, builds the motor pattern. Random practice, changing clubs, targets, and lies rep to rep, is what translates that pattern into course-ready skill, because it forces your brain to solve a new problem every swing instead of grooving autopilot.

Feedback closes the loop. Data on rep quality shows that 30 tracked, purposeful reps can outperform 200 aimless ones, because logging outcomes tells you what actually needs work.

  • Blocked practice: use it early in a session to fix mechanics.
  • Random practice: use it late to test whether the fix holds under variation.
  • Feedback and logging: the difference between practicing and just hitting balls.

The Five-Phase Practice Architecture Pros Swear By

Every serious range session pros run follows the same five-phase order, and the sequence matters as much as the drills themselves.

  1. Literal warmup. Loosen up with putts and half-wedges. No swing thoughts yet.
  2. Pitching and wedges. Hit 5 to 10 balls to sharpen distance control before anything technical.
  3. Technical, or “brush teeth,” work. One focused swing change, repeated deliberately.
  4. Performance and transfer. Simulate real holes, random clubs, and specific yardages.
  5. Speed ramp-up. Close with 5 to 10 full-speed driver swings.

For a 60-minute session, budget roughly 30% of your time on technical work, around 18 minutes, with the rest split across the other four phases. Shrink to 30 minutes by trimming technical work to 8 to 10 minutes and cutting the transfer phase to a single game. Stretch to 90 minutes by adding a second technical block and a longer transfer session with scorecard tracking.

Pro Tip: If you’re still hitting the same “fix” shot after 15 straight balls with no change, you’ve overloaded the technical phase. Switch to random practice immediately, the extra reps are reinforcing a habit, not building one.

Diagram of five-phase LPGA practice routine

What Does a Tour-Style Pre-Round Warmup Look Like?

A tour player’s pre-round routine is a countdown, not a free-for-all, and it starts well before the first tee shot.

  1. Arrive 60 to 90 minutes early.
  2. Putting (15 to 20 minutes): start with short putts, build to lag putts for speed.
  3. Short game (15 minutes): chips and pitches from varied lies.
  4. Full swing on the range (20 to 25 minutes): work from wedges up to driver.
  5. Final putting (5 to 10 minutes): a few pressure putts to settle nerves before you tee off.

Not every day allows the full version. A 20-minute quick warmup keeps putting and short game, then trims range time to a handful of swings per club. The full 60-minute version, closer to what Golf describes, adds mental rehearsal between blocks.

  • Use a putting mirror or alignment rod during the putting block to catch setup faults early.
  • Run one visualization pass of your opening hole before you leave the range.

How Do LPGA Pros Build a Pre-Shot Routine?

Every consistent pre-shot routine splits into two boxes. The Think Box is where you read the shot, pick a target, and choose a club, pure analysis. The Play Box is execution only, no more thinking allowed. What connects them is a physical trigger, a specific move that tells your brain to stop planning and start swinging, and Alexa Pano’s routine, shaped by Annika Sorenstam, is a clear example of this exact structure.

Here’s a checklist to rehearse on the range:

  1. Stand behind the ball and read the shot (Think Box).
  2. Pick your target and club.
  3. Walk into the shot and set your feet.
  4. Perform your trigger, a club-to-ground touch or a set waggle.
  5. Swing without further analysis (Play Box).
  • Common triggers: one waggle, a forward press, or a single deep breath.
  • Drill: rehearse the trigger 20 times on the range without hitting a ball, just to groove the transition.

Sample Practice Plans You Can Run This Week

A 60-minute plan built on the same logic as a tour pro’s competition-week routine looks like this:

  1. Putting (15 minutes): lag putts, then 10 in a row from 3 feet as your success marker.
  2. Short game (20 minutes): chips from three lies, success is 7 of 10 inside a 4-foot circle.
  3. Long game (20 minutes): iron and driver work, alternating targets each swing.
  4. Rhythm check (5 minutes): slow, smooth half-swings to reset tempo before you leave.

A one-week sample spreads the load instead of cramming it: Monday short game only, Wednesday full-swing technical work, Friday a mixed 60-minute session, Saturday or Sunday a pre-round warmup before you play. That rhythm protects recovery while still hitting each skill weekly.

Before you tee off, run a compact checklist: putting stroke feels good, one swing thought only, trigger rehearsed. In your log, note the date, drill, makes versus misses, and one sentence on what changed. That single line is often the most useful thing you write all week.

Which Drills Do LPGA Pros Use by Area?

Short game deserves the largest share of your practice time. Shots from inside 100 yards account for roughly 60% of strokes for most amateur golfers, so drills there pay off faster than anywhere else on the range.

  • Putting: Gate drill (tee gates just wider than the putter head) for stroke path, and a 10-in-a-row pressure drill from 3 feet for nerve control under pressure.
  • Chipping and short game: Three-lie ladder (fairway, light rough, tight lie), landing-zone targets to build feel for carry distance, tied closely to short game strategy work.
  • Wedges: Clock drill using 9, 8, and 7 o’clock swing lengths to dial in specific yardages instead of guessing.
  • Irons: Alignment-rod drill for swing path, paired with a target-changing drill every rep to build transfer.
  • Driver: Tee-height consistency drill, plus a fairway-percentage game using two targets instead of one.

Pro Tip: Set a numeric success criterion for every drill before you start, like 7 of 10 makes, so you know exactly when to move on instead of hitting balls until you get bored.

How Should You Track Progress and Avoid Common Mistakes?

Log four things every session: date, drill, makes versus misses, and one short note. That habit alone prevents drift and gives you a real roadmap for next time, rather than a vague sense that you “hit a bunch of balls.”

The most common mistakes: no success criteria per drill, too many unfocused reps with the same club, and skipping short game because full swing feels more satisfying. If a fault won’t resolve after two or three sessions of focused technical work, it’s worth a video check-in or a session with an instructor rather than more solo reps.

A Short Note on Starting Small

Start with just the 60-minute plan, once a week, before you try to build a full seven-day schedule. Track three sessions in a simple log and you’ll already see which drills are worth repeating. Progress in golf rewards patience more than intensity, and consistency beats any single great range day.

Where Golf Blab Fits Into Your Practice Routine

Building a routine this structured means your gear should keep pace with your effort. Custom Golf Club Labels from Golf Blab let you mark yardages, swing thoughts, or trigger reminders right on the shaft, small details that matter when you’re running a five-phase session and need instant club identification between drills. Round out your practice bag with the Golf Blab Under Armor Golf Hat or a Golf Blab Adidas Sport Polo and Adidas Space Dyed Polo for warm-weather range sessions, and consider Innovate Tour Performance Golf Balls for consistent feedback on greenside spin during your short game blocks.

If you want the feedback loop this article keeps returning to, direct, immediate, expert, nothing accelerates it faster than Play Golf with a Tour Pro, a hands-on session where a professional watches your routine and corrects it in real time. Golf Blab also offers E-Gift Cards if you’re outfitting a practice partner. Start by picking one drill from this guide and one product to support it, then book your session.

Innovate Tour Performance Golf Balls

Frequently Asked Questions

How long should an LPGA-style practice session last?
Sixty minutes covers the full five-phase architecture comfortably. Thirty minutes works if you compress technical time and skip the second transfer game.

Do I need a coach to run these lpga practice routines correctly?
No, you can start solo using the checklists in this guide. A coach becomes useful once a specific fault won’t resolve after two or three focused sessions.

What’s the biggest mistake amateurs make in practice?
Skipping success criteria. Hitting balls without a defined make/miss target turns practice into repetition instead of improvement.

How often should I run a full pre-round warmup?
Every time you play a round that matters to you, tournament or casual. A 20-minute compressed version still beats skipping the warmup entirely.

Sources

Posted on

Care for Golf Polos: Wash, Dry, and Protect Their Fit

Laying golf polo flat to dry with box fan

Wash your golf polos in cold water on a gentle cycle, use a mild detergent, skip the fabric softener, turn them inside out, and let them air-dry or tumble on the lowest heat setting. That single routine protects moisture-wicking finishes, keeps embroidered logos crisp, and prevents the shrinkage that turns a favorite polo into a donation-pile candidate. Every other rule in this guide branches off that one. They recommend washing cold, on a gentle cycle with mild detergent; avoiding bleach, fabric softener, and dryer sheets; turning shirts inside out (using a mesh bag for embroidered polos); and air-drying when possible or tumbling on low heat and removing early.

Pro Tip: Run embroidered polos on the shortest gentle cycle your machine offers, inside a mesh laundry bag. The bag cuts friction against zippers and hooks, which is usually what frays stitched logos before the fabric itself wears out.

Modern performance fabric doesn’t need the aggressive cleaning old-school cotton used to demand. Treat it gently, and it pays you back in wash cycles.

Key Takeaways

Cold water, mild detergent, no softener, and air-drying preserve a golf polo’s fit, color, and moisture-wicking performance for far longer than standard laundry habits allow.

Point Details
Wash cold and gentle Cold water on a gentle cycle protects dye, stretch, and wicking finishes.
Skip softener and bleach Both coat or degrade synthetic fibers and reduce moisture-wicking permanently.
Air-dry when possible Heat causes shrinkage, pilling, and embroidery puckering; hang-dry avoids all three.
Wash performance polos less often 3 to 5 wears between washes reduces fiber stress and microfiber shedding.
Golf Blab pairs care with quality apparel Its performance polos and club labels are built to hold up through this exact routine.

Where to Read More on Apparel Care

Table of Contents

Care for Golf Polos: How Often Should You Wash Them?

Performance polos and heavy cotton blends age differently, so they don’t belong on the same wash schedule. A moisture-wicking polo built from polyester or a poly-spandex blend can usually go several wears between washes if you’re not visibly sweating through it or playing in humidity. Cotton and cotton-blend polos hold odor and oil closer to the surface, so they typically need a wash after every one or two wears.

  • Performance/synthetic polos: 3 to 5 wears, or sooner if visibly soiled
  • Cotton and cotton-blend polos: after 1 to 2 wears
  • Any polo with sunscreen, deodorant, or grass contact: wash immediately

Washing less often isn’t laziness. It’s fabric science. Every wash cycle mechanically stresses the wicking treatment applied to synthetic fibers, and a University of Leeds and Procter & Gamble study found that shorter, cooler cycles cut microfiber shedding by roughly half compared to standard cycles. Fewer, gentler washes mean the fabric’s performance coating lasts longer, and less plastic fiber ends up down the drain.

How to Wash Golf Shirts the Right Way

Getting the wash step right is the single biggest factor in how long a polo keeps its shape, color, and stretch. Here’s the machine-wash sequence that protects both fabric and embroidery.

  1. Check the care label first. Manufacturer instructions override any general rule here.
  2. Button any placket buttons and turn the polo inside out to protect the outer face from friction.
  3. Slide embroidered or logo-heavy polos into a mesh laundry bag.
  4. Wash in cold water on a gentle or delicate cycle, keeping the load small enough that garments move freely.
  5. Use a mild liquid detergent, measured to the “light load” line, not a full scoop.
  6. Skip the extra rinse and spin settings unless your machine defaults to them; performance fabric doesn’t need aggressive extraction.

Hand-washing is worth the extra five minutes for a polo with delicate embroidery, a tour-logo patch, or a fabric blend you’re not sure about. Fill a sink or basin with cold water, add a small amount of mild detergent, and submerge the shirt. Agitate gently for about two minutes, focusing water flow rather than scrubbing, then let it soak for 10 to 15 minutes. Rinse under cool running water until the water runs clear, pressing (never wringing) excess water out.

A few non-negotiables apply to both methods, echoed consistently in manufacturer care guidance for performance polos:

  • No bleach, ever, even the “color-safe” kind on synthetic blends
  • No fabric softener
  • Avoid 2-in-1 detergent-softener combos; check the label before buying one

Pro Tip: A sport-specific detergent, or even just a smaller-than-normal dose of regular liquid detergent, cleans performance fabric more effectively than a full measure. Excess detergent doesn’t rinse fully out of technical weaves, and the residue is what starts dulling wicking performance after a season of washes.

Removing Sweat, Sunscreen, and Grass Stains

Golf stains respond well to fast action and cold water, and poorly to heat or force. Treat each type this way before it goes anywhere near the wash:

  1. Sweat and deodorant marks: Rinse the area with cold water, then work a small amount of liquid detergent directly into the fabric with your fingers. Let it sit five minutes before washing.
  2. Sunscreen (oil-based): Blot, don’t rub, then apply a dab of dish soap to break down the oil before laundering as usual. Dish soap is built for grease and works on synthetic fibers without the harshness of a solvent stain stick.
  3. Grass stains: Apply an enzyme-based stain remover directly to the mark and let it sit 10 to 15 minutes. Enzymes break down the plant proteins causing the stain, which is gentler on synthetic fibers than harsh chemical treatments.
  4. Food or drink spills: Cold rinse from the back of the fabric to push the stain out, then treat as above based on whether it’s oil or protein based.

Avoid these common instincts, all of which make stains worse on modern fabric:

  • Hot water, which sets protein-based stains like sweat and grass permanently
  • Bleach on any colored or performance polo
  • Vigorous scrubbing, which pushes stains deeper into the weave
  • Drying a stained shirt before it’s fully treated; heat locks the stain in for good

Pro Tip: If a stain is still visible after one wash, retreat it before drying again rather than running it through the dryer “to see.” Once heat sets a stain, most enzyme treatments lose their effectiveness entirely.

Best Way to Dry Polos Without Shrinking or Warping Them

Air-drying is the safest default for any performance or embroidered polo, full stop. Lay the shirt flat on a drying rack or hang it on a plastic hanger out of direct sunlight, and it will typically be dry within a few hours depending on humidity.

If you need the dryer, keep these limits:

  • Lowest heat setting only, ideally a “delicate” or “air fluff” cycle
  • Short cycle time, and pull the shirt out slightly damp rather than bone dry
  • Dryer balls instead of dryer sheets, since sheets coat fibers the same way fabric softener does
  • Remove promptly to avoid extended heat exposure sitting in a warm drum

High heat is the fastest way to undo everything a careful wash accomplished. Dryer heat causes embroidery backing and thread to shrink at a different rate than the polyester blend around it, which is exactly what produces that rippled, puckered look around a logo. The same heat also drives shrinkage and pilling in the body fabric.

Pro Tip: Point a box fan at flat-laid polos instead of reaching for the dryer. You’ll get comparable dry times to low heat with zero risk to embroidery or fit.

Ironing, Steaming, and Embroidery-Safe Pressing

Wrinkles happen, but an iron set too hot will do more damage to a golf polo than a season of wear. Set the iron to its lowest synthetic or “polyester” setting, and always press through a thin cloth rather than direct contact with the fabric. Test on the inside hem first if you’re unsure how the fabric will react.

Steaming is the better option for anything with an embroidered crest or logo, since it removes wrinkles without direct heat contact against stitching. Hold the steamer a few inches away and let the vapor do the work rather than pressing the nozzle into the fabric.

  • Turn embroidered polos inside out before ironing to shield the stitching
  • Use a mesh bag in the wash and hang-dry rather than tumble-dry to avoid needing heavy ironing at all
  • Skip high heat entirely on any logo or patch area

Pro Tip: Hang a slightly damp polo on a sturdy hanger and let gravity pull out most wrinkles as it finishes drying. It’s slower than an iron, but it’s the closest thing to a zero-risk pressing method for logo-heavy shirts.

Choosing the Right Detergent, and What to Avoid

Not every detergent on the shelf belongs anywhere near a performance polo. A mild liquid detergent, or one formulated specifically for sport and technical fabrics, cleans oils and odor without leaving the kind of residue that powder detergents and heavy-duty “2-in-1” formulas tend to deposit on technical weaves.

  • Use: mild liquid detergent or a specialty sport detergent
  • Avoid: powder detergents (they dissolve less completely in cold water)
  • Avoid entirely: fabric softener and dryer sheets, and any 2-in-1 detergent-softener blend

Fabric softener and dryer sheets are the single most common care mistake golfers make, largely because the instinct to keep clothes “soft” is so ingrained from cotton laundry habits. On technical fabric, softener coats the microscopic channels that pull sweat away from your skin, and that coating doesn’t wash back out. Once it builds up, no amount of careful washing afterward restores full wicking performance.

Oxygen-based stain removers (the powder or liquid oxygen-bleach alternatives) are safe for occasional use on tough stains and won’t strip color the way chlorine bleach does. Chlorine bleach has essentially no place in a performance-polo routine; it breaks down synthetic fibers over time and yellows white or light-colored shirts faster than sun exposure ever would.

Storing Polos to Prevent Pilling and Collar Damage

How you store a polo between rounds matters almost as much as how you wash it. Hanging preserves collar shape and shoulder structure better than folding, particularly for polos with any structured collar or placket. Use sturdy plastic or wooden hangers rather than wire, which stretches shoulder seams over a season of storage.

  • Hang in a closet with airflow, away from direct sunlight and sealed plastic bags that trap moisture
  • Shave pills carefully with a fabric shaver rather than picking at them, which can pull threads
  • Use padded hangers for heavier cotton-blend polos to prevent shoulder bumps

Pro Tip: Before storing polos for the off-season, confirm every shirt is fully clean and completely dry, then store them in breathable garment bags rather than sealed plastic. Trapped moisture in plastic storage is a common cause of musty odor and mildew spotting that shows up months later.

Quick Fixes for Stains Mid-Round

You don’t need to wait until the 19th hole to deal with a fresh mark. A cold water rinse and gentle blot handles most fresh sweat or drink spills on the spot, and a tiny dab of dish soap worked into sunscreen streaks with a light touch (never a hard rub) keeps oil from setting before you get home.

  • Blot, don’t rub, on any fresh stain
  • Carry a small travel-size stain pen or dish soap packet in your bag
  • Hang the shirt in fresh air at the turn if odor is the main concern

Pro Tip: A safety pin works as a genuine emergency fix for a popped placket button or a stretched seam mid-round. Just launder the shirt normally as soon as you’re home, following the routine above rather than skipping ahead a wash cycle.

The Golf Blab Routine for Longer-Lasting Polos

Golf Blab recommends a simple sequence for every performance and embroidered polo in your bag, built around the same principle every serious apparel-care guide converges on: less heat, less friction, less residue.

  1. Turn the polo inside out and secure it in a mesh bag if it carries embroidery
  2. Wash cold on a gentle cycle with a mild or sport-specific detergent, no softener
  3. Air-dry flat or on a hanger; use the dryer’s lowest setting only if you’re short on time
  4. Steam or low-heat iron through a cloth if wrinkles remain

The environmental case backs up the fabric case. The same Leeds and Procter & Gamble research that found cooler washes reduce microfiber shedding also points to lower energy use per load, since heating water is the most energy-intensive part of a wash cycle. Cold, short washes protect your polo and use less power doing it.

The best care routine is the one that asks less of the fabric, not more. Cold water and patience outperform hot water and force almost every time.

Golf Blab builds this thinking into its own performance apparel line, and readers looking to pair a durable polo with instruction that actually improves their swing can explore Play Golf with a Tour Pro for hands-on coaching alongside the gear.

A Practical Note From Michael Marini

Follow the cold-wash, air-dry routine above and your polos will outlast their fit before they wear out. It’s the small, consistent choices that protect performance fabric over a full season.

A Practical Note From Michael Marini — overview diagram

Shop Polos Built to Handle This Routine

Golf Blab Adidas Sport Polo

The washing and drying steps above work best when you start with a polo engineered for them. Golf Blab’s Adidas Sport Polo and Adidas Space-Dyed Polo use moisture-wicking construction designed to hold up through repeated cold washes and air-drying, so the routine in this guide keeps them performing round after round instead of fighting against a fabric that wasn’t built for gentle care in the first place. Pair either shirt with a set of custom golf club labels to round out a bag that looks as sharp as a freshly cared-for polo, or browse the full performance apparel shop to see what else fits your rotation. If you’re building a complete kit for the season, the Under Armour golf hat rounds it out well. Start with one polo, run it through the cold-wash routine for a full season, and see the difference for yourself.

Sources