Posted on

4 USGA Safe Golf Club Aesthetic Ideas Using Removable Labels

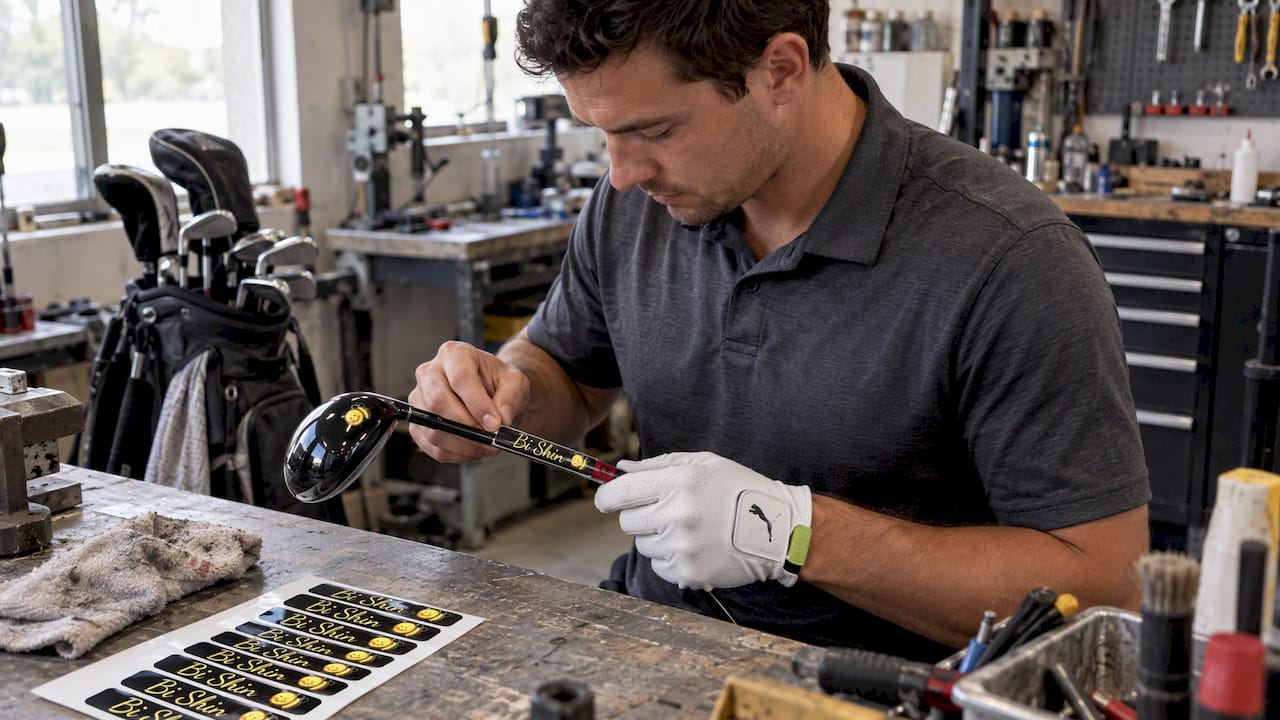
Golf club with removable personalized label

The safest and most practical way to stylize real golf clubs is with removable or semi-permanent labels and wraps applied off the hitting area, never across the face or in a spot that could double as an alignment aid. This approach lets you express your personality through color, initials, and finish while staying compliant with USGA equipment guidance. We offer custom club labels as a ready starting point for exactly this kind of personalization.


TL;DR:

  • Custom decals and wraps should be applied outside the impact area and kept small to avoid violating USGA rules or acting as alignment aids.
  • Vinyl decals are the most beginner-friendly, easily removable, and suitable for seasonal swaps, while shrink-wrap offers a seamless look with careful application.
  • Placement is critical, with decals acceptable on the shaft, crown, and sole edges, but strictly prohibited on the hitting face or protruding as aiming aids.
  • Proper cleaning, UV protective layers, and storing clubs away from heat significantly extend the lifespan of personalized labels.
  • When ordering, measure carefully, choose complementary finishes, and consider UV protection for frequent outdoor play.

Golf Blab
golf-blab.com
Personalize Your Clubs With Purpose
Golf Blab offers personalized golf club labels that combine individual style and practical function for golfers refining their equipment.

Explore custom club labels

Table of Contents

1. Styling ideas you can order and apply today

Personalizing a set of clubs is less about overhauling the equipment and more about layering small, intentional details onto it, much like initials stitched into a leather bag or a family crest pressed into a signet ring. A few themes consistently deliver a polished look without touching anything that affects play, keeping the customizations subtle and compliant.

  • Monogram or initials bands wrapped around the shaft just below the grip, a subtle nod to ownership and craftsmanship.
  • Minimalist crown artwork on the driver, kept outside the impact area, for a signature without visual clutter.
  • Numeric bands on wedges that mirror loft numbers, turning function into a design element.
  • Color-blocked shafts paired with a matching headcover or bag strap for a set that reads as one cohesive statement.

Metallic or gloss trims catch light beautifully on a crisp, modern bag setup, while matte finishes feel more at home with a traditional, leather-and-wood aesthetic. Either direction works when the label material and finish complement the clubs rather than fight them visually. Our golf club personalization resources walk through how these themes translate into printable artwork, and our guide to color-coded clubs offers a practical starting palette for a full set.

Pro Tip: Pick one accent color and repeat it across your labels, headcover, and glove tab. A single recurring hue reads as intentional design, while three competing colors reads as clutter.

2. What USGA rules allow and forbid

Before you commit to any design, it helps to understand where the line sits between personal flair and an unintended rules violation. The USGA’s equipment interpretations permit temporary, non-permanent attachments such as identification decals on the shaft or clubhead, as long as they offer no performance benefit and never function as an alignment aid. Permanent modifications sit in different territory entirely: altering a club’s physical structure can affect its conformity, while a removable label generally does not.

USGA-safe and risky golf club label placements

The impact area itself is off-limits for decoration. Per the official Equipment Rules, decorative markings are permitted outside the impact area, though a small design within a 0.375-inch square may sit at its center provided it does not unduly influence how the ball comes off the face. Anything that protrudes, adds texture, or visually guides your eye along the target line risks crossing into alignment-aid territory. When a tournament or a club’s local rules leave you uncertain, the simplest move is to remove the attachment before you tee off.

3. Comparing vinyl, shrink-wrap, and pressure-adhesive labels

Not every material behaves the same way on a shaft or a crown, and the right choice depends on your comfort with heat tools and how long you want the result to last.

  • Vinyl decals are the most beginner-friendly option: no heat required, easily removable, and well suited to shafts and small crown accents.
  • Heat-shrink wraps deliver a seamless, factory-made look, but they demand a careful, even heating technique and a steadier hand.
  • Pressure-activated adhesive wraps hold up well over a season of play, though it is worth checking whether the product includes a UV overlaminate to resist fading.
  • Sizing and seam placement matter more than most golfers expect. Shrink-label methods described in industry patent filings outline how overlap seams and precise sizing keep a wrap looking clean rather than bunched.

Vinyl rewards golfers who want to swap designs seasonally, while shrink-wrap suits anyone chasing a finish that looks original to the club.

4. Placement: where decals belong and where they don’t

Getting placement right is the difference between a clean, rules-safe accent and a label that draws the wrong kind of attention from a rules official.

  1. Do place decals on the crown, outside the impact area, on sole edges, along the shaft, and on the butt end within standard size limits.
  2. Don’t apply anything to the hitting face, and never add raised or protruding accessories that could function as an aiming reference during a stroke.
  3. Keep every attachment low-profile and shaped to follow the club’s existing contours rather than adding bulk.
  4. Small identifiers like initials, a short monogram, or a numeric band on the shaft are reliably acceptable examples of this kind of personalization.

5. Applying and removing labels without damaging the club

A clean result starts before the label ever touches the club.

  1. Clean the surface thoroughly, measure the target area, dry-fit the label, and mask off any zone you want protected.
  2. For vinyl, apply slowly from one edge, smoothing out air as you go; for shrink-wrap, use even, moderate heat and keep the tool moving to avoid scorching the finish.
  3. To remove, warm the material gently and peel slowly, following with a mild adhesive remover rather than a harsh solvent.
  4. If bubbling, seam overlap, or edge lift shows up, a short reheat and reseat usually fixes it; a persistent problem is a sign to consult a professional installer.

Pro Tip: Work in a warm room rather than applying any wrap in cold weather. Cool vinyl and shrink material resist adhesion and are far more likely to lift at the edges within weeks.

6. Caring for labels so they last

A label is only as good as its longevity, and a few habits make the difference between a design that looks sharp all season and one that fades by midsummer.

  • Choose labels with a UV overlaminate or luster layer, which patent-documented wrap designs describe as a key factor in resisting fading over repeated sun exposure.
  • Clean with a soft, damp cloth and a mild soap rather than solvents, which can lift edges or dull the finish.
  • Dry clubs fully after a round before storing them, since trapped moisture is a common cause of early lift.
  • Store your bag away from direct heat, such as a car trunk in summer, and plan on refreshing labels every season or two depending on how often you play.

7. Where Golf Blab fits into this process

We built our custom label line around exactly the problem this guide addresses: how to add personality to real clubs without drifting into non-conforming territory. Our personalized golf club labels are designed for the shaft, crown, and butt-end placements covered above, giving golfers a straightforward way to express individuality on the course. Alongside the product itself, our educational content on club personalization walks through design and application choices for golfers at every level. We also engage with professional golfers to keep our community engagement grounded in the realities of competitive play rather than guesswork.

An honest take on the personalization trend

An honest take on the personalization trend — overview diagram

Most advice on customizing clubs treats the topic as pure inspiration: mood boards, color palettes, and little mention of whether a design actually holds up under tournament scrutiny. That gap is where golfers get into trouble. The conventional wisdom overrates bold, oversized graphics and underrates the quieter details, a shaft band, a small monogram, that read as deliberate without ever approaching the impact area or the silhouette of the clubhead.

If there’s one priority worth putting ahead of everything else, it’s this: confirm placement and permanence before you fall in love with a design. A beautiful decal in the wrong spot is a problem you’ll discover at the worst possible moment, usually on the first tee of a round that matters. Golfers who treat the rules as a design constraint, rather than an afterthought, end up with equipment that looks sharp and never raises a question from a rules official or a playing partner. For event play specifically, it’s worth checking the tournament format you’re entering, since some local rules are stricter than the USGA baseline.

— Michael Marini

Order custom labels and coordinating gear

Once you know what you want, ordering is the easy part. Our Custom Golf Club Labels come in a range of ink colors and finishes sized for shafts, crowns, and butt ends, with straightforward turnaround from order to your mailbox. To round out the look, our Golf Blab Adidas Sport Polo and Golf Blab Adidas Space Dyed Polo pair naturally with a coordinated color scheme across your bag and labels.

Before you check out, run through a short list:

  • Measure the shaft or crown area you’re targeting so your label fits cleanly.
  • Choose a finish, matte or gloss, that matches your bag’s overall style.
  • Decide on quantity for a full set rather than ordering piecemeal.
  • Consider a UV overlaminate if you play frequently in strong sun.

Browse the full shop for labels, e-gift cards, and a chance to play a round with a tour pro.

FAQ

Yes, temporary decals on the shaft or clubhead, other than the face, are generally permitted under USGA equipment interpretations as long as they don’t affect performance or act as an alignment aid. When in doubt for a specific event, removing the decal before play is the safest option.

Can I put a decal on the clubface for a decorative touch?

No, decorative material should stay off the impact area entirely. The official Equipment Rules allow decorative markings outside that zone, with only a small, tightly limited design permitted near its center.

What’s the easiest material for a first-time DIY application?

Vinyl decals are the most forgiving choice because they require no heat and are easy to remove or reposition if the placement isn’t perfect. Heat-shrink wraps look more seamless but take a steadier hand and more practice.

How long do custom golf club labels typically last?

With a UV overlaminate and proper care, most labels hold their color and adhesion for a season or more before needing replacement. Storing clubs away from direct heat and avoiding harsh solvents during cleaning both extend that lifespan.

Can customizing my driver head with initials change what model it is?

Ordinarily, no. USGA submission guidelines note that adding a player’s name or initials to an individual driver head typically does not create a different model, though manufacturers are advised to consult the USGA when a design is more involved than a simple identifier.
Posted on

Stop Losing Golf Clubs with USGA Safe Labels and a Two Minute Checklist

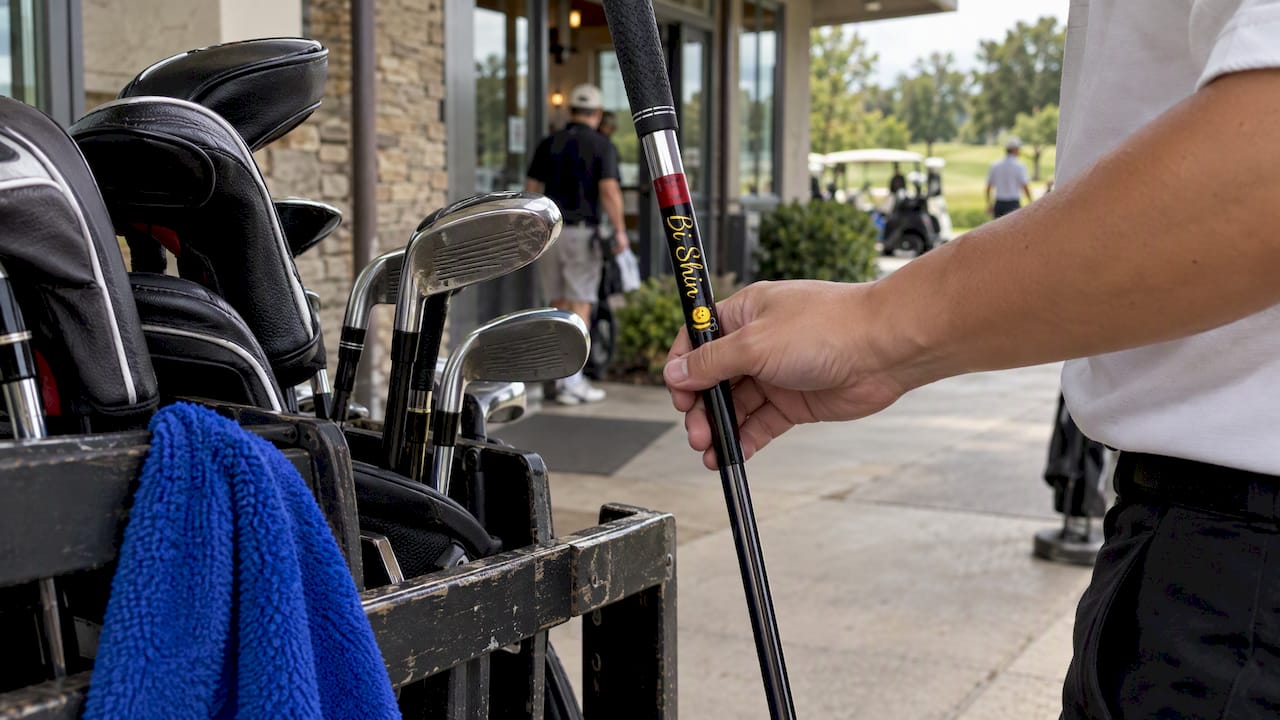
Custom labels identifying golf clubs

The fastest way to stop losing golf clubs is a combined system: a consistent bag setup, durable identification labels, a Bluetooth proximity tag, and a two-minute checklist before and after every round. The Equipment Rules (USGA) restrict attachments on the clubface, but labels placed on the shaft or hosel are generally fine. We build durable custom labels that fit neatly into this approach.


TL;DR:

  • Using a consistent bag setup with designated slots and pockets makes it easy to identify if a club is missing within seconds.
  • Custom durable labels on the shaft or ferrule help recover lost clubs by providing identifiable information that lasts for multiple seasons.
  • Bluetooth proximity tags are useful for detecting clubs left on the course but should be tested beforehand, as their range is affected by obstacles.
  • Following a quick pre- and post-shot checklist, including counting clubs and replacing headcovers, significantly reduces the chances of leaving clubs behind.
  • Proper travel cases with reinforced features and clear labeling are essential for protecting clubs during flights and car trips, preventing damage and loss.

Golf Blab
golf-blab.com
Make Every Club Easy to Identify
Golf Blab creates personalized golf club labels that combine practical identification with a style that reflects your individuality on the course.

Create your club labels

Table of Contents

A quick checklist to stop leaving clubs behind

Most lost clubs disappear in the quiet moments between shots, not in some dramatic mishap. A short routine closes that gap before it opens.

  1. Before you tee off, count your clubs against your scorecard total, confirm every headcover is on, check your pockets for valuables, and save the pro shop’s number in your phone.
  2. After every shot, return the headcover and slot the club back in the same spot every time, so a glance tells you something is missing.
  3. At the end of each hole, take three seconds to scan the bag before you walk or drive to the next tee.
  4. If you notice a club is missing mid-round, stop immediately, retrace your last two shots, check the cart floor and bag pockets, then tell your group and call the pro shop with the hole number and label details.

Keep a photo of your labeled clubs and your bag tag text saved in your phone. A short message like “Lost 7-iron, blue Golf Blab label reads ‘M. Marini, hole 11, cart path’” gets a faster response from the clubhouse than a vague description ever will.

Bluetooth tags and trackers: what they actually do

Bluetooth tags and GPS-style trackers add a layer of insurance that habits alone cannot provide, especially once a club leaves the course entirely. Two distinct categories solve two different problems.

  • Proximity trackers sound an alert on your phone when a tagged club drifts outside a short Bluetooth range, which suits clubs left behind on the course itself.
  • Community or long-range trackers rely on a network of nearby devices to report a location days later, which suits clubs lost during travel or theft.
  • Battery life varies by model, and pairing can be finicky the first few times you set a tag up, so test the connection at home before your first round.
  • Bluetooth signal weakens fast in thick rough, dense trees, or deep bunkers, which means a tag may stay silent exactly when you need it most.

Press coverage of golf gear has paired Bluetooth-based trackers with better bag systems as a practical combination, since the tracker speeds recovery but a solid bag routine prevents the loss in the first place. Treat a tag as a backup, not a guarantee: a dead battery or an unpaired device will not call out a missing club on its own. During group play or tournaments, keep tracker alerts on silent or vibrate so they do not interrupt another player’s swing.

Pro Tip: Test your tracker’s alert distance in your own backyard before trusting it on the course, since Bluetooth range claims rarely hold up once there is a tree line in the way.

Bluetooth tracker range blocked by trees

Labeling and marking methods that actually hold up

A club with a name and contact detail on it gets returned. A blank club gets quietly claimed or forgotten in a cart well. The method and placement both matter.

  • Adhesive custom labels wrap around the shaft or sit on the ferrule, staying visible without touching the clubface.
  • Ferrule engraving etches initials or a short code directly into the plastic collar below the grip, which survives years of bag friction.
  • Heat-shrink ID sleeves fit snugly around the shaft and resist peeling better than standard stickers in wet weather.

Look for laminated polyester material and UV-resistant ink, since ordinary paper labels fade and curl within a season. A durable club label applied correctly can last through four seasons of regular play, which matters far more than a cheap sticker that peels by midsummer.

Placement always stays on the shaft, ferrule, or grip butt, never the striking face. The Equipment Rules allow removable, non-permissible attachments to come off without penalty, but anything fixed to the clubface that could influence ball flight is not allowed at all. Our Custom Golf Club Labels are built around this exact placement and durability standard, and our guide to labeling golf clubs walks through application step by step.

Bag setup habits that make a missing club obvious

A bag organized the same way every round turns a missing club into something you notice in seconds, not after you have driven off the course.

  1. Slot clubs by length, with the driver and woods in the back, irons through the middle, and wedges and putter up front, using full-length dividers when your bag has them.
  2. Assign each pocket a single job, balls and tees in one, rain gear in another, valuables in a zippered pocket you check before leaving every hole.
  3. Replace headcovers immediately after every shot rather than tossing the club back bare, since an uncovered club is the one most likely to get left behind.
  4. On a cart, keep the bag secured against the rear bar and do a two-second visual check before pulling away from each green; walking players should glance at the bag the moment they pick it back up.

This kind of repeatable bag organization is one of the habits coaches most often recommend, precisely because it makes an absence visible at a glance rather than something you discover three holes later. A quick golf bag personalization pass, labeling pockets and dividers the same way you label clubs, reinforces the same muscle memory.

Protecting your clubs during flights and car trips

Travel is where otherwise careful golfers lose clubs, usually to damage or misrouted baggage rather than theft.

  • Choose a travel case with a stiff arm, 360-degree padded head coverage, interior stability straps, a shock-absorbing wheelbase, and a TSA-approved lock, features that reputable travel bag manufacturers build in for exactly this reason.
  • Pack headcovers on first, cinch every interior strap tight, and slip a luggage tag with your name and phone number inside the bag itself, not just on the outside handle.
  • At the counter, declare high-value clubs and consider travel insurance if your set would be costly to replace.
  • For short car trips, wedge the bag against a seat or cargo wall so it cannot tip, and make checking the trunk part of your “keys, phone, clubs” routine before you drive off.

What the USGA actually allows on your clubs

Rule 4 sets the boundaries that matter here, and they are simpler than most golfers assume.

  • You may carry up to 14 clubs, and the rule restricts attachments that could affect how a club performs.
  • Tape or any substance on the clubface that influences ball flight is prohibited outright.
  • A label on the shaft or hosel that does not change the club’s playing characteristics is acceptable.
  • If you discover a non-permissible attachment, such as a sticker stuck to the face, mid-round, USGA clarifications confirm you can remove it immediately and keep playing without penalty.
  • Before a competitive round, run a quick visual check that every label and device sits away from the face and does not alter the clubhead.

If a club goes missing: your recovery playbook

A missing club is recoverable more often than golfers assume, provided you act fast.

  1. Retrace your last few shots immediately, checking the cart floor, bag pockets, and the rough near your last lie.
  2. Ask your playing partners, since someone often notices a club left behind before you do.
  3. Call the pro shop with the hole number, approximate time, and your label text, since a clear description like “Golf Blab label, blue ink, reads ‘M. Marini’” moves much faster than “a 7-iron.”
  4. If it does not turn up, file a lost-and-found report with the course, check local golf community groups, and weigh insurance or replacement if the club has real value. In tournament play, notify officials right away rather than waiting until the round ends.

A note from the author on what actually works

In years of watching golfers lose and recover clubs, the pattern repeats: it is almost never one dramatic event, just a missing routine. Small changes, a label, a checklist, a consistent slot, prevent most of it.

— Michael Marini

How Golf Blab labels fit into this system

Durable identification is the piece of this system most golfers skip, and it is the one we built our business around. Our Custom Golf Club Labels use laminated, UV-resistant material designed for shaft and ferrule placement, which keeps them fully clear of the clubface restrictions outlined above while standing up to four seasons of regular play. A set runs $29.99 at our shop.

Beyond labels, our shop carries items that round out a dependable setup, from the Innovate Tour Performance Golf Balls to the Golf Blab Adidas Sport Polo, alongside instructional offerings like Play Golf with a Tour Pro at $600 per person. None of this replaces the habits above, but a clearly labeled club is the single fastest way to get a lost one back. Browse the full lineup at our shop when you’re ready to set your bag up properly.

How Golf Blab labels fit into this system — overview diagram

FAQ

What’s the 70/30 rule in golf?

The 70/30 rule is a swing or short-game concept some instructors use, typically describing weight distribution or shot-shaping ratios, and definitions vary by coach. It isn’t a formal USGA rule, so check with your own instructor for the specific version they teach.

What is the 24/38 rule in golf?

This isn’t a recognized USGA rule or a standard term in the sport. If you’ve heard it referenced locally, it likely refers to a club-specific pace-of-play or handicap guideline rather than an official Rules of Golf provision.

Why put Vaseline on your driver?

Some golfers apply a thin layer of petroleum jelly to a driver face during casual practice to reduce spin for mishit testing, but this has nothing to do with official play. Under the Equipment Rules, any substance on the clubface that could influence ball movement is not permitted during a round.

Is a 69 wedge illegal in golf?

Wedge loft itself isn’t restricted by a specific number under the Rules of Golf; conformity depends on groove specifications, bounce, and overall design meeting USGA equipment standards. Any wedge must meet the same conformity standards as other clubs.

Can I remove a non-permissible sticker from my club mid-round?

Yes. USGA clarifications confirm you can remove a non-permissible attachment, like a sticker on the clubface, at any point during a round without penalty and continue playing with that club.

Sources

Posted on

Golfers: Course Ready Setups and Drills for Uphill and Downhill Lies

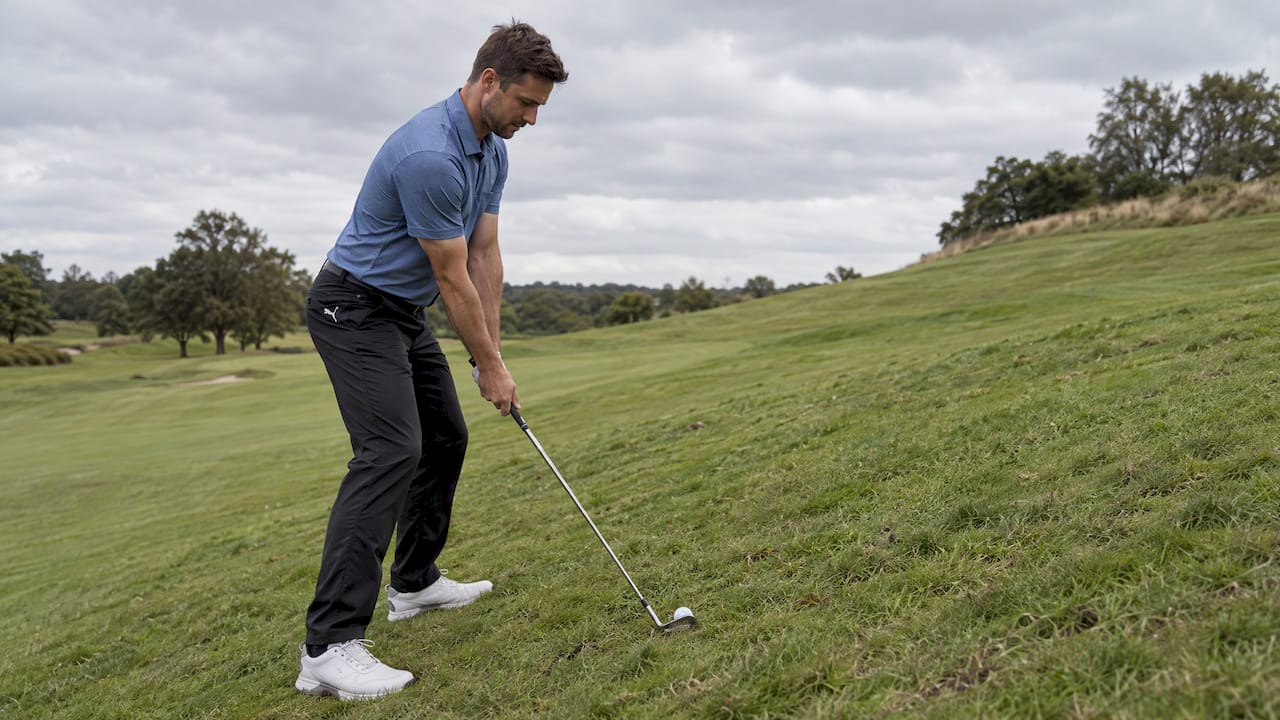
Golfer addressing ball on sloped fairway

Uphill adds loft, so take more club. Downhill delofts the face, so take less. The three setup changes that matter most are ball position, shoulders set parallel to the slope, and weight distributed toward the lower foot on uphill shots and the lead foot on downhill ones. The error that ruins both shots is the same: trying to help the ball into the air instead of swinging with the terrain beneath you.


TL;DR:

  • Take more club on uphill shots and aim slightly right to compensate for the slope’s loft and impact effects, ensuring a natural release.
  • On downhill lies, club less and position the ball back in your stance to prevent fat or thin strikes caused by delofting.
  • Always align your shoulders parallel to the slope and shift your weight toward the lower foot to match the terrain and improve contact.
  • Practice shots from multiple lie types, focusing on predicting launch and carry to develop feel and confidence under pressure.
  • Adjust club selection based on slope severity and turf condition, using wider stances and shorter swings for better balance and control.

Golf Blab
Build Confidence On Every Lie
Golf Blab offers instructional resources and personalized golf club labels for golfers working on skills, style, and course confidence.

Visit Golf Blab

Table of Contents

Uphill lies: setup, club choice, and swing thoughts

An uphill lie behaves like a hidden extra club of loft tucked into the face of your iron. The slope launches the ball higher and steals distance, a pattern instructors at the NCGA describe as a predictable effect of the incline rather than a swing flaw. The fix starts before you ever take the club back.

  • Set your shoulders and hips parallel to the slope so your swing plane matches the hill rather than fighting it.
  • Move the ball slightly forward in your stance to account for the steeper angle of attack.
  • Shift a touch more weight onto your trail foot, since the hill already pushes you that direction.
  • Take more club than the yardage suggests for an uphill lie, increasing further with the severity of the slope.

Right-handed golfers tend to pull uphill shots left, since the slope closes the clubface slightly through impact. Aiming a touch right of your normal target and letting the ball release naturally, rather than steering it, usually solves this without altering your swing.

Pro Tip: Let the slope do the lifting. Swing along the hill instead of swinging up to meet the ball, and the extra loft will take care of itself.

Downhill lies: setup, club choice, and swing path

A downhill lie does the opposite job on your clubface: it delofts the iron, which sends the ball out lower and rolls it farther once it lands. The NCGA and other instructors agree the adjustments here mirror the uphill shot almost exactly, just reversed.

  • Set your shoulders parallel to the slope with your lead shoulder lower than your trail shoulder.
  • Play the ball slightly back in your stance to catch it before the clubhead bottoms out.
  • Shift more weight onto your lead foot at address and keep it there through impact.
  • Take less club than the yardage calls for, as the shot will run farther once it lands.

The single biggest downhill mistake, according to Golf Digest, is the instinct to help the ball into the air. That instinct causes golfers to hang back on their trail foot, which almost guarantees a fat or thin strike.

Pro Tip: Swing down the slope, not up and out of it. Finish your backswing fully before starting down, a move Trevor Immelman credits for keeping the weight moving forward instead of hanging back.

A setup checklist for any sloped lie

Before you touch a club, read the lie. The PGA recommends letting the slope narrow your club selection first, then fine-tuning for yardage, rather than picking a club by distance and hoping the lie cooperates.

  1. Read the slope: uphill, downhill, or sidehill, and how severe.
  2. Set your stance slightly wider than normal for extra stability.
  3. Align your shoulders and hips parallel to the slope, not to the horizon.
  4. Position the ball forward for uphill lies, back for downhill lies.
  5. Shift your weight bias toward the lower foot on uphill shots, the lead foot on downhill shots.
  6. Choke down slightly on the grip if the lie is severe, for added control.
  7. Select your club: one more for moderate uphill, one less for moderate downhill, adjusting further for severity.

Sidehill lies add a different wrinkle. When the ball sits above your feet, expect a pull and plan for extra club, as outlined by PGA.com. When it sits below your feet, expect the opposite curve and adjust your aim accordingly. A proper stance is the foundation that makes every one of these reads usable under pressure.

Common mistakes and quick fixes for slope shots

Most slope shots go wrong for one of four reasons, and each has a specific, repeatable fix.

  • Helping the ball up: hanging back on the trail foot causes thin or fat contact. Fix: commit your weight forward through impact, especially on downhill lies.
  • Picking the club by yardage alone: ignoring the lie leads to the wrong trajectory before you even swing. Fix: read the slope first, then adjust the number.
  • A base that’s too narrow: an unstable stance amplifies every other error on uneven ground. Fix: widen your feet and lower your center of gravity slightly.
  • Scooping at impact: trying to lift the ball instead of trusting the loft produces thin contact on both slopes. Fix: swing through along the slope’s natural angle and let the loft work.

These four fixes resolve the majority of poor contact on sloped lies, and they apply whether you’re facing a gentle rise on a municipal course or a steep drop on a mountain layout.

Practice drills to master uphill and downhill lies

Feel, more than theory, is what makes slope shots reliable under pressure. The PGA suggests building that feel through repetition across a range of lie types rather than drilling one slope in isolation.

  1. Nine-ball progressive-lie drill. Find or build three lies: clean, slightly uphill, and slightly downhill. Hit three balls from each, predicting your launch and carry before you swing, then compare the actual result.
  2. Landing-pattern drill. Using clubs from wedge through 8-iron, hit shots from an uphill or downhill lie and track where each one lands relative to a flat-ground shot with the same club.
  3. Progressive-swing routine. Start with half swings on each slope until contact feels solid, then build up to full swings once you can strike the ball consistently.

Recording your predicted versus actual results, a method PGA.com recommends for building pattern recognition, turns guesswork into a usable mental library you can call on mid-round.

Pro Tip: Practice slope shots from the same few spots on the range or short game area rather than tearing up new turf each time, using golf at home practice drills to build consistency and feel. Your legs will learn the balance faster when the ground itself becomes familiar.

Equipment considerations for sloped lies

Your clubs don’t change shape on a hillside, but how they behave does. A shaft that’s too stiff for your tempo can feel unforgiving on a downhill lie, where timing matters more than usual because the ball is already positioned back and the margin for early release narrows. A shaft with appropriate flex for your swing speed helps the clubhead release naturally through impact rather than forcing you to manipulate the face mid-swing.

Length matters too. Choking down an inch on severe slopes, a move echoed across instructor guidance on sidehill shots, shortens your swing arc slightly and gives you better control of low-point contact. That small sacrifice in distance is worth the gain in consistency.

Grooves and lie angle also play a quiet role. A club with a lie angle that suits your natural setup reduces the amount of compensation you need to make for slope alone, since you’re not fighting your equipment on top of the hill. Understanding how loft and lie interact with your setup gives you a clearer sense of why the same 7-iron behaves differently on flat ground than on a 15-degree uphill rise.

None of this means you need a different set for sloped courses. It means knowing your current clubs well enough to trust their natural tendencies rather than overriding them at the worst possible moment.

Building confidence on a difficult lie

A sloped lie tests your mind before it tests your swing. The moment you see your ball resting above a steep drop or perched on a rise, the instinct is to tense up, shorten your breathing, and swing faster than you intend. That tension is often what turns a manageable shot into a mis-hit.

The antidote is a routine you trust more than the terrain. Walk up to the shot the same way every time: read the lie, pick the club, take your stance, and commit to one swing thought rather than five. Golfers who rehearse this sequence on the range, even without a slope present, tend to carry that same calm into the moment it actually matters.

Accepting that a slope shot rarely finishes exactly like a flat one also helps. A slightly shorter uphill shot or a slightly longer downhill roll isn’t a failure, it’s the physics of the hill doing what it always does. Expecting imperfection removes the pressure to force a perfect outcome and frees you to simply execute the setup you practiced.

Confidence on these shots isn’t about eliminating nerves. It’s about having enough repetitions in your memory that your body already knows what to do, leaving your mind free to commit rather than calculate.

How slope changes your divot and turf contact

The ground itself behaves differently depending on which way it tilts. On an uphill lie, the club naturally wants to bottom out later in the swing because the terrain is rising to meet it, which often produces a divot that starts later and digs slightly deeper than one on flat ground. On a downhill lie, the opposite happens: the ground falls away from the club, so your low point arrives earlier than expected, and a swing that doesn’t account for this will catch the turf behind the ball first.

Uphill and downhill turf contact comparison

This is part of why the “swing with the slope” cue matters so much. A swing path that follows the hill’s angle lets the club interact with the turf the way the shot requires, clipping the ball cleanly before brushing the ground on downhill lies, and compressing slightly deeper on uphill ones without catching the hill early.

Watching your divots after each practice rep tells you almost everything you need to know about whether your weight and swing path matched the slope. A divot that starts too far behind the ball on a downhill lie usually confirms you hung back. A thin strike on an uphill lie often means your weight stayed too far forward and the club bottomed out before reaching the ball. Reading your own turf marks turns every practice swing into feedback you can use the very next rep.

Shaping shots to work with the slope, not against it

Once the basic setup feels automatic, shaping your shot shape around the slope opens up more scoring options. On an uphill lie that naturally pulls the ball left for a right-handed golfer, a golfer comfortable fading the ball can lean into that tendency rather than fighting it, aiming slightly left of target and letting the natural pull bring it back toward the pin.

On severe uphill lies, particularly greenside ones, instructors at Golf.com suggest aiming slightly right when the ball sits above your feet, widening your stance, choking down, and playing the ball a touch back to avoid stubbing the shot into the hill. These are small compensations, but they are the difference between a clean strike and a chunked one on the course’s trickiest lies.

Downhill lies reward golfers who can flight the ball down intentionally, taking advantage of the lower launch the slope already provides. Rather than fighting the lower trajectory, a golfer can choose a stronger loft, let the slope do the work of keeping the ball low, and use the extra roll to reach greens that a normal trajectory would fly past. Shaping shots around slope rather than despite it turns a defensive situation into an offensive one, provided the fundamentals of weight and alignment are already solid.

Adjusting for wet, firm, and variable turf

Slope is only half the equation. The ground’s condition underneath your feet changes how much margin you have for error on every uphill or downhill shot.

Wet turf on an uphill lie often means your feet will slip slightly during the swing, so a wider stance and a shorter, more controlled swing help you maintain balance where you’d otherwise rely on firmer footing. Wet turf also tends to grab the clubhead more on downhill lies, which can slow your release through impact and leave shots short, so a touch more club is a reasonable adjustment when the ground is soft.

Firm, dry turf behaves almost the opposite way on downhill lies. The ball will run out farther once it lands, since firm ground offers less resistance to roll, so taking one additional club of “less” than you normally would on a downhill shot can overcorrect into a shot that sails the green entirely. Firm turf on uphill lies tends to reward a slightly cleaner strike, since the ball comes off the face hotter than it would from softer ground.

The practical takeaway is to treat turf condition as a second filter after you’ve read the slope itself. A severe downhill lie on firm turf calls for a more conservative club than the same slope on wet ground, and an uphill lie in soft conditions may need an even longer club than the slope alone would suggest. Reading both the hill and the ground beneath it, rather than one or the other, is what separates golfers who guess from golfers who commit with a clear plan.

Adjusting for wet, firm, and variable turf — overview diagram

Why Golf Blab teaches slope shots this way

Small setup changes, repeated with attention, build the kind of feel that no single tip can replace. That’s the foundation of how Golf Blab approaches instruction: pairing focused practice like Play Golf with a Tour Pro with the right gear so golfers can track real improvement, not just memorize advice. Try one drill from this guide this week, and watch what happens to your contact.

— Michael Marini

Practice the slope, then gear up for it

Reading a slope correctly is only half the job. Showing up with the right tools makes the practice stick, which is where Play Golf with a Tour Pro gives you focused, hands-on time working through uphill and downhill lies with someone who can see what your eyes can’t. Pair that session with Innovate Tour Performance Golf Balls for shots that respond predictably off firm or wet turf, and a set of Custom Golf Club Labels so every club in your bag is one glance away from the right choice on a tricky lie. Browse the full Golf Blab shop to put together your own practice kit.

FAQ

Should you club up on a downhill lie?

No, you generally club down on a downhill lie, since the slope delofts the clubface and the ball tends to launch lower and run farther once it lands. Most instructors recommend one less club for a moderate downhill slope, adjusting further for steeper hills, a guideline echoed in Golf.com’s setup advice.

What is the hardest shot to hit in golf?

There’s no single universally agreed answer, but severe sidehill and downhill lies rank among the toughest because they combine an unfamiliar stance with the instinct to help the ball up, which causes the fat or thin contact instructors warn against. Confidence and a trusted pre-shot routine matter as much as technique on these shots.

What is the difference between an uphill lie and a downhill lie in golf?

An uphill lie effectively adds loft to your club, launching the ball higher and shorter, while a downhill lie removes loft, producing a lower flight with more roll once it lands. Setup also reverses: uphill calls for the ball slightly forward and weight toward the trail foot, while downhill calls for the ball slightly back and weight toward the lead foot, as detailed by the NCGA.

Where should I place my ball when playing a downhill lie?

Position the ball slightly back in your stance compared to a flat lie, which helps you catch it cleanly before the clubhead reaches its lowest point on the slope. Combine this with a lower lead shoulder and forward weight bias for the most reliable contact.

Sources