
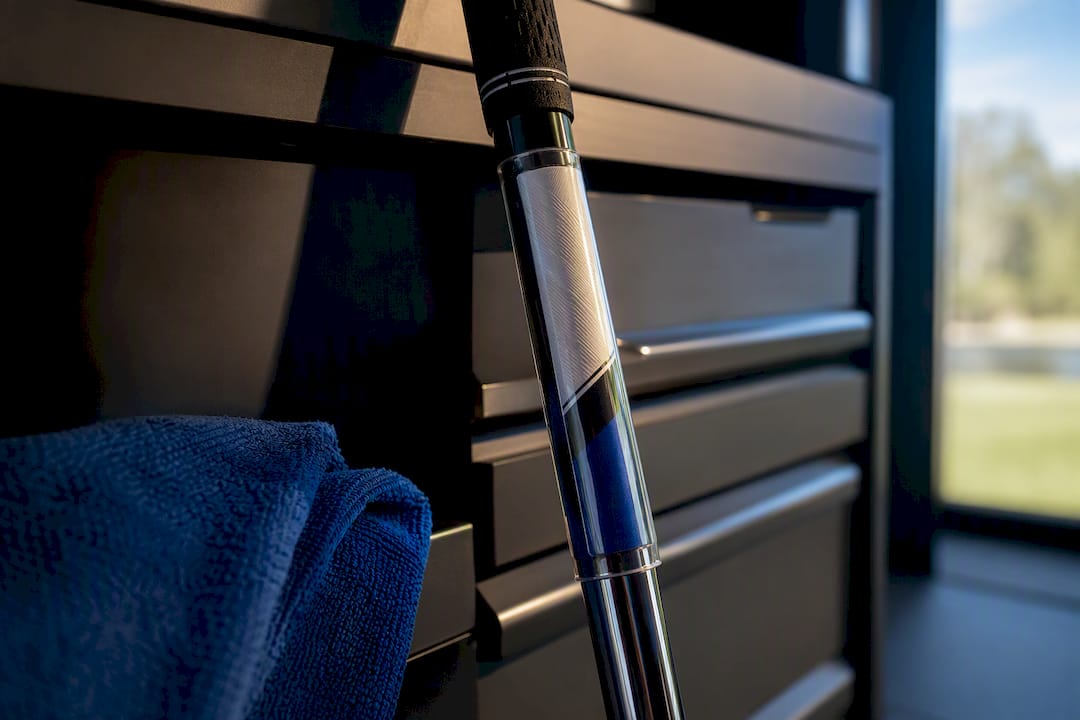
Laminated Mylar or weatherproof vinyl, applied below the grip with a high-tack acrylic adhesive, outlasts every other labeling method golfers try. Clean the shaft with isopropyl alcohol, burnish the label firmly to eliminate air pockets, and let it cure for 24 hours before it ever sees a fairway or a car trunk. That combination of material, placement, and patience is the difference between a label that survives four seasons and one that peels by June, and it’s exactly what Golf Blab builds its custom golf club labels around.
TL;DR:
- Laminated Mylar and weatherproof vinyl with high-tack acrylic adhesive withstand UV exposure, rain, and bag friction for multiple seasons when applied correctly.
- Placement below the grip on the shaft’s flat section between steps or just above the hosel ensures durability and ease of visibility without interference from turf or bag contacts.
- Proper application involves thorough alcohol cleaning, precise positioning, gradual pressing, and curing for 24 hours, with warming labels on cold days improving adhesion.
- Removal should be gentle, using low heat and solvents like alcohol to avoid damaging club finishes, especially on vintage or specialty clubs.
- Vendor-printed laminated labels outperform homemade ones in longevity, offering better resistance against fading, delamination, and edge lift over several seasons.
Table of Contents
- What Makes a Golf Label Material Durable?
- Where Should You Place a Label on Each Club?
- How Do You Apply a Label for Maximum Adhesion?
- How Do You Remove a Label Without Damaging the Finish?
- How Do You Keep Labels Readable Through the Seasons?
- DIY Labels or Vendor-Printed: Which Lasts Longer?
- What Sizes and Tools Do You Need to Get This Right?
- What Do Experienced Players and Event Staff Say About Label Durability?
- Is a Slightly Visible Label Worth the Trade-off for Durability?
- Order Custom Golf Club Labels Built for Multi-Season Wear
- Sources
- FAQ
What Makes a Golf Label Material Durable?
The material determines almost everything else. Laminated Mylar and weatherproof vinyl share a construction that matters more than most golfers realize: a printed layer sealed beneath a clear polyester or polypropylene film, so UV rays, rain, and the friction of a crowded bag never touch the ink directly. That sub-surface printing is why laminated Mylar and polyester labels with permanent adhesive show up again and again in vendor specs built for golf equipment specifically.
Adhesive chemistry deserves just as much attention as the face material. High-tack acrylic adhesive forms a permanent bond that resists heat softening in a hot trunk and cold stiffening in a winter bag, and it grips both steel and graphite shafts without leaving residue behind when you eventually remove it. Generic office-label adhesive does neither reliably.
Cheap paper or unlaminated vinyl fails in predictable ways:
- Fading from UV exposure within a few rounds of direct sun
- Delamination, where the printed layer separates from the backing after repeated wiping
- Edge lift, starting at the corners and unraveling the whole label within a season
- Adhesive failure, where the label slides or spins after contact with sunscreen or rain
A product marketed as waterproof, scratchproof, and made in the USA with a strong long-adhesion bond illustrates the standard serious buyers should expect. Anything short of that is a temporary fix, not a durable one.
Where Should You Place a Label on Each Club?
Below the grip, on the exposed shaft, is the placement that balances visibility against wear for the overwhelming majority of clubs. That zone stays clear of grip torque and away from the head, where turf contact and cart bag racks do the most damage. The USGA’s own equipment guidance backs this logic indirectly: markings need to be permanent, clear, and unambiguous for equipment management, and a spot that avoids abrasion is the only way to keep a marking legible for years, not weeks.
A few situations call for adjustments:
- Rental sets often carry molded head markings or numbered bag tags instead of shaft labels, since rental clubs get swapped and refinished too often for a permanent label to make sense.
- Stepped steel shafts need the label centered on a flat section between steps, never straddling a step, or the laminate will bridge and eventually crack.
- Putters, with their shorter, often non-standard shafts, sometimes take a smaller label just above the hosel instead of the standard below-the-grip zone.
- Bag tags work as a backup identifier for tournament play, but they get lost or swapped far more easily than a shaft label ever does.
Golf Blab’s guide to labeling golf clubs walks through sizing for each club type if you’re outfitting a full set at once.
How Do You Apply a Label for Maximum Adhesion?
Application technique separates a label that lasts four seasons from one that lifts at the edges within a month. Even the best laminate fails on an oily or curved surface if you skip the prep work, and that single mistake accounts for most of the “my labels keep falling off” complaints golfers post online.
Start with surface prep. Wipe the shaft with isopropyl alcohol on a lint-free cloth, working past the spot where the grip’s lower edge sits, since grip solvent and hand oils leave a residual film that blocks adhesive contact. Let it dry fully before touching the label.
Then follow this sequence:
- Position the label against the dry shaft and confirm the orientation before committing.
- Peel back roughly a third of the backing and set that exposed edge in place first.
- Align the label along the shaft’s length, keeping it parallel to the grip line.
- Press down gradually while peeling the remaining backing away, working out from the center to avoid trapping air.
- Burnish firmly with a squeegee or the edge of a credit card, pushing outward toward the edges to force out any remaining bubbles, which matter more on curved or stepped shafts where the label has to conform to a slight radius.
Let the label cure for 24 hours before the club goes back in a bag or sees rain. Immediate exposure to moisture or heavy handling is the single most common reason a properly applied label still fails early.
Pro Tip: Warm the label slightly with your hands before burnishing on a cold day. Cold adhesive is stiffer and bonds less completely on the first pass, which is exactly when edge lift starts.
How Do You Remove a Label Without Damaging the Finish?
Start gentle, then escalate only if you need to. Peel from one corner slowly, at a low angle, rather than pulling straight up, since a shallow angle puts less stress on the clearcoat underneath.
If the label resists, a hairdryer on low heat softens the adhesive enough to lift it cleanly in most cases. For residue left behind, isopropyl alcohol or an adhesive remover made for painted or coated surfaces will dissolve the remaining tack without attacking the finish. A few practical guardrails:
- Test any solvent on an inconspicuous spot first, especially near a shaft’s paint fill or logo.
- Never scrape with a blade or fingernail across the clearcoat. That’s how removal turns into a repair job.
- Work in short passes rather than one long aggressive pull, which tends to stretch the laminate and smear adhesive rather than lift it whole.
Pro Tip: Vintage clubs and specialty finishes, like hand-painted persimmon woods or collector irons, are worth a call to a club repair professional before you apply any solvent at all. Some older lacquers react poorly to alcohol.
How Do You Keep Labels Readable Through the Seasons?
A quick visual check every time you clean your clubs catches problems while they’re still cheap to fix. Look for lifted corners, cloudy lamination, or fading text, then wipe each label with a damp cloth rather than scrubbing, since aggressive scrubbing is what starts edge lift in the first place.
A few habits extend label life measurably:
- Avoid leaving clubs in a hot trunk for extended stretches. Heat cycles are harder on adhesive than a single hot round on the course.
- Position clubs in bag dividers so labels don’t rub directly against neighboring shafts or the bag’s interior lining.
- Re-burnish edges after a stretch of heavy play, especially if you’ve noticed any lifting starting at a corner.
- Replace a label once you see delamination, persistent edge lift after re-burnishing, or fading that makes the text hard to read at arm’s length.
Vendor and community durability reports consistently describe multi-layer laminated Mylar surviving multiple seasons of rain, UV, and bag friction when it’s applied with proper edge prep, which is the pattern worth trusting over any single product’s marketing claim.
DIY Labels or Vendor-Printed: Which Lasts Longer?

Vendor-printed laminated labels beat home-made versions on durability almost every time, mainly because sub-surface printing seals the ink beneath a protective layer in a way home thermal printers and inkjet labels can’t replicate. A home-printed label sitting exposed on the surface starts fading and smearing far sooner, especially with any rain exposure.
Cost and time cut the other way, somewhat. A vendor set costs more per label upfront than a roll of address labels, but the time saved and the multi-season durability usually make it the better value once you count a full bag of clubs and a season or two of reapplication for DIY versions. Consider:
- Cost per club adds up fast when you’re relabeling DIY versions two or three times a season versus once with a laminated set.
- Time investment for DIY includes design, printing, cutting, and troubleshooting adhesive that wasn’t built for a golf shaft in the first place.
- Privacy and format choices matter too. A phone number is faster for a stranger to use if your clubs go missing, while a QR code linking to a private contact form keeps your number off a public shaft.
- Tournament readability favors simple, high-contrast text over a QR code, since event staff scanning a rack of clubs need something they can read at a glance, not something they have to scan.
What Sizes and Tools Do You Need to Get This Right?
Drivers and fairway woods typically take a slightly longer label to wrap the wider shaft taper, while irons and wedges use a shorter, narrower size suited to a straighter shaft section. Putters need the smallest size of the group, given their shorter exposed shaft. Stepped shafts require sizing the label to fit within a single flat section rather than spanning a step, which is where most fit problems happen.
A short tools checklist covers nearly every job:
- Isopropyl alcohol and a lint-free cloth for prep
- A burnisher, squeegee, or credit card edge for pressing labels flat
- A hairdryer for any future removal
- A cutting mat and sharp blade if you’re trimming DIY labels to size
Before final adhesion, mock-fit the label dry against the shaft to confirm placement and size. That one extra minute prevents the far more annoying problem of peeling off a misaligned label and starting over.
What Do Experienced Players and Event Staff Say About Label Durability?
Multi-season durability shows up consistently in how golfers talk about their labels once a few years have passed, not right after a purchase. The clubs that still carry a legible label after three or four seasons almost always got the same treatment: a proper alcohol wipe, a firm burnish, and a full 24-hour cure before their first round.
A durable label isn’t the one that looks best on day one. It’s the one nobody notices again until they need it, still readable, still stuck flat, three seasons later.
Tournament staff have a practical reason to care about this beyond aesthetics. Event organizers who build labeling into their planning checklist alongside bag tags and cart signage report far less confusion at the bag drop and faster equipment returns when clubs go missing mid-round. Clear, permanent shaft markings speed up that process in a way a loose bag tag alone never does.
Is a Slightly Visible Label Worth the Trade-off for Durability?
The most durable label on the market does no good if it looks like an afterthought stuck onto a club you’re proud of, and the reverse is just as true. I’ve come to think the right answer isn’t choosing between invisible and legible. It’s choosing a label thin and well-matched enough to the shaft’s finish that it reads as part of the club, not an addition to it.
Durable labeling belongs in the same category as regripping on schedule or storing clubs properly between rounds: a small maintenance decision that protects resale value and equipment identity over years, not weeks. Golfers who replace flimsy labels three times a season aren’t saving money. They’re paying for the same fix repeatedly. Choose the better material once, apply it correctly, and let it do its job for the long haul instead of chasing quick, cheap fixes that need constant attention.
— Michael Marini
Order Custom Golf Club Labels Built for Multi-Season Wear
Golf Blab’s Custom Golf Club Labels are $29.99 one-off and built around the same principles this article just walked through: laminated, sub-surface printing sealed against water and UV, a high-tack adhesive that holds on both steel and graphite, and sizing options that fit drivers, irons, wedges, and putters without guesswork. When you order, include your name or phone number in high-contrast text, keep the design simple enough to read at a glance, and place it below the grip for the best balance of visibility and protection.
Outfitting a whole bag or shopping for a gift, the shop page also carries Golf Blab E-Gift Cards at $25 one-off and the Play Golf with a Tour Pro experience at $600 one-off per person, alongside apparel like the Adidas Sport Polo and Adidas Space Dyed Polo. Start with the labels, get your set applied correctly, and your clubs carry identification that actually survives the seasons ahead.
Sources
Material and adhesive claims in this guide draw on USGA’s equipment submission guidelines on permanent marking standards, vendor specifications for laminated Mylar and vinyl label construction, a waterproof, US-made label product listing documenting real-world durability claims, and tournament planning guidance on integrating labels with bag tags and event signage.
- USGA golf club and other equipment submission guidelines (2021)
- Custom Golf Club Labels – LabelValue
- Golf Tournament Planning Checklist (8 Weeks) | Chase Birdies
FAQ
What Are the Best Golf Club Labels for Durability?
Laminated Mylar or weatherproof vinyl labels with a high-tack acrylic adhesive outperform paper or unlaminated vinyl by a wide margin, since the sub-surface printing protects the ink from UV and moisture. Vendor specifications consistently point to that laminated construction as the standard for shafts that see regular play. Golf Blab’s own custom labels use this same approach.
What Is the 70/30 Rule in Golf?
The 70/30 rule generally refers to a swing or practice concept, often describing a recommended weight distribution or focus split during setup or the golf swing rather than anything related to equipment labeling. Definitions vary by instructor, so it’s worth confirming the specific context before applying it to your own swing.
What Is the 24/38 Rule in Golf?
This is a niche term used in some regional or informal golf discussions, and there’s no single widely recognized standard definition for it tied to labeling or equipment rules. Treat any specific numeric “rule” you encounter with some skepticism unless it comes from an official body like the USGA.
What Is the 90% Rule in Golf?
Like the other numbered “rules” above, this phrase circulates informally among golfers and coaches with inconsistent definitions, often tied to swing tempo or short-game practice ratios rather than equipment. It isn’t part of any official USGA guidance on clubs or markings.
How Long Does a Properly Applied Golf Label Last?
A laminated label applied with correct surface prep and a full 24-hour cure commonly lasts multiple seasons of regular play, rain, and heat exposure. Failure almost always traces back to skipped degreasing or a rushed cure rather than the material itself.