Posted on

The Golf Polo Fit Guide Every Golfer Needs Before Buying

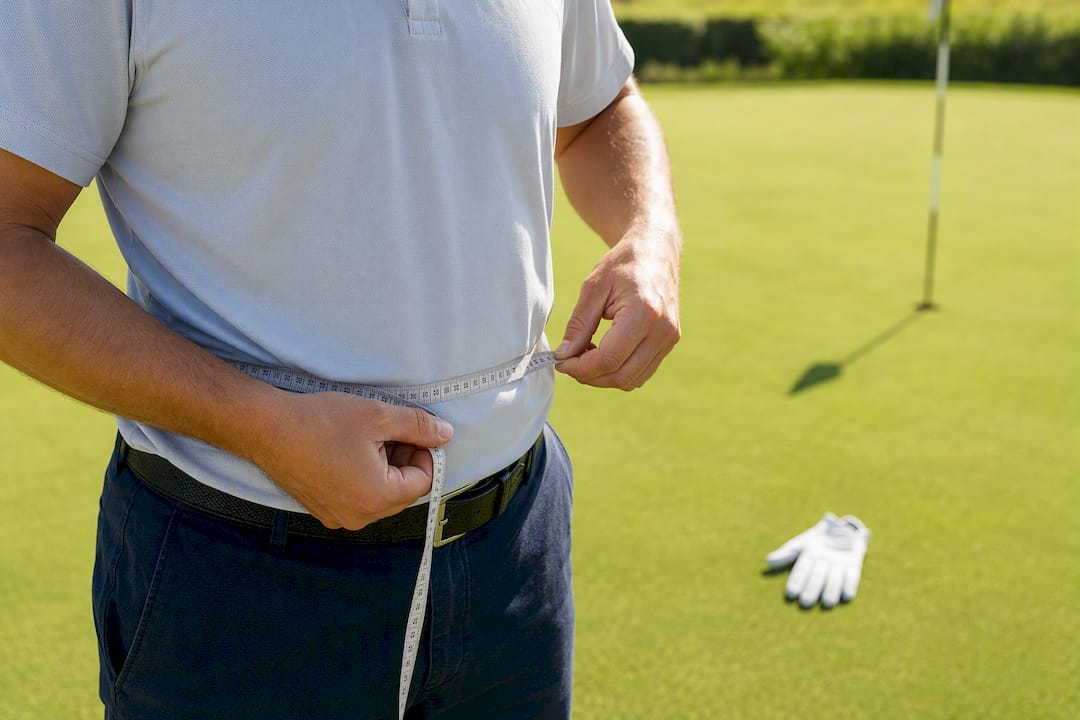
Hands measuring chest for golf polo fit

The ideal golf polo sits with the shoulder seam right at the edge of your shoulder bone, leaves roughly 1 to 2 inches of fabric to pinch on each side of your chest, finishes at mid-bicep, and drops low enough to stay tucked through a complete swing. Run four checks before you buy: pinch the chest fabric, check the sleeve hits mid-bicep, confirm the hem clears your waistband by a few inches, and take a full backswing. You only need a soft tape measure, a mirror, and maybe a polo you already own and trust.


TL;DR:

  • The ideal golf polo should fit with shoulder seams at the edge of your shoulders and stay tucked during a full swing, requiring proper check before purchase.
  • Movement tests reveal if a polo fits correctly, with shoulder seams staying put and the hem remaining tucked after a complete swing.
  • Fit categories like classic, tailored, and athletic depend on chest, waist, and sleeve measurements, with swing tests guiding the final choice.
  • Fabric stretch significantly influences sizing, as blends with elastane allow closer fits without restricting movement, unlike pure cotton.
  • Proper polo care involves washing in cool water, air drying, and avoiding hot dryers to maintain fit and fabric integrity over time.

Table of Contents

How to Measure Yourself for a Golf Polo Size Chart

Skip the guesswork. A tape measure and five minutes will tell you more than any size label ever could.

For chest, wrap the tape around the fullest part of your chest with your arms relaxed at your sides, keeping the tape level front to back. For shoulders, measure edge to edge across the bone, not across the fabric of a shirt you’re currently wearing. For waist, find where your golf pants actually sit, which is usually higher than you think.

There’s a faster shortcut if you already own a polo that fits the way you like: lay it flat, measure armpit to armpit, then double that number. This flat-shirt measurement is one of the most reliable predictors of fit, and it sidesteps the problem of brand letter sizes meaning wildly different things from one label to the next.

  1. Measure chest, shoulders, and waist with the tape method above.
  2. Lay a favorite polo flat and double the armpit-to-armpit measurement.
  3. Compare both numbers against the brand’s size chart, not just the letter size.
  4. If your chest measurement falls between two sizes and you plan to layer, size up.

Pro Tip: If the polo has visible elastane or spandex content on the tag, trust the tighter of your two measurements. Stretch fabric gives you room the number doesn’t show.

What Is the Swing Test and Why Does It Matter?

A polo can look perfect standing still and fail completely the moment you swing. That’s why the real test of fit is movement, not a mirror check.

Try this sequence in the fitting room or at home:

  1. Tuck the shirt as you normally would on the course.
  2. Take your address position and check the shoulders sit flat.
  3. Take a full backswing, pausing at the top.
  4. Follow through completely, then check if the hem stayed tucked.
  5. Reach across your body and rotate your shoulders both directions.

Watch for these signs as you move:

  • Shoulder seams sliding down your arm instead of staying put
  • Chest fabric pulling tight across your sternum at the top of the backswing
  • Bunching or resistance in the armpit
  • The hem creeping out of your waistband after follow-through

Shoulder seams shifting usually means the shirt is too small in the shoulders, full stop, no amount of “breaking it in” fixes that. Chest pull at the top of the swing signals you need a size up or a roomier cut. Hem creep points to a length problem, not a width problem, so don’t compensate by buying bigger overall.

Classic, Tailored, and Athletic Fits: Which One Is Yours?

Fit categories aren’t marketing labels. Each one changes your actual measurements at the chest, waist, and sleeve, and each suits a different body and swing style.

  • Classic or regular fit carries more room through the chest and waist, works well for larger midsections, and tends to favor golfers who prioritize comfort over a tailored silhouette.
  • Tailored or modern fit follows your natural shape closely without restricting rotation, since tailored doesn’t mean tight; it’s a middle ground most golfers land on comfortably.
  • Athletic fit sits closest to the body and suits broader-shouldered players who want a sharper, TV-ready look, but it demands the most stretch fabric to preserve swing mobility.

If you’re stuck between two cuts, let the swing test decide. Whichever fit passes the backswing check without bagginess or pull wins, regardless of what the label implies about your body type.

Does Fabric Stretch Change What Size You Should Buy?

Fabric composition changes the math on sizing more than most golfers realize. A polo built with polyester and a touch of elastane behaves nothing like a pure cotton pique shirt, even in the identical listed size.

  • Blends with roughly 3 to 5% elastane content improve mobility and let you comfortably size down to a closer cut without losing swing freedom.
  • Moisture-wicking synthetic knits tend to hold their shape through a swing better than cotton, which stretches out at the shoulders and sleeves over a round.
  • Pure cotton pique offers a classic look and feel but usually needs slightly more room built in, since it doesn’t spring back the way a technical knit does.

Here’s the catch: not every “performance fabric” claim on a hangtag translates into real stretch. If the tag doesn’t list elastane or spandex content, treat the shirt as a standard woven and size according to your true measurements, not the marketing copy.

Fixing Common Golf Polo Fit Problems

Most fit complaints trace back to one of four fixable issues, and knowing which is which saves you a return trip to the store.

  • Hem rides up when tucked in: Size up one, or look for a brand offering a longer or curved hem designed to stay tucked.
  • Bunching or tightness under the arm: This usually means a low arm hole, and it’s rarely something a tailor can fix; switch brands or cuts instead.
  • Sleeves squeeze your bicep: Move to an athletic or tailored cut with stretch fabric, or size up one.
  • Chest pulls at the top of your swing: Size up, or choose a fit built with more built-in mobility.

Tailoring works well for shortening a hem or tapering a sleeve. It does nothing for arm hole placement, so don’t waste money altering a shirt that restricts your rotation at the source.

Pro Tip: If you regularly wear an undershirt or base layer, size your polo based on how it fits over that layer, not on its own. Layering eats into your chest pinch room fast.

How Do You Keep a Golf Polo Fitting Right Over Time?

A polo that fit perfectly on day one won’t stay that way without a little care. Elastane breaks down under heat, and cotton shrinks the moment it hits a hot dryer.

  • Wash in cool water with a mild detergent to protect the elastane fibers that give stretch blends their shape.
  • Air-dry flat when possible, or use low heat briefly. High heat is the fastest way to shrink a hem or curl a collar permanently.
  • Fold performance polos rather than hanging them for long stretches, which helps the collar hold its shape.

Golf Blab’s care guide for golf polos walks through wash settings by fabric type in more detail if you want a reference to keep near the laundry room.

Author and Golf Blab Notes on Fit Expertise

Golf Blab Adidas Space Dyed Polo

This guide was written by Michael Marini, drawing on measurement-based fitting principles and swing-mechanics research that inform how performance golf apparel is built and tested.

Golf Blab designs and sells apparel around these exact fit principles rather than treating them as abstract advice:

  • The Adidas Sport Polo uses a stretch-friendly construction built for full-swing mobility.
  • The Adidas Space Dyed Polo applies the same fit logic in a distinct fabric finish for golfers who want texture variety without sacrificing rotation.
  • Golf Blab also offers personalized golf club labels, letting golfers extend that same sense of personal identity from their shirt to their bag.

Fit isn’t a cosmetic detail bolted onto a golf shirt after the fact. It’s the mechanical difference between a swing that flows and one that fights the fabric at the top of the backswing.

Golfers wanting hands-on fit or swing feedback can book Play Golf with a Tour Pro or check individual product pages for size-specific guidance.

Why Golf Blab Builds Around Performance-First Fit

A polo that restricts your backswing costs you more than comfort. It costs you consistency, and confidence follows fit almost as closely as ball flight follows contact. That’s why Golf Blab designs apparel around the swing test first and the look second, and why our lessons and product pages exist side by side for golfers who want both dialed in.

— Michael Marini

Golf Blab Apparel That Follows These Fit Rules

Golf Blab is the apparel partner for golfers who’d rather buy a polo built around swing mechanics than gamble on a size label. The Adidas Sport Polo delivers the mid-bicep sleeve and chest mobility this guide recommends, straight out of the box. The Adidas Space Dyed Polo offers the same fit logic in a fabric finish suited to golfers who want variety in their rotation. For cooler rounds, the Adidas Quarter Zip Pullover is cut to layer over a polo without eating into your chest pinch room.

Golf Blab Adidas Sport Polo

Every product page lists a full size chart, and if your measurements fall between two sizes, reach out through the site for sizing help before you order. Once your shirt fits right, the personalized golf club labels are worth a look too, a small way to make your bag as much yours as your fit is.

Five Steps to Take Before You Buy Your Next Polo

  1. Measure your chest, shoulders, and waist, or measure a favorite polo flat.
  2. Compare both numbers to the brand’s actual size chart, not just the letter size.
  3. Run the full swing test before finalizing any purchase.
  4. Choose classic, tailored, or athletic fit based on body type and layering habits.
  5. Favor stretch blends if you want a closer cut without losing mobility.

Sources

Posted on

Your Online Lesson Setup: The Coach-Ready Checklist

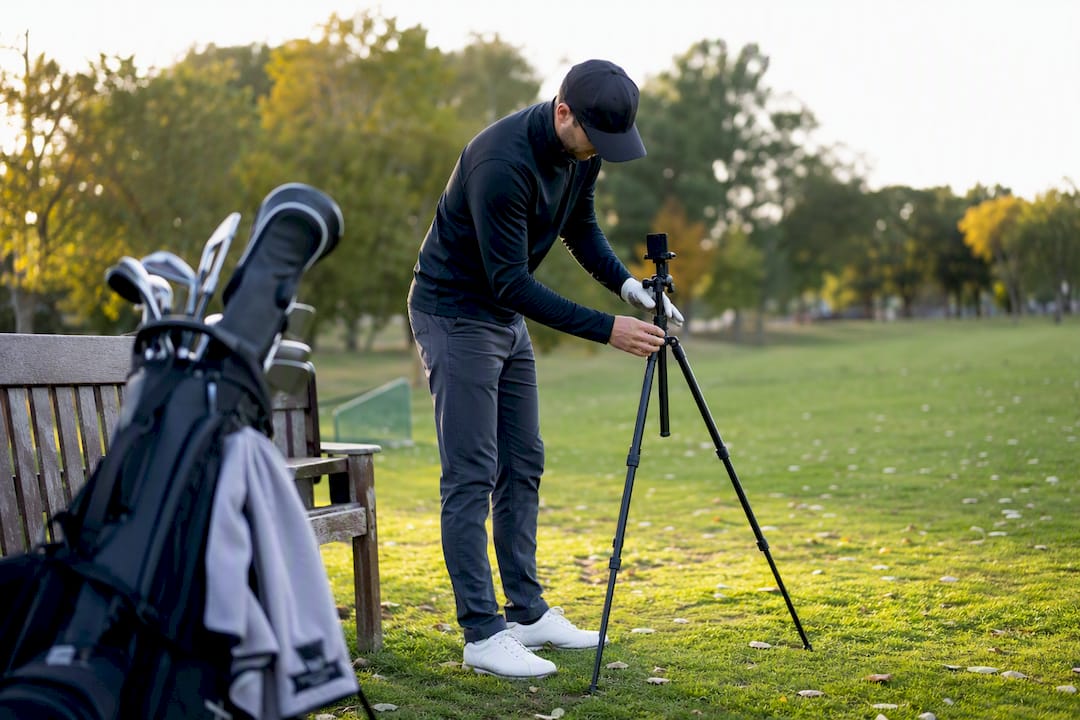
Golfer setting up smartphone tripod outdoors

The setup that matters comes down to five things: a face-on view, a down-the-line view, a stable camera, decent light, and several trimmed swings. That’s the entire foundation a qualified instructor needs to diagnose your swing through a screen rather than in person. Everything else, from tripods to alignment sticks, exists to make those five elements reliable and repeatable session after session.

Mount your phone or camera on a tripod at waist or hand height, never handheld. Shoot at 1080p and, when possible, at a higher frame rate such as 60fps to capture more detail around impact. Trim your footage down before you send it.

  • Two views, always: face-on and down-the-line, no exceptions
  • Stability: a tripod or phone clamp, not a friend’s shaky hands
  • Video quality: 1080p minimum, 60fps preferred
  • Swing count: several clean swings, trimmed to the useful window
  • Notes for your coach: one line on what you felt or what you want checked

Key Takeaways

A coach-ready online lesson setup depends on two consistent camera angles, a stable mount, even lighting, and 6 to 8 trimmed, natural swings submitted with a short note.

Point Details
Two views are mandatory Film both face-on and down-the-line; skipping either limits what a coach can diagnose.
Camera height and distance Mount at waist or hand height, roughly 10 to 12 feet away, adjusted for your lens.
Frame rate over resolution Shoot 1080p at 60fps when your device allows it, without chasing 120fps or higher.
Light behind the camera Position the sun or lamps behind your camera and pick a plain background.
Mark your spots for repeatability Tape or mark tripod positions so every future session matches your baseline angles.
Book with confidence Golf Blab’s online lessons carry a money-back guarantee, backed by prep-ready apparel and gear from its catalog.

Table of Contents

Building Your Online Lesson Setup: Equipment Checklist

The gap is usually one $20 tripod and a little discipline about where you plant it.

Start with your camera. Any smartphone from the last four or five years shoots 1080p without trouble, and many can hit 60fps or higher. That frame rate matters more than resolution for swing analysis, since a higher frame rate captures more frames around impact, the split second where most swing flaws actually reveal themselves. Push much higher than 60fps, though, and you’re trading a marginal detail gain for files that take forever to upload.

A tripod or phone clamp is non-negotiable. Handheld footage drifts, tilts, and ruins the angle references your coach needs to measure your posture and plane. Spend the extra few dollars on one with a phone mount rather than balancing your device on a water bottle.

Beyond the camera rig, a few extras earn their place in your bag:

  • Alignment sticks, for marking your stance line and ball position
  • A portable mat or net if you’re filming indoors or in a garage
  • A power bank, since a dead phone mid-session is a wasted trip to the range
  • A wired headset or earbuds with a mic, useful if your lesson includes a live video call component

If you’re filming somewhere you’ll also want to look put together on screen, whether for your own footage or a live call with your coach, a sport polo reads cleaner on camera than a faded T-shirt, and practicing with a consistent ball like Innovate Tour Performance Golf Balls removes one more variable from your ball-flight footage.

Pro Tip: Mark your tripod’s feet with tape or chalk the first time you get the angle right. Every future session, you just line up the tripod legs to the marks and you’re ready to shoot.

How Do You Position the Camera for Face-On and Down-the-Line?

Coaches evaluate your swing by comparing what they see against known planes and angles, which only works if your camera sits in the same relative position every time you film. Get these two setups right once, and you can replicate them in ten seconds on any future trip to the range.

Down-the-line view:

  1. Set the tripod roughly 10 to 12 feet behind you, adjusting closer or farther depending on your phone’s lens (wide lenses need more distance to avoid distortion).
  2. Raise the camera to mid-torso or hand height, not eye level and not ground level.
  3. Line the camera up directly behind your target line, so the shaft and body rotation read as true angles rather than skewed ones.
  4. Frame the shot so your full swing arc and the clubhead stay visible at both ends of the swing.

Face-on view:

  1. Position the tripod 10 to 12 feet in front of you, camera perpendicular to your target line.
  2. Center the frame on your hands at address, leaving room above your head and below your feet.
  3. Confirm the camera is level. A tilted horizon throws off every angle measurement a coach makes.

Once both spots are dialed in, mark the tripod positions with tape, a divot tool, or even a tee pushed into the turf. Consistency between sessions is what turns a single clip into a real progress record, and it’s also the fastest fix for the single most common filming error: camera placement that shifts every time you set up.

Statistic Callout: Instructors consistently point to 60fps as the practical sweet spot for swing footage, capturing meaningfully more detail through impact than standard 30fps without the massive file sizes that 120 or 240fps produce.

If your phone supports higher frame rates, a short slow-motion clip through impact is a worthwhile bonus, not a replacement for your standard face-on and down-the-line pair.

How Do You Position the Camera for Face-On and Down-the-Line? — overview diagram

What Lighting and Background Work Best for Swing Video?

Light direction decides whether your coach sees a golfer or a silhouette. Put the sun, or your main light source, behind the camera and facing you. Shooting into the sun turns your swing into a shadow puppet show, useless for anything beyond counting how many times you waggle.

Diffuse light beats dramatic light every time for analysis purposes. Overcast skies, shade, or the soft light of early morning and late afternoon all produce even detail across your body and the club without harsh shadows carving up your form.

Background matters more than golfers expect:

  • Choose a plain backdrop: a net, a fence, or open sky
  • Avoid reflective surfaces like glass doors or water behind you
  • Skip busy patterns (parked cars, other golfers, striped range mats) that pull the eye away from your swing

Filming indoors? Position two or three lamps around the space rather than relying on one overhead light, which casts hard shadows across your setup and grip.

Pro Tip: If you only have one shooting window each day, pick the flattest light, not the brightest. A gray, overcast afternoon will give your coach cleaner footage than blazing noon sun ever will.

Setting Up a Safe and Effective Practice Space

Your hitting area needs room to breathe, both for your swing and for anyone standing nearby. Clear at least 6 to 8 feet behind you and to each side before you ever press record.

Indoors, check your ceiling height against your longest club before you take a full swing. A driver clipping a garage rafter is a bad way to end a lesson prep session. Lay down a mat if you’re hitting off concrete or bare ground, and use a net if you don’t have 200 yards of open grass in front of you.

Mark your target line with alignment sticks or painter’s tape so your stance and ball position stay consistent from swing to swing and from session to session. That single habit makes it far easier to spot when a real change happened in your swing versus when you just stood a little differently that day.

A few safety basics round out the space:

  • Proper golf shoes or firm-soled sneakers, not flip-flops or slick dress shoes
  • Bystanders and pets cleared well outside your swing radius
  • A screen or net between you and any nearby windows, cars, or foot traffic
  • Soft practice balls if you’re working in a tight garage or basement setup

How Should You Film and Prepare Your Video Files?

Record a sample clip first, always. Play it back, check your framing, confirm both angles look right, and only then start your real recording set. Skipping this step is how golfers discover, after 20 swings, that the tripod was two feet too far left the whole time.

  1. Set your specs: 1080p minimum, 60fps preferred, balancing detail against file size.
  2. Record your set: 6 to 8 swings per angle is plenty, more than that just slows down upload and review.
  3. Trim each clip: cut to roughly one second before address and one second after impact, so your coach isn’t scrubbing through dead time.
  4. Export as MP4 (H.264): the most widely compatible format for coaching platforms and video review software.
  5. Name your files clearly: something like FaceOn_01 and DTL_01 saves your coach from guessing which angle they’re opening.
  6. Add a short note with each set describing what you were working on or what felt different.
  7. Upload over Wi-Fi when possible, using a background upload or a cloud link rather than fighting a slow connection at the worst moment.

Pro Tip: Compress your files only if the platform demands it. Coaches would rather wait an extra minute for a clear upload than analyze a blurry, over-compressed clip.

What Do Coaches Actually Want to See in Your Footage?

Golf Blab contributor Michael Marini has reviewed enough submitted swing footage to know the pattern: golfers who try to hit a “perfect” showcase swing for the camera almost always produce less useful footage than golfers who just swing normally.

Instructors consistently ask for typical swings, not exhibition attempts, because a coach can only fix a pattern they actually see repeated.

Before you record your real set, warm up properly, take three practice swings to settle your rhythm, and then start filming your normal swing, not your best-case scenario.

Concise notes tied to specific clips, what you felt in that swing and what you’d like checked, help a coach focus their feedback instead of guessing at your intent from silent video alone.

A few habits that consistently produce better lesson footage:

  • Record your natural tempo, not a slowed-down “camera swing”
  • Keep notes short: one sentence per clip beats a paragraph of context
  • If something felt different (a miss, a good strike), say so directly
  • Reference your swing sequence if you’re unsure how to describe what happened

What Audio Quality Do You Need for an Online Lesson?

Most swing-review submissions don’t need audio at all, since coaches are analyzing motion, not commentary. If your lesson format includes a live video call or a voice memo alongside your clips, though, audio quality suddenly matters a lot more than golfers expect.

Your phone’s built-in microphone works fine for a quick verbal note recorded standing still, close to the device. It falls apart the moment wind, traffic, or range noise gets involved, which is most outdoor filming locations. If you’re recording yourself talking through what you felt during a swing, step closer to the phone and cup a hand slightly around the mic side to cut wind noise.

For live coaching calls, a basic wired earbud microphone beats your device’s speaker and mic combo every time, since it eliminates echo and keeps your voice clear even if you’re moving around your practice space. Bluetooth earbuds work too, though they introduce a small lag that can feel awkward during back-and-forth conversation.

Skip background music or talk radio playing nearby. It seems harmless until your coach is trying to catch a verbal note buried under a stadium broadcast. Quiet surroundings and a close mic solve nearly every audio problem golfers run into during lesson prep.

What Audio Quality Do You Need for an Online Lesson? — overview diagram

Do You Need Fast Internet to Submit Lesson Video?

Upload speed determines how long you wait between filming and getting your footage into your coach’s hands, and it varies more than most golfers assume based on location and connection type.

A standard home Wi-Fi connection handles a handful of trimmed 1080p clips without issue, typically uploading a full set within a few minutes. Range or course Wi-Fi, where it exists at all, tends to be slower and less reliable, so filming there and uploading once you’re home usually beats fighting a weak signal on-site.

Mobile data works in a pinch, but large 60fps files chew through data allowances fast, and spotty cell coverage at outdoor ranges can stall an upload indefinitely. If you’re on a limited data plan, wait for Wi-Fi rather than burning your allowance on a failed upload attempt.

Most lesson platforms accept either a direct upload or a cloud storage link (Google Drive, Dropbox), and the link option is often faster since it lets the file finish uploading in the background while you do something else. Trimming your clips before upload, rather than sending raw uncut footage, cuts both your wait time and your coach’s review time considerably.

What Actually Matters Most in Your Setup

Most online lesson setup advice treats every variable as equally important, and that’s where it goes wrong. Camera angle and stability carry the analysis. Lighting and background support it. Everything past that, frame rate beyond 60fps, premium microphones, elaborate multi-camera rigs, is marginal.

The conventional wisdom oversells production value. A golfer with a $15 tripod, correct camera height, and decent daylight will get a better lesson outcome than a golfer with expensive gear and a crooked angle. Coaches diagnose patterns, not cinematography.

If you prioritize one thing, prioritize repeatability. The golfers who improve fastest through online lessons aren’t the ones with the best single clip, they’re the ones whose setup barely changes week to week, so the coach is comparing swing to swing rather than swing to camera-angle-guessing. Mark your spots. Keep your height. Keep your light consistent. That discipline does more for your progress than any hardware upgrade.

How Golf Blab Supports Your Lesson Prep and Presentation

Getting your setup right is half the work. The other half is having a coach worth sending that footage to, and gear that keeps you consistent session after session. Golf Blab’s online lessons come with a money-back guarantee, so booking one carries no risk if the feedback doesn’t move your game forward.

A few products round out your prep kit. A branded Adidas Sport Polo or Space Dyed Polo keeps your on-camera presentation sharp, while an Under Armour Golf Hat cuts glare during outdoor sessions. Practicing your ball-flight drills with Innovate Tour Performance Golf Balls keeps that variable consistent from clip to clip. If you’re setting up a bag for someone else’s lesson prep, Custom Golf Club Labels make it easy for a coach to identify exactly which club is in your hand on screen. Not ready to commit yet, or shopping for a golfer in your life? A Golf Blab E-Gift Card covers a lesson or gear purchase without locking anyone into a specific choice. For golfers who want the highest-touch experience beyond standard remote coaching, Play Golf with a Tour Pro puts you on the course with real professional insight.

Book your lesson, grab your gear, and get your first coach-ready clip filmed this week.

Sources

Posted on

The Common Golf Mistakes Costing You Strokes Every Round

Golfer adjusting swing posture on tee box

Most recreational golfers lose strokes to the same handful of errors: a faulty grip and setup, an early clubface fault in the takeaway, a swing that sways instead of turns, rushed tempo, poor ball position, over-lofted short-game club selection, unknown carry distances, and mental lapses that skip the pre-shot routine entirely. Every one of these has a coach-backed fix and a drill you can rehearse this week. Below, you’ll find corrections built on Shot Scope data, insight from Golf Monthly and Golf.com instructors, and a four-week practice plan you can start tomorrow.

  • Grip, pressure, and stance flaws that cause slices
  • Takeaway faults: fanning the face or dragging too far inside
  • Sway instead of rotation, killing your low point
  • Tension and rushed tempo that produce thin or topped shots
  • Ball position errors that prevent compression
  • Over-clubbing around the green instead of chipping and running
  • Guessing carry distances instead of knowing them
  • Skipping the pre-shot routine and compounding mistakes with hero shots

Jump to the four-week practice plan once you’ve spotted your pattern below.

Key Takeaways

Fixing common golf mistakes works best when you isolate one fault per week, drill it with immediate feedback, and track results using a simple E/S/M scorecard system.

Point Details
Start with grip and setup Correct hand placement and alignment before working on any other swing fault.
Fix the takeaway first A fanned face or overly inside path causes most slices and hooks downstream.
Learn real carry distances Track actual yardages from range sessions instead of guessing on the course.
Choose lower-lofted short shots Chip-and-run options often outperform lofted wedges around the green.
Support practice with personalized gear Golf Blab’s Custom Golf Club Labels and E-Gift Cards reinforce practice milestones and make thoughtful gifts.

Table of Contents

Common Golf Mistakes in Grip and Setup

A weak or overly strong grip changes your clubface angle before you ever start the swing, and it’s the single most common cause of the slice that haunts recreational golfers. Squeeze the handle too hard and you lose wrist hinge and clubhead speed; grip too loose and the club twists open at impact. Both problems show up as inconsistent launch, weak contact, and shots that curve when you least expect it.

Run through this checklist before every practice session:

  • Set the club in your fingers, not your palm, with the V formed by thumb and forefinger pointing toward your trail shoulder.
  • Keep grip pressure around a 4 out of 10. Firm enough to control the club, loose enough to hinge naturally.
  • Position the ball off your lead heel for driver, moving progressively back toward center for shorter irons.
  • Align your feet, hips, and shoulders parallel to your target line, not aimed directly at it.

Pro Tip: Lay an alignment stick on the ground pointing at your target, then place a second stick parallel to it along your toe line. Step away and check from behind: if your feet aren’t parallel to the target stick, you’ve found your miss before you ever swing.

Takeaway and Swing Path: Golf Swing Errors That Start Every Miss

Two takeaway faults account for a disproportionate share of bad shots: fanning the clubface open as you move it away from the ball, and dragging the club too far to the inside during the first foot of the swing. Both create predictable, repeatable misses, which is actually good news. A fanned face tends to produce a slice or a weak push. An overly inside takeaway often forces a compensating move later in the swing that leads to a smothered hook or a fat strike. Both faults are among the most common swing mistakes instructors see week after week.

Fixing either one starts with actually seeing your swing, not guessing at it.

  1. Record your takeaway on your phone from a face-on angle and check whether the clubhead stays outside your hands through the first 18 inches.
  2. Compare that frame to a mirror check at home: the clubface should look square to slightly toe-down, never wide open toward the sky.
  3. Practice one-hand takeaways (trail hand only) to chest height, feeling the club stay connected to your body’s rotation rather than getting yanked inside or flipped open.
  4. Repeat the takeaway to chest height 15 to 20 times without hitting a ball, then add contact once the path feels automatic.

Weight Shift and Balance Errors During the Swing

Swaying your hips laterally away from the target on the backswing, instead of rotating around a stable base, is one of the most common golfing errors among mid- and high-handicap players. Sway pushes your low point behind the ball, which produces fat shots when you catch the ground first and thin shots when your body lifts to compensate. Real power and consistency come from coiling against a braced trail leg, then shifting your weight forward into a firm lead leg through impact.

Focus on these cues during your next range session:

  • Feel your trail hip turn behind you on the backswing rather than slide sideways.
  • Keep roughly 80% of your weight on your lead side by the time the club reaches impact.
  • Finish in a balanced position with your belt buckle facing the target and your trail foot up on its toe.

Try the step-drill: start with your feet together, take a small step toward the target as you start your downswing, and swing through. It forces the forward weight transfer your body needs to feel before it becomes automatic.

Tempo, Tension, and Swing Speed Control

Rushing the transition from backswing to downswing, combined with a white-knuckle grip, is a quiet killer of good contact. Tension in your hands and forearms slows your release and produces thin or topped shots even when your mechanics are otherwise sound.

Pro Tip: Count “one” on your backswing and “two” on your downswing, out loud if you have to. A roughly 3:1 ratio between backswing and downswing time is what most smooth, repeating swings share, and forcing the count breaks the rushed pattern instantly.

  • Check your grip pressure at address, then again at the top of the backswing. If it climbed, you’re gripping for control instead of trusting your setup.
  • Save maximum speed for the driver, where a longer swing arc rewards it. With irons and wedges, prioritize tempo and center-face contact over trying to swing harder.

Ball Position and Compression: Fixing Flipping and Scooping Ball Mistakes

Bad ball position sets up nearly every “flip” you see at impact, where the hands try to scoop the ball into the air instead of letting the loft of the club do that work. Play the ball too far forward and you’ll catch it on the upswing with an open face. Play it too far back and you’ll deloft the club and drive it low and left.

Use these general reference points, adjusting slightly for your own swing:

  • Driver: off the inside of your lead heel.
  • Mid irons: roughly two ball-widths inside the lead heel, trending toward center.
  • Wedges and short irons: center of your stance, promoting a descending strike.

Compression shows up in your divots and in the sound of contact. A ball-then-turf divot pointing at the target and a crisp, low-pitched strike both signal good compression. A shallow scuff or no divot at all usually means you’re scooping. Practice hitting three balls in a row focusing only on taking a shallow divot after the ball. Once that feels repeatable, add a normal swing tempo back in.

Short Game Mistakes: Club Selection Around the Green

Amateurs consistently reach for the highest-lofted wedge in the bag when a lower-lofted club or even a putter would produce a far more reliable result. Shot Scope data cited by Golf Monthly found only a 21% up-and-down success rate with lofted wedges around the green, a number that climbs when players choose a chip-and-run with less loft instead. More loft means more margin for error in theory, but in practice it means more ways to catch the shot thin or heavy.

Use simple distance windows to guide your choice:

  1. Inside 10 feet of the green edge with no obstacle: putt it, even from the fringe or light rough.
  2. Ten to 30 feet with a clear runway: chip with an 8 or 9 iron, letting the ball release toward the hole.
  3. Beyond 30 feet or over a bunker: pitch with a gap or sand wedge, focusing on landing spot rather than the hole itself.

Build the feel with a three-station drill: hit five chip-and-run shots landing 3 yards onto the green, then 10 yards, then 20 yards, tracking how far each one rolls out before you move on.

Course Management and Distance Control

Guessing at yardages instead of knowing them is one of the clearest gaps between low and high handicappers. Single-figure players consistently emphasize learning true carry distance, not the career-best number you hit once with a following wind. Most recreational golfers overestimate their carry by at least half a club, which is exactly why so many approach shots come up short of the green.

Build real numbers through a few range sessions where you actually track outcomes:

  • Hit 10 balls with each iron and note where the majority land, not your longest one.
  • Write those numbers down and carry them in your bag or phone.
  • When in doubt on the course, take one more club and swing smoothly rather than forcing a smaller club to its absolute maximum.
  • Factor in wind and temperature: cold air and a headwind both shrink your effective distance more than most players expect.

Pro Tip: Play to the middle of the green, not the flag, unless the pin is tucked and you have full confidence in your number. The middle of the green forgives more mistakes than any other target on the course.

Mental Errors: Skipping the Pre-Shot Routine

Rushed decisions and skipped routines cause more wasted strokes than most golfers realize, and they’re the easiest mistakes to fix because they don’t require any swing change at all. Coaches classify errors into three types: Execution (you hit it fat), Strategic (you picked the wrong shot), and Mental (you rushed or lost focus). Marking an E, S, or M next to each bad shot on your scorecard reveals, by the end of 18 holes, whether your problems are mechanical, tactical, or between your ears.

  • Pick your target and club before you step to the ball.
  • Take one practice swing that matches the shot you’re about to hit.
  • Address the ball, take one final look at the target, and go. No re-gripping or second-guessing.
  • After a genuine mistake, take the smart recovery shot rather than the hero shot. Coaches note that a low-percentage recovery attempt usually compounds one bad shot into two.
  • Tally your E/S/M marks after the round to see which category needs the next week of practice.

Four-Week Practice Plan to Fix These Mistakes

Fixing every fault at once is how most self-directed practice sessions fail. Instead, target one or two of the highest-impact errors per week, in the order they tend to show up in a real swing sequence.

  1. Week 1: Grip, setup, and takeaway. Two sessions of 30 minutes. Alignment-stick checks plus one-hand takeaway drills, 20 reps per session.
  2. Week 2: Weight transfer and balance. Step-drill and finish-position holds, 15 reps each session, filmed from face-on.
  3. Week 3: Tempo and contact. Count-drill tempo work paired with the compression drill, alternating in sets of five balls.
  4. Week 4: Short game and course management. Three-station chip-and-run drill plus a nine-hole round where you track carry distances and mark E/S/M on every shot.

Daily reps matter more than session length. A compression drill done for 10 minutes every day beats one hour once a week. Golf Blab’s learning center breaks several of these drills down further with video walkthroughs, and pairing a milestone, like completing all four weeks, with a small reward can help the habit stick.

Physical Conditioning and Flexibility Mistakes Affecting the Swing

Limited hip and thoracic spine rotation forces compensations that look like swing flaws but are actually mobility problems in disguise. A golfer who can’t rotate their trail hip fully on the backswing will often sway instead, not because they don’t understand the correct motion but because their body physically won’t allow the turn. This is one of the more overlooked common golfing errors, because it gets diagnosed as a swing fault when the real fix is a stretching routine.

Golfer stretching hips outdoors before playing

Tight hamstrings and hip flexors, common in golfers who spend most of the day seated, restrict the hip turn needed for a full backswing and a complete follow-through. Weak core strength shows up as a loss of posture through impact, where the spine angle set at address collapses as the club approaches the ball. Skipping a warm-up before a round compounds all of this. Cold muscles resist rotation, so the first few holes often produce the worst swings of the day, purely because the body hasn’t loosened up yet.

A few minutes of dynamic stretching before you tee off, focused on hip rotation and shoulder turn, addresses more of your early-round misses than a swing thought ever will. Simple exercises like standing trunk rotations with a club across your shoulders, or hip circles before you leave the parking lot, cost nothing and take less time than a bucket of range balls. Building general rotational mobility two or three times a week off the course pays off in a swing that can actually execute the mechanics you’ve been practicing.

Playing clubs that don’t match your swing speed is a quiet source of mishits that no amount of practice will fully correct. A shaft that’s too stiff for your swing speed produces a low, weak ball flight because you can’t load and release it properly. A shaft that’s too flexible for a faster swing does the opposite, ballooning shots too high and costing distance and control. Off-the-rack clubs are built around average specifications, and plenty of recreational golfers fall well outside that average in height, swing speed, or posture.

Diagram comparing shaft flex and fitting effects

Improper lie angle is another overlooked equipment-related mistake. If your clubs are too upright or too flat for your setup, the toe or heel of the club digs into the ground at impact, pushing your shots offline no matter how clean your swing path is. Grip size matters too. Grips that are too thin encourage overly active hands through impact, while grips that are too thick can restrict the wrist hinge you need for full power.

A basic fitting session, even a simple one at a local shop rather than a full launch-monitor workup, can identify whether your current shaft flex and lie angle match your swing. It’s a one-time investment that prevents you from practicing the wrong compensations into your swing for years. Custom touches matter for confidence too. A set of Custom Golf Club Labels won’t fix a mismatched shaft, but knowing your equipment is dialed in, and personalized to you, is part of what makes a golfer trust the club in their hands.

What to Fix First as a Beginner

Fix your grip and setup before anything else. Every other fault on this list gets harder to diagnose when your foundation is wrong, and Golf Blab’s instructional resources are built around that same sequence. Track your mistakes with the E/S/M method for a full round before you decide what to work on next, and give the four-week plan a real chance before switching drills.

Practice Gear and Gifts That Support the Fixes Above

Working through a structured practice plan is easier when your equipment feels like your own. Custom Golf Club Labels let you mark distances, personal reminders, or a milestone date directly on your clubs, a small detail that keeps your carry-distance work and setup cues visible every time you address the ball. For golfers who’d rather hand off the decision, Golf Blab E-Gift Cards make it simple to gift a training session, apparel, or personalized labels to a beginner working through their own list of swing faults. Both options tie directly into the habits this article covers, whether that’s rewarding a completed four-week plan or setting a new golfer up with gear built around real practice, not guesswork about what they need. Visit the product pages above to see current options and pricing.

Sources