Posted on

Golf Tempo Explained: How to Build a Better Swing

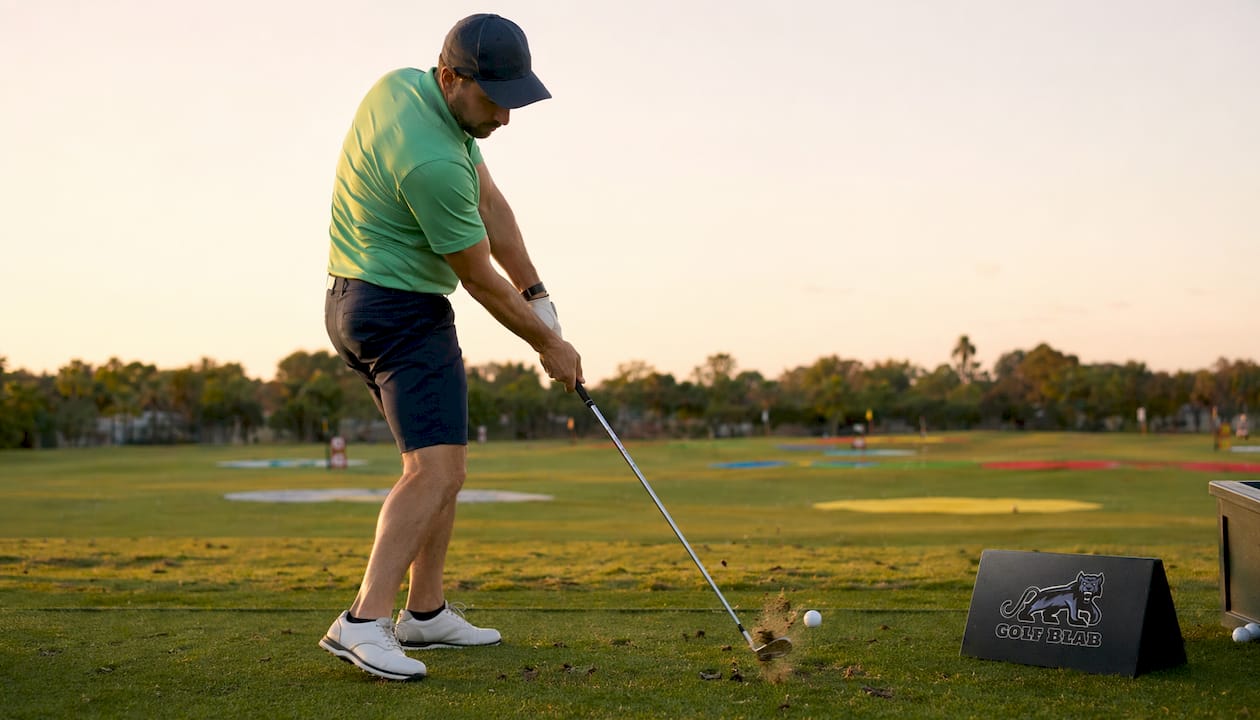
Golfer practicing golf swing tempo at driving range


TL;DR:

  • Golf tempo is the timing ratio between a golfer’s backswing and downswing, with professionals maintaining a 3:1 ratio. Training this pattern as a skill through drills and feedback improves consistency and power, especially under pressure. Most amateurs rush the transition, which disrupts swing sequencing and reduces shot quality; deliberate practice corrects this.

Golf tempo is defined as the timing ratio between your backswing and downswing, and tour professionals average a 3:1 ratio regardless of how fast or slow they swing. That single number, three parts backswing to one part downswing, separates consistent ball strikers from golfers who spray shots across the course. What is golf tempo, really? It is not about swinging slowly. It is about maintaining a precise, repeatable relationship between two phases of the swing. Understanding this ratio is the first step toward building a swing that holds up under pressure, round after round.

What is the ideal golf swing tempo for pros vs. amateurs?

Tour pros maintain a 3:1 backswing-to-downswing ratio across every club in the bag, from a wedge to a driver. That consistency is not accidental. It reflects years of deliberate training that embeds the ratio as a motor pattern rather than a conscious thought. When measured at 30 frames per second, elite players typically use about 21 frames on the backswing and 7 frames on the downswing, a measurement known as the 21/7 frame tempo.

Amateur golfers, by contrast, typically fall into a 1.5:1 to 2:1 ratio. The backswing is rushed, the transition is jerky, and the downswing arrives before the body has loaded properly. That mismatch produces power leaks, slices, and thin contact because the swing sequence is out of order before the club even reaches the ball.

The table below illustrates how tempo ratios affect swing quality across skill levels.

Golfer type Typical ratio Common result
Tour professional 3:1 Consistent power, solid contact
Low-handicap amateur 2.5:1 Good contact, occasional timing errors
Mid-handicap amateur 2:1 Inconsistent contact, moderate power loss
High-handicap amateur 1.5:1 Frequent mis-hits, poor sequencing

The gap between a 3:1 and a 1.5:1 ratio may sound small, but it represents a fundamentally different swing experience. A golfer with a 1.5:1 ratio is essentially rushing the transition, which collapses the kinematic sequence that generates effortless power. Closing that gap is the single highest-return improvement most golfers can make.

Pro Tip: Record your swing at 30 frames per second and count the frames from address to the top, then from the top to impact. Divide backswing frames by downswing frames. If the result is below 2.5, tempo training should be your primary focus.

Infographic comparing pro and amateur golf swing tempo ratios

Why tempo is a skill, not a feeling

Proprioception has a processing lag that makes real-time self-correction during a golf swing impossible. The nervous system reacts too slowly to self-correct swings that last under 1.2 seconds. That means the “feel” you trust on the range is often a memory of the swing, not an accurate read of what actually happened.

Golf coach reviewing swing video indoors

This is why tempo is a trainable skill requiring dedicated practice rather than intuition. Five to ten minutes of focused tempo drills per session builds motor patterns that eventually run on autopilot. The goal is to make the 3:1 ratio so deeply ingrained that it survives the pressure of a tight fairway on the back nine.

Effective tempo training relies on external feedback rather than internal feel. The most accessible methods include:

  • Counting aloud. Say “one-two-three” during the backswing and “hit” at impact. The verbal count externalizes the rhythm and gives your brain a reference point outside the swing itself.
  • Weighted flexible trainers. Flexible shaft trainers wobble when the swing is jerky or out of sequence, providing immediate physical feedback that no internal feel can replicate.
  • Video review. Frame-counting your swing video at 30fps is the most objective measurement available without specialized equipment.
  • Metronome apps. Setting a metronome to match your target tempo and swinging to the beat trains the auditory-motor connection that governs rhythm.

Tempo sets the foundation for rhythm and timing, and poor tempo disrupts swing mechanics regardless of how technically sound the rest of the motion is. You can have a textbook grip, perfect posture, and a beautiful shoulder turn, and still hit weak, inconsistent shots if the timing ratio is off. Building tempo first, before adding speed or complexity, is the correct order of operations.

Pro Tip: Practice your tempo drills without a ball at least half the time. Removing the outcome pressure lets your nervous system focus entirely on the rhythm pattern rather than the result.

Common tempo faults and how to fix them

Most tempo problems originate at the transition, the brief moment between the end of the backswing and the start of the downswing. Common faults include early hip dump, arm-first downswing initiation, and hip stall, each of which disrupts the kinematic sequence and reduces shot quality. Recognizing which fault you carry is the first step toward correcting it.

Here are the four most effective drills for correcting tempo faults, ordered from foundational to advanced:

  1. The pause drill. Stop at the top of your backswing for a full second before starting down. A brief pause at the top resets sequencing and prevents premature downswing initiation. It feels exaggerated on the range, but it trains the transition to begin from a complete, loaded position.
  2. The step-through drill. Start with your feet together, step toward the target as you begin the downswing, and let the step trigger the lower-body lead. This drill physically prevents the arm-first fault by forcing the lower body to initiate the sequence.
  3. The trail hip coil check. A complete trail hip coil produces a proprioceptive load that signals backswing completion. Practice turning until you feel resistance in the trail hip before starting down. That sensation is your body’s built-in “ready” signal.
  4. The slow-motion swing. Swing at 25% speed while maintaining the 3:1 ratio. This is harder than it sounds. A controlled backswing followed by a relatively aggressive downswing increases power and consistency more effectively than slowing the entire swing. The slow-motion drill exposes whether you are actually maintaining the ratio or just swinging slowly overall.

Integrating these drills into your golf practice routines three to four times per week produces measurable improvement within four to six weeks. Pair each drill session with a consistent pre-shot routine that includes one smooth practice swing at your target tempo. That practice swing becomes your tempo anchor, a physical reset that carries the trained rhythm into every shot.

Pro Tip: If you struggle with hip stall, place a golf ball under the outside edge of your trail foot during practice swings. The instability forces a more complete hip coil and naturally delays the transition.

How to maintain your tempo under pressure

Competitive pressure accelerates everything. Heart rate rises, breathing shortens, and the nervous system pushes toward faster, more forceful movement. Without a deliberate strategy, trained tempo evaporates the moment a round matters.

A consistent tempo anchor in the pre-shot routine is the most reliable defense against pressure-induced rushing. Taking one smooth practice swing that matches your intended tempo before each shot resets the rhythm and gives your motor system a reference point. This is not a superstition. It is a neurological primer that activates the same motor pattern you trained on the range.

The following strategies help preserve rhythm when the stakes rise:

  • Breathe before you swing. A single slow exhale before starting the backswing lowers heart rate slightly and reduces the urgency that causes rushing.
  • Focus on the backswing, not the result. Directing attention to the quality of the backswing occupies the conscious mind and prevents it from interfering with the trained downswing sequence.
  • Use a verbal cue. The same “one-two-three” count you practiced on the range works equally well on the course. Golfers who use mental toughness strategies consistently report that verbal tempo cues are among the most effective tools for staying present under pressure.
  • Accept that tempo feels slower under pressure. When nerves are high, a 3:1 tempo will feel almost leisurely. That feeling is correct. Trying to force a slower tempo often backfires. The goal is steady, unhurried motion, not mechanical slowness.

Consistent practice embeds tempo as a motor pattern that resists pressure. The more rounds you play with deliberate tempo awareness, the more automatic the rhythm becomes. Reviewing your swing sequence fundamentals alongside tempo training reinforces the mechanical foundation that tempo depends on.

Key Takeaways

Golf tempo is the 3:1 backswing-to-downswing ratio that separates consistent ball strikers from golfers who rely on feel alone, and training it as a measurable skill produces lasting improvement across all skill levels.

Point Details
Tempo is a ratio, not a speed The 3:1 ratio applies to both slow and fast swingers; consistency matters more than pace.
Amateurs rush the transition Most amateurs swing at a 1.5:1 to 2:1 ratio, causing power leaks and poor contact.
Feel is unreliable Proprioception lags behind the swing; use video, counting, or flexible trainers for feedback.
Transition faults are fixable Pause drills, step-through drills, and slow-motion swings correct the most common tempo errors.
Pressure disrupts tempo A pre-shot practice swing and a verbal count anchor trained rhythm during competitive rounds.

Tempo is the one thing most golfers skip

I have watched golfers spend months rebuilding their grip, their stance, and their shoulder turn, only to step onto the course and hit the same erratic shots they always did. The culprit, almost every time, is tempo. Not technique.

The most common misconception I encounter is that slowing down fixes tempo. It does not. Slowing the entire swing just produces a slow, poorly sequenced swing. What actually works is training the ratio. A deliberate, unhurried backswing followed by a committed, accelerating downswing. That contrast is where the power lives, and it is what the 3:1 ratio captures.

My honest advice: spend four weeks doing nothing but tempo drills before your next swing overhaul. Use a flexible trainer, count aloud, and film yourself. You will be surprised how much your ball striking improves before you change a single mechanical element. Tempo is the foundation. Everything else sits on top of it. Build the foundation first, and the rest of the swing tends to organize itself around it.

— Michael Marini

What Golf Blab offers to support your swing development

Golf Blab brings together the tools, instruction, and personal touches that make improvement feel rewarding rather than mechanical. The Swing Like a Pro program gives golfers direct access to professional-level instruction focused on the mechanics and timing that tempo training demands. For golfers who want to personalize their equipment while they sharpen their game, custom golf club labels add a distinctive identity to every club in the bag. Browse the full Golf Blab shop for accessories, educational resources, and products designed to support every stage of your development on the course.

FAQ

What is golf tempo in simple terms?

Golf tempo is the ratio between how long your backswing takes and how long your downswing takes. Tour professionals average a 3:1 ratio, meaning the backswing is three times longer than the downswing.

What is the ideal tempo ratio for amateur golfers?

The 3:1 ratio is the target for all skill levels. Most amateurs currently swing at a 1.5:1 to 2:1 ratio, which causes rushed transitions and inconsistent contact.

Can you train golf tempo at home?

Yes. Pause drills, slow-motion swings, and counting aloud during practice swings all build tempo without requiring a range. A weighted flexible trainer adds physical feedback that accelerates the learning process.

Does tempo affect distance?

A controlled backswing followed by an aggressive downswing at a 3:1 ratio generates more distance than simply swinging harder. Slowing the downswing or rushing the transition both reduce clubhead speed at impact.

How long does it take to improve golf swing tempo?

Five to ten minutes of focused tempo drills per session, practiced three to four times per week, produces measurable improvement in four to six weeks for most golfers.
Posted on

Golf Flexibility Exercises: Improve Your Swing and Mobility

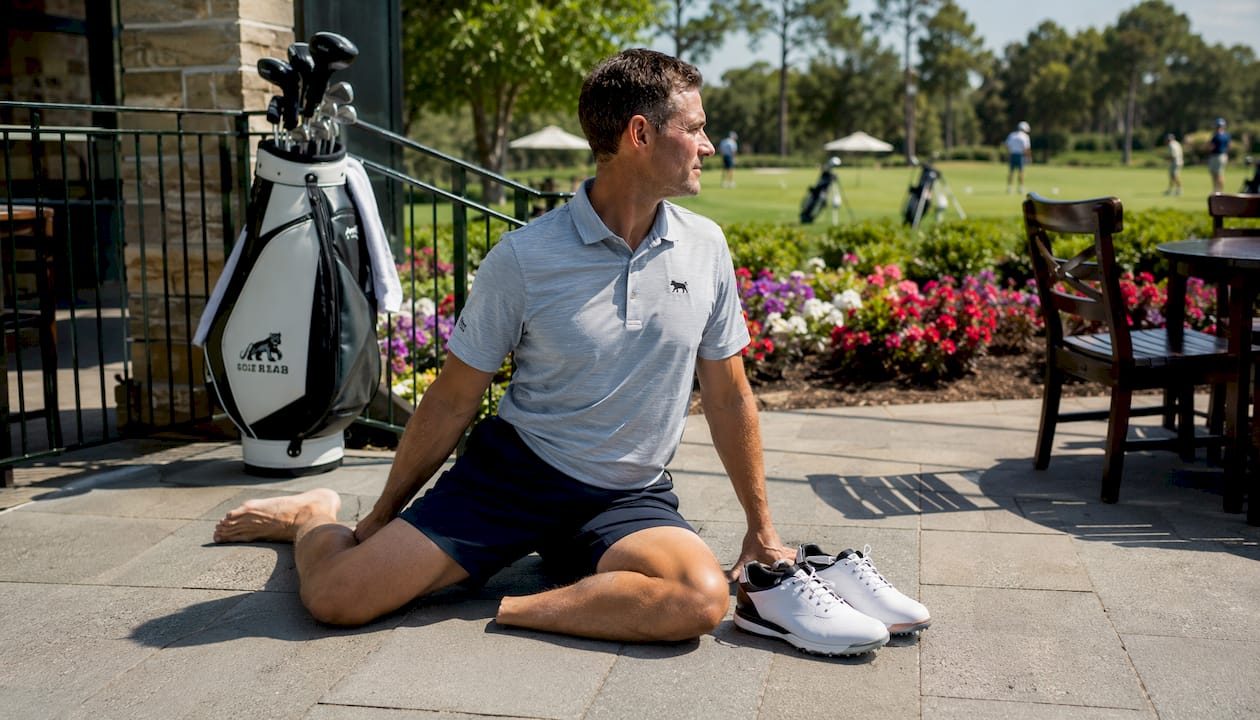
Man stretching hips on golf course grass

TL;DR:

  • Golf flexibility exercises target key areas like hips and thoracic spine to improve swing movement and reduce injuries. Regular dynamic warm-ups and static stretches held 45-90 seconds promote lasting mobility gains, while neglecting proper timing and duration can hinder progress. Strengthening mobility through consistent off-course training prevents compensatory patterns and chronic injury development.

Golf flexibility exercises are targeted stretches and mobility routines that increase range of motion in the hips, thoracic spine, shoulders, and hamstrings to improve swing mechanics and reduce injury risk. The industry term for this practice is golf mobility training, which distinguishes controlled movement under load from passive stretching alone. Golfers who commit to a structured flexibility and strength routine see measurable gains in swing rotation, club speed, and postural stability. Whether you play once a week or compete regularly, the joints you move through during a swing demand consistent preparation. The exercises below give you a complete, evidence-based system to build that foundation.

1. What are the essential golf flexibility exercises?

Golf mobility training targets six primary areas: hips, thoracic spine, shoulders, hamstrings, calves, and wrists. Each area contributes a specific mechanical function to the swing. Neglecting any one of them creates compensatory patterns that restrict hip and thoracic mobility and raise your injury risk over time.

Woman performing chest stretch indoors

The exercises below form a complete golf flexibility exercises list, organized from lower body to upper body. Each entry includes recommended volume and a brief explanation of its swing benefit.

90/90 hip switch

Sit on the floor with both knees bent at 90 degrees, one leg in front and one behind. Rotate your hips to switch sides, keeping your spine tall. 8–10 repetitions per side improve both internal and external hip rotation, which directly drives hip clearance through impact.

World’s Greatest Stretch

Step into a deep lunge, place the same-side hand on the ground, and rotate your upper arm toward the ceiling. This single movement trains hip flexors, thoracic rotation, and shoulder mobility simultaneously. It is the most efficient single exercise in any golf stretching routine list.

Open Book thoracic rotation

Lie on your side with knees stacked and arms extended. Sweep the top arm open toward the floor behind you, following with your eyes. This exercise isolates thoracic rotation without loading the lumbar spine, making it safe for golfers with lower back sensitivity.

Doorway chest stretch

Stand in a doorway, place both forearms on the frame, and lean forward gently. Hold for 45–90 seconds per side. Tight pectoral muscles pull the shoulders forward and restrict the backswing, so this stretch directly restores address posture.

Seated hamstring stretch

Sit on the edge of a chair, extend one leg, and hinge forward from the hips with a flat back. Tight hamstrings tilt the pelvis posteriorly, which flattens the lumbar curve and limits hip rotation. Releasing them restores the athletic posture the swing requires.

Standing hip flexor stretch

Step one foot forward into a lunge and drop the back knee to the ground. Shift your hips forward until you feel a pull at the front of the rear hip. Restricted hip flexors prevent full hip extension through the downswing, costing you both power and balance.

Thoracic spine rotation with club

Hold a club across your shoulders and rotate your torso left and right from a golf posture. This movement grooves the rotational pattern specific to your swing plane. It also serves as an excellent bridge between static stretching and active warm-up.

Ankle circles and calf raises

Stand on one foot and draw slow circles with the ankle, then perform 10–15 calf raises. Ankle mobility anchors the kinetic chain at its base. Poor ankle dorsiflexion forces the heel to lift early in the backswing, disrupting weight transfer.

Wrist flexion and extension stretch

Extend one arm, palm up, and gently pull the fingers back with the other hand. Repeat with palm down. Wrist flexibility affects grip pressure and clubface control through impact, particularly on wedge shots and putting.

Lateral thoracic stretch

Stand tall, reach one arm overhead, and side-bend away from it. This stretch opens the lateral rib cage and intercostal muscles, which limit full shoulder turn when tight. Golfers who sit at desks for long hours benefit most from this one.

Glute bridge

Lie on your back, feet flat, and drive your hips toward the ceiling. Hold for two seconds at the top, then lower slowly. Strong, mobile glutes stabilize the pelvis during the downswing and prevent the lower back from absorbing rotational forces it was not designed to handle.

Pro Tip: Pair the 90/90 Hip Switch with the Open Book on the same day. Together, they address the two joints most responsible for swing rotation: the hips and the thoracic spine.

2. How to perform a dynamic warm-up for golf before your round

Dynamic priming before a round activates neuromuscular pathways and raises tissue temperature, preparing your body for high-speed movement in a way that static stretching cannot. Static stretching held over 30 seconds before play temporarily reduces muscle force production, which costs you swing speed at the worst possible time. The goal of a pre-round routine is activation, not elongation.

An effective dynamic warm-up for golf runs 8–15 minutes and follows this sequence:

  1. Ankle rolls and toe raises (30 seconds each foot). Start at the base of the kinetic chain to establish ground contact and balance.
  2. Hip circles (10 per direction). Loosen the hip capsule before any rotational demand.
  3. Leg swings, front to back (10 per leg). Activate the hip flexors and hamstrings through their full range.
  4. Leg swings, side to side (10 per leg). Target hip abductors and adductors that stabilize the stance.
  5. Thoracic rotations with club across shoulders (10 per side). Prime the thoracic spine for the rotational demands of the swing.
  6. Arm circles, small to large (10 forward, 10 backward). Warm the shoulder capsule and rotator cuff.
  7. Wrist rotations (10 per direction). Prepare the grip and forearm muscles for club control.
  8. Club-hitting progression: Start with half-speed chip shots, move to three-quarter swings, then build to full swings over 10–15 balls.

Dynamic movements warm joints and muscles for immediate performance needs, while static stretching addresses long-term tissue change. Treat them as two separate tools with two separate purposes.

Pro Tip: If you arrive at the course with only five minutes to spare, prioritize hip circles, thoracic rotations, and the club-hitting progression. Those three steps deliver the highest return per minute before your first tee shot.

3. Integrating static stretching and off-course training for lasting gains

Long-term mobility gains come from off-course static stretching practiced consistently, not from occasional pre-round routines. Holding static stretches for 45–90 seconds per side is required for meaningful tissue remodeling. Holds shorter than 30 seconds produce minimal lasting change.

The most effective off-course golf flexibility stretches include:

  • 90/90 hip stretch: 45–60 seconds per side, three times per week minimum
  • Doorway chest stretch: 60 seconds per side, daily if possible
  • Supine thoracic rotation (Open Book): 10 slow repetitions per side, held at end range for two seconds
  • Seated hamstring stretch: 60 seconds per leg, focusing on a flat-back hinge rather than rounding the spine
  • Standing hip flexor stretch: 45–60 seconds per side, especially after long periods of sitting
  • Lateral thoracic stretch: 30–45 seconds per side, performed standing or seated

Aim to practice this routine at least three times per week, with daily sessions producing the fastest results. Combine static stretching with glute and core stability work to translate mobility gains into actual swing power. Flexibility without supporting strength creates instability, not performance.

Golfers over 50 face a specific challenge: hip and thoracic mobility decline faster with age, and joint sensitivity requires a more gradual approach. Start with 30-second holds and add five seconds per session as comfort allows. Modify positions using a chair or wall for support when needed. The principle remains the same; only the progression changes.

4. Common mistakes golfers make with flexibility training

Most golfers undermine their own mobility work through a handful of repeatable errors. Recognizing them is the fastest way to stop losing ground.

  • Static stretching before a round: Holding a stretch over 30 seconds before play reduces muscle force production. Save static work for after the round or on off days.
  • Confusing flexibility with mobility: True mobility requires controlled range of motion at the speeds relevant to the golf swing, not just passive muscle length. A golfer can touch their toes and still lack the hip mobility to clear properly through impact.
  • Neglecting hips and thoracic spine: These two areas drive the majority of swing rotation. Skipping them forces the lower back to compensate, which is a leading cause of chronic golf injuries.
  • Under-holding stretches: Holds under 30 seconds produce minimal tissue change. Most golfers rush through stretches and wonder why nothing improves.
  • Skipping the warm-up progression: Walking straight to the first tee and swinging cold is the single fastest path to a pulled muscle or a wasted front nine.

Mobility beyond the range your swing actually requires offers limited performance benefit compared to strength and power training. Once you achieve the range of motion your mechanics demand, the next investment is building strength through that range, not stretching further.

Key takeaways

Consistent golf mobility training, combining dynamic pre-round priming with off-course static stretching held 45–90 seconds, produces the most reliable gains in swing rotation, power, and injury prevention.

Point Details
Dynamic priming before rounds Use 8–15 minutes of movement-based warm-up to activate joints without reducing muscle force.
Static stretching off the course Hold each stretch 45–90 seconds, three or more times per week, for lasting tissue change.
Prioritize hips and thoracic spine These two areas drive swing rotation; neglecting them causes compensations and chronic injuries.
Mobility differs from flexibility Controlled range of motion under load matters more than passive muscle length for golf performance.
Consistency outperforms intensity Daily short sessions build more mobility than occasional long ones.

What I’ve learned after years of watching golfers stretch wrong

The most common pattern I see is golfers who stretch religiously before a round, hold each position for about 10 seconds, and then wonder why their swing still feels stiff on the back nine. They are doing the right thing at the wrong time, for the wrong duration, and expecting the wrong result.

The distinction between dynamic priming and static stretching is not a minor technical detail. It is the difference between preparing your body to perform and inadvertently dulling its ability to generate force. I have seen golfers improve swing power sources dramatically simply by moving their static stretching routine to the evening and replacing their pre-round ritual with five minutes of hip circles, thoracic rotations, and graduated swings.

The other thing worth saying plainly: mobility beyond your swing’s requirements stops paying dividends. Once your hips clear freely and your thoracic spine rotates through a full shoulder turn, the next gains come from strength and stability, not more stretching. Golfers who chase endless flexibility without building the strength to control it often end up with hypermobile joints and inconsistent ball-striking. The goal is a body that moves well and holds its position under load, not one that simply bends far.

For golfers dealing with persistent tightness that stretching alone does not resolve, therapies like the Graston Technique address soft tissue restrictions at a deeper level and can accelerate the mobility gains that exercise alone takes months to produce.

— Michael Marini

Golf Blab gear and instruction to complement your training

Physical conditioning and quality equipment belong together. Golf Blab’s custom golf club labels let you personalize your clubs with the same attention to detail you bring to your mobility work, turning your bag into a genuine expression of your game. For golfers who want to translate improved flexibility into better scores, Golf Blab’s Play Golf with a Tour Pro experience pairs you with a professional who can show you exactly how your new range of motion translates into swing mechanics. Better movement is only half the equation. Knowing how to use it is the other half.

FAQ

What are the best golf flexibility exercises for beginners?

The World’s Greatest Stretch, the 90/90 Hip Switch, and the Open Book thoracic rotation cover the three most critical areas for beginners: hip rotation, thoracic mobility, and shoulder flexibility. Perform 8–10 repetitions per side for each exercise three times per week.

How long should I hold a golf flexibility stretch?

Hold static stretches for 45–90 seconds per side to produce meaningful tissue change. Holds shorter than 30 seconds yield minimal lasting improvement, according to established mobility training guidelines.

Should I stretch before or after a golf round?

Use dynamic movements before a round to activate joints and raise tissue temperature. Save static stretching for after the round or on off days, since holding stretches over 30 seconds before play temporarily reduces muscle force production.

How often should golfers do flexibility training?

Practice static stretching routines at least three times per week, with daily sessions producing the fastest results. Dynamic warm-ups should precede every round and every practice session without exception.

Can flexibility exercises prevent golf injuries?

Targeted hip and thoracic spine mobility work prevents the compensatory swing patterns that cause chronic lower back injuries in golfers. Consistent flexibility training, combined with core stability work, addresses the root mechanical causes of most common golf injuries.

Posted on

What Is Impact Position in Golf: A Complete Guide

Golfer striking ball at impact on course


TL;DR:

  • Impact position in golf is the precise body, hand, and club configuration at contact that affects shot accuracy. Proper impact relies on key checkpoints like forward shaft lean, hip rotation, and weight shift, which are developed through specific drills and correct swing sequencing. Focusing on impact improves consistency more than emphasizing traditional swing mechanics or setup positions.

Impact position in golf is defined as the precise configuration of your body, hands, and clubface at the exact moment the club contacts the ball. This single moment determines shot direction, distance, and consistency more than any other point in the swing. PGA Tour players deliver 4–7° of forward shaft lean at impact with irons, compressing the ball with authority. Understanding what is impact position in golf, and training your body to repeat it, separates golfers who improve steadily from those who plateau. Whether you are a beginner or a seasoned player, mastering this position is the most direct path to better ball striking.

What is impact position in golf and why does it matter?

Impact position is not a single body part doing one thing. It is a coordinated configuration of hands, hips, weight, and clubface arriving together at the right moment. Think of it as the body’s signature written on the ball at the speed of 100 miles per hour. Every flaw in your swing sequence shows up here, and every strength gets amplified.

Close-up of golfer’s hands and hips at impact position

Clubface angle at impact controls approximately 75–85% of initial ball direction, making it the single most influential variable in shot accuracy. That means your grip, wrist position, and rotation through the ball matter far more than your backswing shape. Golfers who obsess over the takeaway but ignore impact are solving the wrong problem.

The industry term for this moment is “impact position,” and it is the recognized standard in PGA coaching, biomechanics research, and modern launch monitor analysis. Golf Blab’s educational content consistently returns to this concept because it sits at the center of every improvement conversation, from golf swing fundamentals to advanced ball-striking technique.

What are the key components of a proper impact position?

A correct impact position is built from six measurable checkpoints. Each one contributes to compression, direction, and power. Miss one, and the others compensate poorly.

  • Forward shaft lean: Hands sit slightly ahead of the ball at contact, creating 4–7° of forward shaft lean for irons. This delofts the club slightly and drives the ball forward with compression rather than scooping it upward.
  • Hip rotation: Optimal hip rotation at impact is 30–40° open to the target, generating the rotational power that flows through the arms and into the club. Hips that stall produce weak, blocked shots.
  • Lead wrist position: Elite players move from wrist extension at address to a flat or slightly bowed lead wrist at impact. A cupped lead wrist opens the clubface and adds unwanted loft.
  • Weight distribution: About 80% of body weight sits on the lead foot at impact. This forward pressure is what allows the club to strike the ball first and then the turf.
  • Clubface alignment: The face must be square to the swing path at contact. Even a few degrees of deviation sends the ball off line, given the face’s dominant influence on direction.
  • Head position: The head stays behind the ball at impact. Moving it forward causes topped shots and a loss of the natural arc needed for solid contact.

Pro Tip: Place a tee in the ground six inches ahead of your ball during practice swings. Train yourself to feel the club brushing past that tee after impact. This builds the forward shaft lean and low-point awareness that define a strong impact position.

Each checkpoint reinforces the others. Forward shaft lean only works when the hips are open enough to allow the hands to lead. Weight shift only produces power when the wrist position keeps the face square. These elements are not independent; they are a system.

Infographic illustrating five key golf impact position components

How does the swing sequence influence impact position?

The kinematic sequence is the order in which body segments accelerate through the downswing: hips, then torso, then arms, then club. Proper swing sequencing leads to a natural, ideal impact position without forcing hand positions at the last moment. When this chain fires correctly, the club arrives in the right place because the body put it there.

Strong impact position is the result of proper swing sequence and weight pressure shift, not forcing hand positions at the last moment. This is the insight that changes everything for mid-handicap golfers. You cannot steer the club into a good impact position with your hands at 100 miles per hour. The body has to do the work earlier.

Shifting pressure to the lead foot early in the downswing is the trigger that starts the chain. When the lower body leads, the torso follows, the arms drop into the slot, and the club arrives with the hands ahead of the ball. Golfers who try to “hit” with their hands first reverse this sequence and flip the club through impact.

“Impact position is not something you create at the last second. It is the natural outcome of everything that happened before it. Fix the sequence, and the impact fixes itself.”

Many amateurs wrongly assume impact should mirror address setup, but impact is dynamic. Hips are rotated open, weight is forward, and the hands are ahead of the clubhead. Address is static and centered. Treating them as the same position is one of the most common and costly misconceptions in amateur golf.

The low point of the swing arc should occur just after the ball for irons, producing ball-first contact followed by a divot in front of the ball. Golfers who hit behind the ball have a low point that arrives too early, usually because weight never shifted forward and the sequence broke down.

Common mistakes golfers make at impact and how to correct them

Most impact errors trace back to one root cause: the body stops rotating and the hands try to save the shot. Recognizing the specific error is the first step toward fixing it.

  • Hands trailing the ball: When the hands arrive at or behind the ball at contact, the club adds loft and the face opens. The result is a weak slice or a high, short shot. The fix is to feel the hands leading the clubhead through the hitting zone, not chasing it.
  • Hips not open enough: Fear of opening hips causes many amateurs to flip wrists too early, leading to inconsistent contact. Hips that stall force the hands to compensate, producing flips, hooks, and fat shots. Practice hip rotation drills without a club to build the movement pattern.
  • Cupped lead wrist: A cupped or extended lead wrist at impact opens the clubface and adds loft. Lead wrist position at impact is a top differentiator between elite and amateur ball strikers. Strengthening your grip slightly or using a wrist brace during practice can train the flat position.
  • Weight on the trail foot: Golfers who hang back through impact produce fat shots, thin shots, and a loss of distance. The fix is a deliberate weight shift drill where you step onto the lead foot before swinging through.
  • Head moving forward: Chasing the ball with your head causes the low point to shift backward, producing topped shots. Keep your head behind the ball through contact and let your eyes follow the shot after the club has passed.

Pro Tip: Record your swing from a face-on angle and pause the video at impact. Check your hands against the ball, your hip line, and your head position. Video feedback removes guesswork and shows you exactly which checkpoint needs attention.

Correcting these errors requires patience. The body has built muscle memory around the wrong pattern, and changing it takes deliberate repetition at slow speed before it transfers to full swings.

Effective drills to achieve and maintain the ideal impact position

Drills work best when they isolate one checkpoint at a time. Trying to fix everything at once produces confusion, not improvement.

  1. Alignment stick shaft lean drill: Push an alignment stick into the ground just outside the ball, angled toward the target. Swing and train the club to match the stick’s angle at impact. This builds the feel of forward shaft lean without guesswork.
  2. Step drill for pressure shift: Start with your feet together, then step onto the lead foot as you begin the downswing. This forces the weight transfer that triggers the kinematic sequence and prevents hanging back.
  3. Slow-motion rotation drill: Make half-speed swings focusing entirely on hip and torso rotation through the hitting zone. Proper hip and torso rotation through impact prevents flipping wrists, producing more consistent, powerful shots. Slow motion lets you feel the sequence without the urgency of a full swing.
  4. Lead wrist control exercise: Hold a ruler or flat object against your lead forearm and grip. Swing to impact and check that the ruler stays flat or slightly bowed. Any cup shows up immediately, giving you real-time feedback.
  5. Low point awareness drill: Place a tee two inches ahead of the ball. Your goal is to clip the tee after striking the ball. This trains the arc to bottom out in front of the ball, producing ball-first contact.
  6. Impact bag training: Strike a filled impact bag and hold your finish position. Check all six checkpoints: hands ahead, hips open, weight forward, wrist flat, face square, head behind. Impact position drills that focus on pressure shift and wrist control are more effective than trying to manipulate the clubhead with hands.
Drill Primary checkpoint Best for
Alignment stick lean Forward shaft lean All skill levels
Step drill Weight shift and pressure Beginners and mid-handicappers
Slow-motion rotation Hip and torso sequencing Mid-handicappers
Lead wrist ruler drill Wrist position Intermediate to advanced
Low point tee drill Arc and ball-first contact All skill levels
Impact bag training Full impact position review All skill levels

Integrate two or three of these drills into every practice session. Repetition at slow speed builds the muscle memory that transfers to full-speed swings on the course.

Key Takeaways

A correct impact position, built on forward shaft lean, open hips, a flat lead wrist, and forward weight shift, is the single greatest predictor of consistent ball striking at any skill level.

Point Details
Forward shaft lean Hands lead the clubhead by 4–7° at impact to compress the ball effectively.
Hip rotation Hips must be 30–40° open to the target to generate power and prevent flipping.
Lead wrist position A flat or slightly bowed lead wrist keeps the clubface square and controls direction.
Swing sequence drives impact Hips, torso, arms, and club must fire in order; forcing hands at the last moment ruins contact.
Drills build muscle memory Isolation drills targeting pressure shift and wrist position outperform full-swing repetition alone.

Why impact position changed how I think about teaching golf

I spent years watching golfers work tirelessly on their backswing, their grip, their stance, and their takeaway, only to arrive at impact in the same broken position they started with. The backswing is preparation. Impact is the verdict. Once I shifted my coaching focus to what the body is doing at the moment of contact, the results changed dramatically and quickly.

The most revealing thing I have seen across golfers of every skill level is this: the ones who improve fastest are not the ones with the prettiest swings. They are the ones who understand what their body needs to do at impact and practice backward from that moment. They build their backswing mechanics to serve the impact position, not the other way around.

What surprises most golfers is how different impact feels from address. The hips are open, the weight is forward, the hands are ahead. It feels almost aggressive compared to the balanced, centered setup. That discomfort is exactly right. Impact is not a pose; it is a moment of organized force moving through the ball.

My honest advice: stop practicing your swing and start practicing your impact. Use an impact bag, use video, use alignment sticks. Get obsessed with those six checkpoints. The rest of the swing will organize itself around a position your body learns to trust.

— Michael Marini

Golf Blab tools to sharpen your impact position

Improving your impact position takes more than knowledge. It takes the right tools and the right guidance working together. Golf Blab’s Swing Like a Pro digital training program breaks down impact mechanics with step-by-step instruction designed for golfers at every level, from first-time players to single-digit handicappers. For those ready to take their practice further, playing golf with a Tour Pro offers a rare opportunity to see elite impact position up close and receive direct feedback. Golf Blab also offers custom golf club labels to personalize your equipment, keeping your clubs identifiable and your focus sharp during every practice session.

FAQ

What is impact position in golf?

Impact position is the configuration of your body, hands, and clubface at the exact moment the club strikes the ball. It determines shot direction, distance, and consistency more than any other point in the swing.

How much does clubface angle affect ball direction at impact?

Clubface angle at impact controls approximately 75–85% of initial ball direction. Even a small deviation from square sends the ball significantly off line.

Should impact position look like my address position?

No. Impact position is dynamic, with hips rotated 30–40° open, weight shifted to the lead foot, and hands ahead of the ball. Address is static and centered.

What is the most common impact mistake among amateur golfers?

The most common mistake is the hands trailing the ball at impact, which adds loft, opens the face, and produces weak or sliced shots. Opening the hips earlier in the downswing corrects this pattern.

What drills best improve impact position?

The alignment stick shaft lean drill, the step drill for weight shift, and impact bag training are the most effective. These drills target the specific checkpoints of forward shaft lean, pressure transfer, and wrist position that define a strong impact.