Posted on

Common Golf Swing Cues That Actually Work

Golfer mid-swing on green practice area


TL;DR:

  • Effective golf swing cues are mental triggers paired with measurable checkpoints that promote consistency. Using cues like the count-to-three for tempo or tee drills for swing plane helps golfers verify progress objectively. Focusing on one cue per category and tracking results accelerates meaningful improvement and avoids overwhelm.

Golf swing cues are simple, memorable mental triggers that keep your mechanics on track when you’re standing over the ball with a scorecard on the line. The common golf swing cues that produce real results target five areas: tempo, swing plane, ball position, power generation, and posture control. Most golfers spend years collecting tips without a system. This article gives you that system, built from coach-validated cues used by instructors like EA Tischler, Dr. Alison Curdt, and Tom Stickney, along with drills you can use today.

1. Tempo cues that smooth out your swing sequence

Tempo is the single most underrated element in golf swing fundamentals. Most amateur golfers rush the transition from backswing to downswing, which destroys sequencing before the club ever reaches the ball.

Close-up of golfer's hands gripping club at address

EA Tischler’s “cruise control” cue is one of the most practical fixes available. The instruction is direct: go to the top, count to three, then transition and swing through. That deliberate pause trains your body to stop forcing speed from the top and instead let the lower body lead the downswing naturally.

Why does this work? Controlling tempo with a pause before transition improves sequencing better than trying to accelerate directly from the top. When you rush, your arms outrace your hips, and the club comes over the top. The count-to-three cue breaks that habit at the source.

Practice this with a 7-iron at 70% effort. Count out loud. You will feel awkward at first, which is exactly the point. That awkwardness is your body recalibrating.

Pro Tip: Try the count-to-three cue with your eyes closed on the range. Removing visual distraction forces you to feel the sequencing rather than watch for results.

2. Swing plane cues for consistent club path

Swing plane is where most ball-striking problems originate. A club that travels too steep or too shallow at impact creates weak pulls, fat shots, and inconsistent contact. The fix is not a vague feel. It is a measurable drill.

Dr. Alison Curdt’s tee drill gives you objective feedback in seconds. Place a tee in the grip end of your club. At the P3 position, which is when your lead arm is parallel to the ground, the grip-end tee should point at a rear tee placed behind the ball. If the tee points outside that target, your plane is too shallow. If it points inside, your plane is too steep.

This matters because measurable physical drills like the tee-to-tee check calibrate internal feel objectively, accelerating learning and consistency. Feel alone lies to you. Physical markers tell the truth.

Plane position What the grip tee does What it means
On plane Points directly at rear tee Correct club path at P3
Too shallow Points outside the rear tee Club approaching too flat
Too steep Points inside the rear tee Club approaching too upright

Pro Tip: Film your swing from down the line at P3 while using the tee drill. Watching the video alongside the physical feedback accelerates your ability to self-correct between sessions.

You can read more about mastering swing plane on Golf-blab, including drills that build on this foundation.

3. Ball position cues for driving consistency

Driver inconsistency is one of the most frustrating problems in golf, and the cause is often a setup error rather than a swing flaw. Moving the ball too far forward in your stance forces you to reach for it, which opens your shoulders early and sends the club on an out-to-in path. That is the recipe for a slice.

Tom Stickney’s fix is direct. Move the ball back to align with the inside of your lead heel rather than the toe. This single adjustment prevents the reach and keeps your shoulders square to the target line at address.

Here is what that correction produces:

  • Shoulders stay square, which eliminates the early opening that triggers out-to-in paths
  • The club can approach the ball from the inside, promoting a draw or straight flight
  • You stop compensating mid-swing for a poor setup, which frees up your natural tempo
  • Consistent low-point control improves, which means more solid contact across the face

Junior golfers working with programs like GoD1Golf learn this setup principle early because it affects every driver swing they will ever hit. Getting it right at address removes a layer of in-swing compensation that takes years to unlearn.

4. Feel-based cues for effortless iron power

Power in iron play does not come from swinging harder. It comes from sequencing large-muscle motion with wrist leverage at exactly the right moment. The “nun/sum” framework from instructor Martin Chuck gives you a cue system to practice this.

Here is how it works:

  • “Nun” means large-muscle driven motion with minimal wrist hinge. Think of a smooth, controlled arm swing where the body does the work.
  • “Sum” means adding wrist hinge to create leverage and speed through the hitting zone.
  • The progression starts with “nun, nun, nun” for controlled, compact swings, then builds to “nun, sum, nun” to introduce wrist leverage for power.

This framework is useful because it gives you a verbal cue you can repeat on the range without overthinking mechanics. Short irons benefit from a “nun, nun, nun” pattern. Mid-irons and long irons benefit from the “nun, sum, nun” sequence where the “sum” fires just before impact.

The practical result is compression. When the wrist hinge releases at the right moment, the ball launches lower with more spin, which is exactly what better players produce without seeming to try hard.

5. Cues to fix early extension and posture loss

Early extension is one of the most common swing faults in amateur golf, and most golfers do not know they have it. It happens when the pelvis thrusts forward toward the ball during the downswing. The result is less room for your hands and arms, which forces the club off its path and causes inconsistent contact and power loss at impact.

Posture loss and swaying off the ball are closely related faults. Swaying off the trail hip instead of turning around it leads to weak, high, spinny shots and poor low-point control. These are not feel problems. They are setup posture problems that make every feel cue less effective.

The fix starts at address. Set the base of your spine closer to the target side and correct your hip hinge to create an athletic posture. This position gives your pelvis somewhere to rotate rather than slide. The cue to use during the swing is “turn, don’t slide.” Your hips should rotate around a stable axis, not push toward the ball.

Pro Tip: Practice with your trail glute touching a wall or chair during slow-motion swings. If you lose contact with the wall before impact, you are early extending. This drill builds the hip stability cue into muscle memory faster than any verbal reminder alone.

Reviewing your golf posture fundamentals before applying these cues will make the corrections stick faster. Posture is the foundation everything else sits on.

6. Cues for detecting and correcting common takeaway faults

The takeaway sets the tone for everything that follows. Fanning the clubface open in the first foot of the backswing is one of the most common swing mistakes in amateur golf, and it creates a chain reaction of compensations through the entire swing.

The cue to fix it is “logo to the sky.” As you take the club back, the logo on your glove should face upward when your hands reach hip height. This keeps the face square and the club on a neutral path. If your glove logo faces the ground at that checkpoint, the face is already open and you are chasing a problem that started before you even reached the top.

A second useful cue for the takeaway is “low and slow.” Keeping the clubhead close to the ground for the first 12 inches of the backswing prevents the steep, wristy pickup that leads to over-the-top moves. Pair this with the logo check and you have two objective markers that tell you immediately whether your takeaway is on track.

These cues work because they give you a specific, checkable position rather than a vague instruction like “keep it smooth.” You can verify them in a mirror, on video, or with a training partner in 30 seconds.

7. Using feedback to make cues actually stick

Feel is a starting point, not a destination. Data shows that golfers benefit most when cues are tied to objective feedback rather than purely internal sensations. Strike location on the face, carry distance, and ball flight are the real report card.

The practical application is simple. After applying a cue, check your divot pattern, look at where the ball struck the face using foot powder spray or impact tape, and track carry distance over a session. If the cue is working, those numbers move. If they do not, the cue is not producing real change regardless of how it feels.

Justin Thomas uses an over-exaggeration method in practice where he amplifies the feel cue far beyond what he wants in the actual swing. The logic is that motor-learning inertia requires a bigger input to produce a smaller real-world change. If you want to feel 10% different, you often need to practice feeling 40% different. That is not a flaw in the method. That is how the nervous system learns.

Pairing this approach with a self-taught vs. instructor-led framework helps you decide when to apply cues independently and when to get a second set of eyes on your swing.

Key takeaways

The most effective golf swing cues combine a clear physical checkpoint with objective feedback, making them measurable rather than purely subjective.

Point Details
Tempo before power Use EA Tischler’s count-to-three cue to sequence the downswing before adding speed.
Measure your plane Dr. Alison Curdt’s tee drill gives you an objective plane check at P3 in seconds.
Fix setup before swing Ball position and posture corrections eliminate faults before the swing starts.
Exaggerate in practice Over-amplify cues during practice sessions so real swings reflect the desired small change.
Tie cues to outcomes Check strike location and carry distance to confirm a cue is producing real results.

What I’ve learned about picking the right swing cues

Here is the honest truth about swing cues: most golfers collect them like souvenirs and use none of them well. I have seen players walk onto the range with six cues rattling around their heads and hit worse than they did with zero. The problem is not the cues. The problem is the absence of a feedback loop.

The cues that changed my own ball-striking were the ones I could verify immediately. Dr. Curdt’s tee drill is a perfect example. You do not have to wonder whether your plane is correct. The tee either points at the target or it does not. That kind of certainty is worth ten feel-based reminders.

I also think the golf teaching industry undersells exaggeration. When I started over-amplifying the “turn, don’t slide” cue during practice, my actual on-course hip rotation improved noticeably within two weeks. The feel vs. real gap is real, and the only way across it is to practice bigger than you play.

My advice: pick one cue from each category in this article, tempo, plane, and posture, and spend three range sessions doing nothing else. Measure your results with impact tape and a rangefinder. If the numbers move, the cue is working. If they do not, swap it out. Treat your swing like a scientist, not a wishful thinker.

— Michael

Take your swing cues further with Golf-blab

Reading about swing cues is one thing. Practicing them with the right equipment makes the difference between a range habit and a real on-course change.

https://golf-blab.com

At Golf-blab, we have put together resources and gear specifically for golfers who want to practice smarter. From personalized golf clubs that build confidence at address to training programs designed around real swing mechanics, the goal is the same as this article: give you tools that produce measurable results. If you are ready to put these cues into practice with gear that supports your game, check out the Golf-blab swing program and see what fits your game.

FAQ

What are golf swing cues?

Golf swing cues are short, memorable mental triggers that remind you of a specific mechanical position or feeling during your swing. They work best when paired with a physical checkpoint or measurable outcome rather than used as vague reminders.

How many swing cues should I use at once?

Use one cue per swing category, such as one for tempo and one for posture, and no more than two total during a single practice session. More than two cues at once creates mental overload and reduces swing quality.

Why does my swing feel correct but produce bad shots?

Feel often misleads because your nervous system reports what is familiar, not what is correct. Using impact tape, video, and carry distance data alongside your cues gives you an objective check that feel alone cannot provide.

What is the best swing cue for beginners?

EA Tischler’s count-to-three tempo cue is the best starting point for beginners because it addresses the most common fault, rushing the transition, without requiring any technical knowledge of swing geometry.

How long does it take for a swing cue to produce real change?

Most golfers see measurable improvement in strike location and ball flight within three to five focused practice sessions when they pair a cue with objective feedback like impact tape or a launch monitor.

Posted on

Workflow para etiquetar palos de golf paso a paso

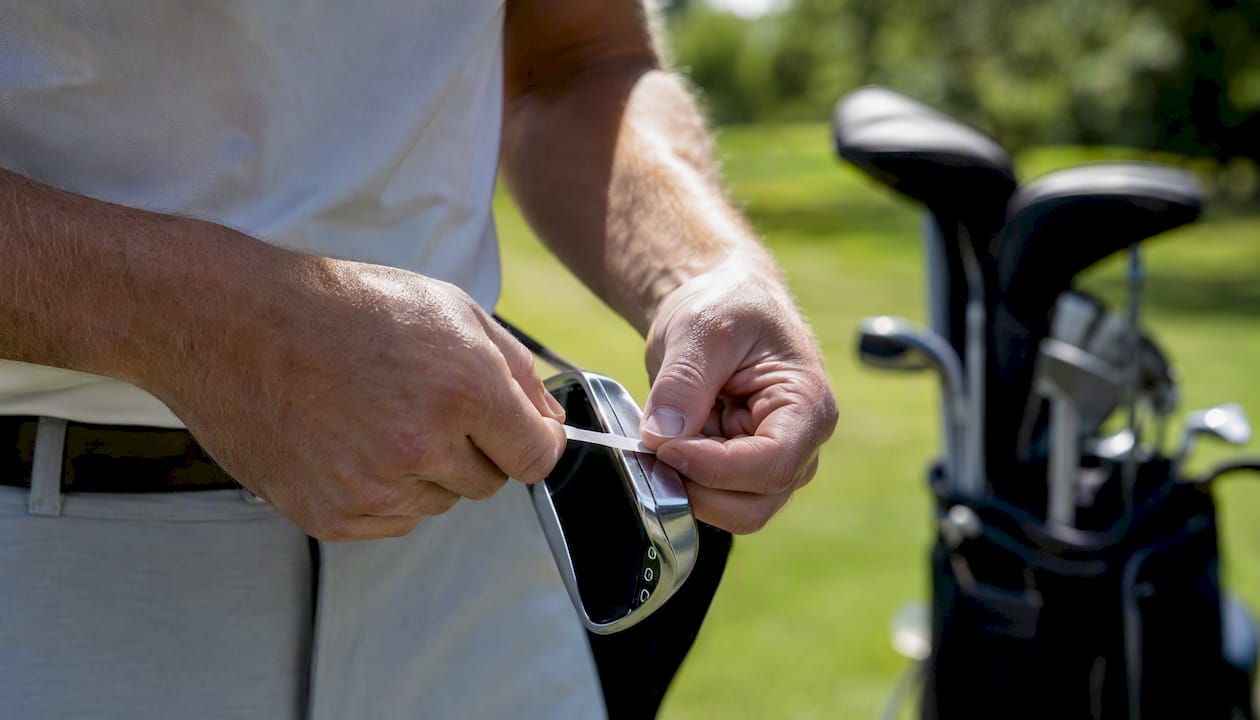
Especialista colocando una etiqueta en un palo de golf

El workflow para etiquetar palos de golf es el proceso de preparar, aplicar y personalizar marcas de identificación en cada palo para mejorar la organización y la velocidad de selección durante el juego. No existe una etiqueta oficial única para este fin: se trata de un sistema de identificación privado que cada golfista adapta a sus necesidades. Las herramientas más comunes incluyen etiquetas adhesivas personalizadas, grabado láser y micropercusión. Aplicado correctamente, este proceso reduce el tiempo que pierdes buscando el palo correcto y te permite concentrarte en lo que importa: el golpe.

¿Qué materiales necesitas para el workflow de etiquetado?

El etiquetado de palos de golf requiere tres categorías de materiales: los soportes de identificación, las herramientas de preparación y los elementos de fijación. Elegir bien en cada categoría determina si tu etiqueta dura una ronda o toda la temporada.

Tipos de etiquetas disponibles:

  • Etiquetas adhesivas personalizadas: la opción más accesible y rápida. Permiten incluir nombre, número o código de color. Son ideales para golfistas amateurs que quieren organización sin inversión alta.
  • Grabado láser: marca permanente sobre metal o plástico. Compatible con hierros, maderas y putters de acero o titanio.
  • Micropercusión: golpes mecánicos que crean marcas profundas en metal. Especialmente efectiva en superficies reflectantes donde el láser pierde precisión.

Herramientas de preparación y aplicación:

Herramienta Uso principal Nivel de usuario
Alcohol isopropílico Limpieza de superficie antes de aplicar Todos
Quitaesmalte sin acetona Eliminar residuos de adhesivos anteriores Todos
Máquina de grabado láser Marcado permanente en metal y plástico Avanzado
Máquina de micropercusión Marcado profundo en metales resistentes Avanzado
Espátula de silicona Aplicar etiquetas adhesivas sin burbujas Todos

La selección de máquina de grabado debe considerar el tipo de material del palo, el presupuesto y las dimensiones de la etiqueta. No todas las máquinas son compatibles con todos los materiales, y elegir mal puede dañar el acabado del palo.

Consejo profesional: Antes de comprar cualquier etiqueta adhesiva, verifica que el adhesivo sea resistente al agua y a la fricción. Los palos de golf se mojan, se frotan contra la bolsa y se limpian con frecuencia. Una etiqueta de papel estándar no sobrevive ni nueve hoyos.

¿Cómo aplicar etiquetas adhesivas en palos de golf?

La aplicación correcta de etiquetas adhesivas sigue un orden específico. Saltarte cualquier paso compromete la durabilidad. Aquí está el proceso completo:

  1. Limpia la superficie con alcohol isopropílico. Aplica sobre un paño limpio y frota la zona donde irá la etiqueta. La limpieza previa con alcohol elimina grasa, polvo y residuos que impiden que el adhesivo agarre bien. Este paso es el más ignorado y el que más fallas causa.

  2. Deja secar completamente. Espera al menos dos minutos después de limpiar. Aplicar sobre una superficie húmeda, aunque sea con alcohol, reduce la adherencia del adhesivo.

  3. Elige la posición correcta en el palo. La zona más visible y menos expuesta a impacto directo es el eje (shaft), en la parte superior cercana al grip. Evita la cara del palo y las zonas de contacto frecuente con el suelo o la bolsa.

  4. Retira el respaldo de la etiqueta con cuidado. Sostén la etiqueta por los bordes para no contaminar el adhesivo con el aceite de tus dedos.

  5. Aplica desde el centro hacia los bordes. Coloca el centro de la etiqueta primero y presiona hacia afuera con una espátula de silicona o con el pulgar. Esto expulsa el aire y evita burbujas.

  6. Presiona firmemente durante 30 segundos. El calor de tu mano activa el adhesivo. No es un mito: la presión sostenida mejora la adherencia inicial.

  7. Espera 24 horas antes de exponer al agua. El adhesivo necesita tiempo para curar completamente. Usar el palo en condiciones húmedas antes de ese tiempo puede despegar la etiqueta desde los bordes.

El éxito del etiquetado adhesivo depende más de la preparación de la superficie que del diseño o precio de la etiqueta. Un palo limpio y seco con una etiqueta económica supera a un palo sucio con una etiqueta premium.

Consejo profesional: Si el palo tiene un acabado mate o texturizado, usa etiquetas con adhesivo de alta resistencia (high-tack). Las etiquetas estándar no se adhieren bien a superficies rugosas y se despegan desde las esquinas en pocos días.

Manos limpiando el palo de golf antes de colocar las etiquetas

¿Qué opciones de grabado existen para identificación permanente?

El grabado es la alternativa al adhesivo cuando buscas una identificación que no se despegue jamás. Existen dos tecnologías principales, y elegir entre ellas depende del material de tu palo y del resultado que quieres.

Grabado láser frente a micropercusión:

Característica Grabado láser Micropercusión
Materiales compatibles Metal, plástico, madera Principalmente metales
Durabilidad Muy alta Muy alta
Profundidad del marcado Superficial a media Profunda
Costo del equipo Alto Medio
Velocidad de producción Muy rápida (ideal en serie) Más lenta
Resultado en superficies reflectantes Puede perder contraste Excelente contraste

El grabado láser es más eficiente para producción en serie y se adapta a una mayor variedad de materiales. La micropercusión destaca en metales resistentes con acabado profundo y visible. Si tienes hierros de acero inoxidable con acabado espejo, la micropercusión produce un resultado más legible que el láser.

Antes de grabar cualquier palo, haz una prueba en una zona no visible, como la parte inferior del eje. El grabado en área discreta permite verificar la legibilidad y la resistencia del marcado según el material específico de ese palo. Los acabados termoplásticos reaccionan de forma diferente al láser que el acero o el titanio.

Consideraciones prácticas para elegir proveedor:

  • Pide muestras antes de comprometer toda tu bolsa de palos.
  • Verifica que el proveedor tenga experiencia con materiales deportivos, no solo industriales.
  • Pregunta por la profundidad del grabado: marcas demasiado superficiales desaparecen con el uso.
  • Confirma que el proceso no afecta el acabado protector del palo, especialmente en maderas con recubrimiento de pintura.

La elección entre micropercusión y grabado láser es un equilibrio entre costo, material y acabado final. No hay una respuesta universal. Hay una respuesta correcta para tu palo específico.

¿Cómo organizar el etiquetado para optimizar tu juego?

Un buen proceso para etiquetar palos no termina en la aplicación. La organización del sistema de etiquetas determina si realmente ahorras tiempo en el campo o solo tienes palos bonitos.

Guía visual: cómo etiquetar tus palos de golf paso a paso

Consejo profesional: Usa un código de colores consistente: un color por categoría de palo. Por ejemplo, azul para maderas, rojo para hierros cortos, verde para hierros largos y negro para el putter. Con este sistema, tu mano va al color correcto antes de que tu mente procese el número.

Los errores más comunes en el etiquetado de palos de golf son estos:

  • Etiquetar sin limpiar: el error más frecuente y el más costoso. La etiqueta se despega en la primera ronda bajo lluvia.
  • Colocar la etiqueta en la cara del palo: interfiere con el golpe y se destruye en el primer impacto.
  • Usar etiquetas de papel sin laminado: el sudor y el agua las deterioran en horas.
  • No renovar etiquetas dañadas: una etiqueta a medias es peor que ninguna. Confunde más de lo que ayuda.
  • Sistemas demasiado complejos: si necesitas un manual para leer tus propias etiquetas, el sistema falla en el campo.

Para mantener el etiquetado en buen estado, revisa tus palos cada cuatro o cinco rondas. Las etiquetas adhesivas en zonas de alta fricción, como cerca del grip, se desgastan antes. Tener un pequeño stock de etiquetas de repuesto en tu bolsa de golf es una práctica que los jugadores organizados adoptan desde el primer año.

Conocer bien los tipos de palos de golf que usas con más frecuencia también ayuda a definir qué palos necesitan identificación más visible y cuáles puedes reconocer de memoria.

Puntos clave

Un proceso para etiquetar palos de golf que funciona requiere preparación de superficie, materiales adecuados al uso deportivo y un sistema de organización que sea legible en segundos durante el juego.

Punto Detalles
La limpieza es el paso más crítico Limpiar con alcohol antes de aplicar cualquier etiqueta determina su durabilidad real.
Elige el material según el palo El grabado láser funciona en metal y plástico; la micropercusión es superior en metales reflectantes.
Posición correcta de la etiqueta Coloca las etiquetas en el eje superior, cerca del grip, lejos de zonas de impacto.
Sistema de colores acelera la selección Un código de colores por categoría de palo reduce el tiempo de decisión en el campo.
Revisa y renueva con regularidad Inspecciona las etiquetas cada cuatro o cinco rondas y reemplaza las dañadas de inmediato.

Lo que nadie te dice sobre etiquetar tus palos

He visto golfistas gastar dinero en etiquetas premium y luego aplicarlas sobre palos sucios. El resultado es predecible: la etiqueta se despega en la segunda ronda y el jugador concluye que “las etiquetas no sirven”. No. El proceso falló, no el producto.

La verdad es que el etiquetado de palos es uno de esos detalles que separa al jugador organizado del que pierde 30 segundos en cada hoyo buscando el palo correcto. No es un tema glamoroso. Pero en un recorrido de 18 hoyos, esos segundos suman. Y la distracción de buscar un palo en el momento equivocado arruina más golpes de lo que crees.

Mi recomendación personal: empieza con etiquetas adhesivas de calidad deportiva y un sistema de colores simple. No necesitas grabado láser para tu primera temporada. Lo que necesitas es consistencia: misma posición en todos los palos, mismo sistema de colores, misma rutina de revisión. Cuando ese hábito esté instalado, entonces considera el grabado permanente para los palos que más usas.

Y si alguna vez dudas entre dos métodos, recuerda esto: el mejor sistema de etiquetado es el que realmente usas. Un sistema perfecto que abandonas en la tercera ronda vale menos que uno simple que mantienes toda la temporada.

— Michael

Personaliza tus palos con Golf-blab

Golf-blab tiene exactamente lo que necesitas para llevar tu etiquetado al siguiente nivel. Desde etiquetas personalizadas para palos hasta opciones de diseño que combinan estilo y durabilidad deportiva, la tienda está pensada para golfistas que toman en serio su organización en el campo.

https://golf-blab.com

Si quieres explorar el catálogo completo, las etiquetas para ejes de palos están disponibles en varios formatos y diseños. Cada producto está pensado para resistir las condiciones reales del juego: agua, fricción y uso intensivo. Visita la tienda de Golf-blab y encuentra la opción que se adapta a tu bolsa y a tu estilo de juego.

FAQ

¿Qué es el workflow para etiquetar palos de golf?

Es el proceso ordenado de preparar la superficie, seleccionar el tipo de etiqueta o grabado, aplicar correctamente y mantener el sistema de identificación en cada palo. El objetivo es mejorar la organización y la velocidad de selección durante el juego.

¿Cuál es el paso más importante al aplicar etiquetas adhesivas?

La limpieza previa con alcohol isopropílico es el factor más determinante para la durabilidad de la etiqueta. Sin ese paso, el adhesivo no agarra bien y la etiqueta se despega con el primer uso en condiciones húmedas.

¿Es mejor el grabado láser o la micropercusión para palos de golf?

Depende del material del palo. El grabado láser es más versátil y rápido, compatible con metal y plástico. La micropercusión produce marcas más profundas y visibles en metales reflectantes como el acero inoxidable con acabado espejo.

¿Dónde debo colocar la etiqueta en el palo?

La posición recomendada es el eje superior del palo, cerca del grip, en una zona visible pero alejada de la cara de impacto y del contacto frecuente con el suelo o la bolsa. Esta ubicación maximiza la visibilidad y la durabilidad de la etiqueta.

¿Con qué frecuencia debo revisar y renovar las etiquetas?

Revisa el estado de tus etiquetas cada cuatro o cinco rondas. Las etiquetas dañadas o parcialmente despegadas confunden más de lo que ayudan. Mantener un pequeño stock de repuestos en la bolsa de golf garantiza que el sistema funcione siempre.

Recomendación

Posted on

Golf Equipment Care Steps to Protect Your Game

Golfer cleaning clubs on home deck


TL;DR:

  • Consistent golf equipment care, including cleaning grooves, maintaining grips, and proper storage, significantly improves performance and prolongs gear lifespan. Neglecting routine maintenance leads to control loss, faster wear, and costly repairs, while low-effort routines ensure optimal shot accuracy and durability. Building simple, regular habits with the right tools makes equipment care an effortless yet impactful part of your game.

Golf equipment care is the practice of systematically cleaning, inspecting, and storing your clubs, grips, bags, and accessories to preserve performance and extend the life of your investment. Most golfers spend thousands on their gear and then leave it to degrade in a car trunk or skip groove cleaning for months. That is a costly mistake. The golf equipment care steps covered here draw on guidance from Golf Digest, PGA Play, and MyGolfSpy to give you a practical, performance-backed routine you can actually stick to. Whether you play twice a week or twice a month, these steps will protect your gear and sharpen your game.

What tools and products you need for effective golf equipment care

Before you clean a single club, you need the right supplies. Using the wrong materials is one of the fastest ways to damage finishes, degrade grips, or strip the coating off your irons. The good news is that a complete maintenance kit costs less than a sleeve of premium balls.

Here is what belongs in every golfer’s maintenance kit:

  • Groove brush or stiff-bristle brush: Clears packed dirt and grass from clubface grooves. A dedicated groove brush is ideal, but a firm toothbrush works in a pinch.
  • Mild dish soap: Dawn or any gentle dish soap mixed with warm water is the standard cleaning solution recommended across the industry.
  • Microfiber cloths and dry towels: Microfiber lifts debris without scratching. Dry towels are non-negotiable for drying shafts and grips after washing.
  • Wooden tee or plastic groove pick: Dislodges compacted mud from grooves without scratching the face.
  • Headcovers: Protect woods, hybrids, and putters from contact damage during transport.
  • Golf bag with dividers: Prevents club-on-club contact that chips finishes and weakens shafts over time.

What to avoid is just as important. Harsh chemicals and high-pressure water damage club finishes, loosen adhesives, and degrade grip rubber. Alcohol-based disinfectants are particularly destructive to grip tackiness. Steel wool and abrasive pads scratch metal faces and remove protective coatings permanently.

Supply Purpose
Groove brush Removes debris from clubface grooves to restore spin
Mild dish soap + warm water Safe cleaning solution for heads and grips
Microfiber cloth Lifts dirt without scratching shafts or faces
Headcovers Prevents impact damage to woods and putters during transport
Wooden tee or groove pick Clears packed mud without scratching the clubface

Pro Tip: A $5 to $10 groove brush clipped to your bag is one of the highest-return investments in golf. Tour pros use them between every shot. You should too.

Infographic illustrating golf equipment care steps

How to clean golf clubs: step-by-step for heads, shafts, and grips

Proper club cleaning, known in maintenance circles as component-specific care, means treating each part of the club differently because each part is made of different materials with different vulnerabilities. Here is the full process.

Cleaning clubheads (irons and wedges)

  1. Fill a bucket or sink with warm water and a few drops of mild dish soap.
  2. Submerge only the clubheads. Never submerge the full shaft, especially on graphite, because water can seep under the ferrule and weaken the bond.
  3. Let irons and wedges soak for five to ten minutes to loosen caked-on dirt.
  4. Scrub the face and grooves firmly with a groove brush or stiff-bristle brush. Work the brush in the direction of the grooves, not across them.
  5. Use a wooden tee to clear any remaining packed debris from individual grooves.
  6. Rinse the head with clean water and dry immediately with a microfiber cloth.

Cleaning shafts

Steel shafts can be wiped down with a damp cloth and dried right away. Graphite shafts need gentler handling. Use a soft, barely damp cloth and avoid twisting or scrubbing. Dry completely before storing. Moisture left on graphite shafts accelerates micro-cracking over time.

Close-up of golf cleaning tools and club

Cleaning grips

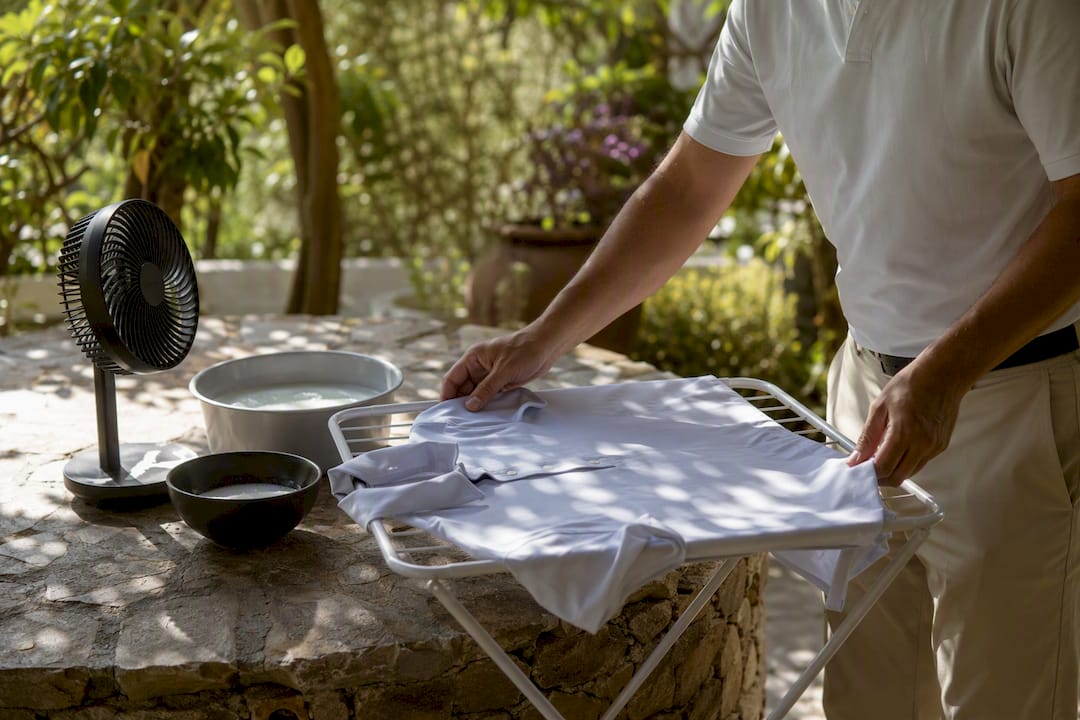
PGA Play and Golf Pride recommend washing grips with warm water and mild soap, scrubbing gently with a soft cloth, rinsing thoroughly, and air drying completely before the next round. This process restores tackiness and removes the oils and sweat that build up with every round. Grips dried in direct sunlight or near heat sources will harden and crack faster, so air dry at room temperature.

How often should you clean your clubs?

Clean clubheads and grips after every round. A quick wipe takes two minutes and prevents buildup from hardening. Do a full deep clean, including soaking irons and scrubbing every groove, once a month or after any round played in wet or muddy conditions.

Pro Tip: Clean grooves produce dramatically more spin. Dirty grooves cut spin from roughly 10,500 rpm to 5,759 rpm on wedge shots. That is nearly a 50% drop. Two seconds with a brush between shots is the simplest stroke-saver in golf.

What should you do during a round to protect your equipment?

In-round care is where most amateur golfers leave strokes on the table. You do not need to carry a cleaning kit the size of a toolbox. A wet towel, a dry towel, and a groove brush clipped to your bag handle the job.

Here is a practical in-round maintenance routine:

  • After every iron or wedge shot: Wipe the clubface with a damp towel, then run a groove brush across the face. This takes two seconds and restores the friction that creates spin and shot control.
  • After every shot in wet conditions: Dry the grip with a dry towel before re-gripping. Slippery grips cause tighter grip pressure and tension throughout the swing, which degrades both speed and consistency.
  • Between holes: Replace headcovers on woods and hybrids. Bag dividers prevent clubs from banging together during cart rides or carries.
  • During rain delays: Dry all grips and clubfaces before play resumes. Wet grips left to sit will lose tackiness faster than normal wear.
  • At the turn: Take thirty seconds to wipe down your bag handles, check for loose headcovers, and clear any mud from your shoes or spikes.

The on-course groove cleaning workflow used by tour pros is simple: towel, brush, tee. Standardize that sequence and you will never hit a shot compromised by a dirty face again.

Pro Tip: Clip a groove brush to your bag’s towel ring so it is always within reach. Golf Pride advises drying grips during every round, especially after rain, to sustain control through the full 18 holes.

How should you store golf equipment to extend its lifespan?

Storing golf gear correctly is one of the most overlooked aspects of golf gear maintenance tips. The damage from poor storage is slow and invisible until it is expensive. Here is what proper storage looks like.

The cardinal rule: Never store clubs in your car trunk. Heat dries out grips and makes them brittle. Cold stiffens them and reduces tackiness. Extreme temperatures shrink grip lifespan significantly and affect overall club performance. A cool, dry indoor space is always the right answer.

Follow this storage checklist after every round:

  1. Dry all clubs completely before putting them in the bag. Moisture trapped in a closed bag breeds rust on steel components and weakens graphite bonds.
  2. Replace all headcovers on woods, hybrids, and putters.
  3. Stand the bag upright in a cool, dry location. Laying it on its side causes clubs to shift and rub against each other.
  4. Remove wet towels, gloves, and any food or drink from bag pockets. Wet items left inside create mold and odor.
  5. Check the bag’s feet and stand mechanism for damage. A broken stand causes the bag to fall repeatedly, which stresses shafts and club connections.

Seasonal maintenance: the spring reset

MyGolfSpy’s 7-step spring cleaning routine is the gold standard for seasonal gear preparation. It includes emptying and vacuuming the bag, washing all textiles, checking spikes and grips, deep cleaning every club, and inspecting for damage. This kind of seasonal reset reveals unseen dirt and damage that builds up over a full season and restores your gear to functional readiness before the first round of the year.

During your seasonal inspection, check for these specific issues:

  • Loose clubheads or rattling ferrules
  • Cracks or flat spots on graphite shafts
  • Worn or hardened grips that no longer feel tacky
  • Frayed or broken bag straps and zippers
  • Worn shoe spikes that reduce traction

Catching early wear during a cleaning routine prevents costly repairs and avoids performance loss mid-season. Gear that cannot be restored should be donated to junior golf programs or recycled through manufacturer take-back programs rather than left to deteriorate in a closet.

Common mistakes that damage your golf equipment

Even golfers who care about their gear make these errors regularly. Knowing what not to do is half the battle.

  • Using harsh cleaning products: Bleach, acetone, and alcohol-based sprays strip protective finishes from clubheads and destroy grip rubber. Stick to mild dish soap and warm water, full stop.
  • Skipping groove cleaning: Dirty grooves are not just a cosmetic issue. The spin loss is real and measurable. Neglecting this one step costs you control on every wedge shot you hit.
  • Wet storage: Putting damp clubs into a closed bag is the fastest way to rust steel shafts and corrode the hosel. Always dry before storing.
  • Ignoring grip wear: Worn grips cause you to grip tighter, which creates tension and kills swing speed. Replace grips when they lose tackiness or show visible cracking. Most golfers should replace grips once per season.
  • Neglecting the bag itself: Bags collect dirt, moisture, and debris that transfer back onto clean clubs. Wash the bag’s exterior and vacuum the interior at least once per season.
  • Overlooking shoes: Golf shoes with worn spikes reduce stability at address and through impact. Check spikes every few rounds and replace them before they affect your footing.

The updating your equipment conversation always comes up, but the truth is that well-maintained gear outperforms neglected new gear. Care first. Replace when care is no longer enough.

Key takeaways

Consistent golf equipment care, built around cleaning grooves, maintaining grips, and storing gear correctly, is the single most cost-effective way to protect performance and extend the life of your clubs.

Point Details
Clean grooves after every shot Dirty grooves cut wedge spin by nearly 50%, costing you control on every approach.
Wash grips regularly Mild soap, warm water, and full air drying restore tackiness and extend grip life.
Store clubs indoors Extreme heat and cold degrade grips and affect shaft integrity over time.
Do a seasonal deep clean A spring reset reveals hidden damage and restores full equipment readiness before the season.
Avoid harsh chemicals Bleach and alcohol-based cleaners strip finishes and destroy grip rubber permanently.

What 20 years on the course taught me about equipment care

Here is the naked truth: most golfers treat equipment care like a chore they will get to eventually. I used to be one of them. I would finish a round, toss the bag in the garage, and wonder why my wedges were spinning inconsistently two months later. The answer was always sitting right there in the grooves.

The habit that changed everything for me was the two-second groove clean between shots. It sounds trivial until you see the spin numbers. Going from 5,759 rpm to 10,500 rpm on a wedge shot is not a marginal gain. That is the difference between a ball that checks up and one that rolls through the green. Once I standardized the towel-brush-tee routine, my short game became noticeably more predictable.

Grip care was the second revelation. I was gripping tighter than I needed to because my grips had lost their tackiness and I did not even realize it. A simple wash and a fresh set of grips every season removed tension I had been carrying for years. If you want to know more about how golf strategy and equipment reliability connect, the relationship is tighter than most people think.

My honest advice: build the routine around convenience, not perfection. A quick wipe after every shot, a full clean once a week, and a seasonal deep clean before the first round of the year. That is it. You do not need an hour and a specialty cleaning station. You need consistency and the right tools within arm’s reach.

— Michael

Gear that works as hard as you do

https://golf-blab.com

At Golf-blab, we believe your equipment should reflect the care you put into your game. If you are already following a solid maintenance routine, the next step is making sure your gear is set up exactly the way you want it. Our golf club personalization options let you customize shaft labels, protect your clubs with branded accessories, and organize your bag the way a serious golfer should. Browse the full range of maintenance accessories and personalization products at the Golf-blab shop and give your gear the treatment it deserves.

FAQ

What are the most important golf equipment care steps?

The core steps are cleaning clubface grooves after every shot, washing grips with mild soap and warm water regularly, drying all clubs before storage, and doing a full seasonal inspection. These four habits cover the majority of performance and longevity gains.

How often should you clean golf club grooves?

Clean grooves between shots during a round, especially on wedges and short irons. Dirty grooves reduce wedge spin by nearly 50%, dropping from roughly 10,500 rpm to 5,759 rpm, which directly costs you shot control.

What is the best way to store golf clubs?

Store clubs in a cool, dry indoor space with headcovers on woods and hybrids. Avoid car trunks and garages with extreme temperature swings, as heat and cold both degrade grip materials and affect shaft performance over time.

How do you know when to replace golf grips?

Replace grips when they feel hard, slick, or show visible cracking. Most golfers should replace grips once per season. Worn grips force tighter grip pressure, which creates swing tension and reduces both speed and consistency.

Why is golf equipment care important for performance?

Clean, well-maintained equipment performs the way it was designed to. Dirty grooves, worn grips, and damaged shafts all introduce variables that no amount of swing improvement can fully compensate for. Maintenance is the foundation that makes every other improvement possible.