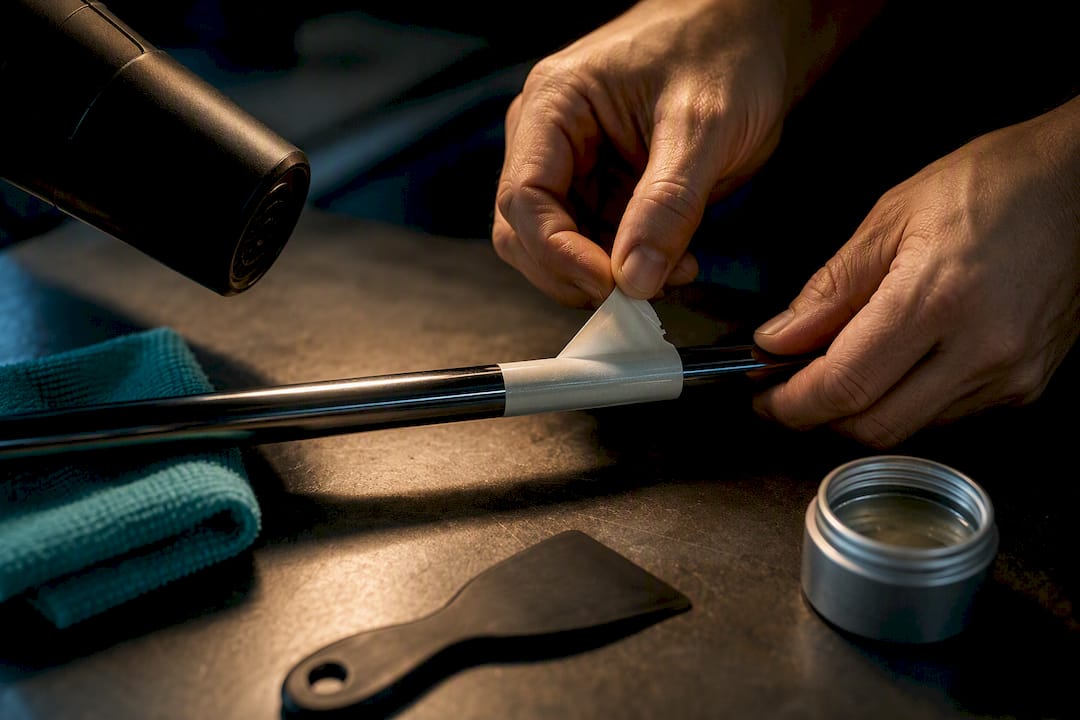
Heat the sticker with a hair dryer, peel it low-and-slow from one corner, then dissolve what’s left with a citrus remover like Goo Gone or a splash of isopropyl alcohol. That sequence works safely on both steel and graphite shafts, though graphite demands lower heat and a lighter hand near the ferrule. Skip acetone and metal blades entirely, and you’ll walk away with a clean shaft and an intact finish.
TL;DR:
- Using a hair dryer on low or medium heat for 30 to 60 seconds softens the sticker’s adhesive, making peeling safer and reducing finish damage.
- A plastic scraper or an old credit card should be used gently at a low angle to lift the sticker without scratching the shaft surface.
- Citrus-based removers like Goo Gone are effective for most residues, but stubborn adhesive may require stronger solvents like WD-40 or isopropyl alcohol, applied carefully.
- Graphite shafts require lower heat and milder solvents, while steel shafts tolerate slightly more aggressive cleaning, but metal blades and acetone must be avoided.
- Proper cleaning, including thorough washing and drying, preserves the shaft finish and creates a better surface for new labels or grips that last longer.
Table of Contents
- How Do You Remove Stickers From Golf Clubs Safely?
- What Tools and Supplies Do You Need on Hand?
- The Step-by-Step Method: Heat, Lift, Solvent, Clean
- Which Solvent Should You Use for Adhesive Residue?
- Does Shaft Material Change How You Should Clean It?
- What About Stubborn Residue, Lead Tape, or Hosel Labels?
- What Do You Do When Something Goes Wrong?
- How Do You Clean Up and Restore the Club’s Finish?
- Why Careful Label Removal Matters More Than Golfers Think
- Give Your Freshly Cleaned Clubs a Label That Actually Lasts
- Sources
- FAQ
How Do You Remove Stickers From Golf Clubs Safely?
The short version deserves a longer explanation, mostly because so many golfers reach for the wrong tool first. A butter knife feels efficient. A splash of nail polish remover feels like a shortcut. Both are how a $200 driver shaft ends up with a scarred clear coat and a warranty claim nobody wants to file.
Removing golf club stickers correctly is less about brute force and more about patience layered on top of the right chemistry. Heat softens the adhesive bond. A plastic edge lifts the label without scoring the surface underneath. A solvent finishes the job by breaking down whatever glue residue clings on after the sticker itself is gone. Every credible source on golf club label removal, from equipment forums to gear publications, converges on this same three-stage logic, and for good reason: it respects the materials instead of fighting them.
This matters more than it sounds like it should. A shaft isn’t just a stick that swings a clubhead. It’s the one part of the club your hands feel on every single swing, and any residue, tackiness, or dulled finish left behind changes that feel in small but noticeable ways. Getting the removal right the first time means you’re not troubleshooting a sticky grip zone three rounds later.

What Tools and Supplies Do You Need on Hand?
Gather everything before you start. Stopping mid-project to hunt for a scraper while a sticker cools back down defeats the purpose of the heat step.
Tools:
- A hair dryer, set to low or medium heat (no heat gun, which runs far too hot for shaft finishes)
- A plastic scraper or an old, expired credit card for lifting edges
- Microfiber cloths, at least two, for wiping and buffing
- Cotton swabs for tight spots near the ferrule or hosel
Solvent options, each with its own trade-off:
- Goo Gone or another citrus-based remover, for speed and general safety on finished surfaces
- WD-40, for stubborn adhesive that laughs at citrus removers
- Isopropyl alcohol, for a clean, film-free finish
- Plain cooking oil, for delicate or unknown finishes where you’d rather go slow than risk a reaction
Keep acetone, steel wool, and anything metal-bladed out of reach. Abrasive tools and acetone are the two most common causes of avoidable shaft damage, and there’s no upside to the risk when gentler options work just as well given a little more time.
Pro Tip: Dab any new solvent on a hidden section of the shaft, like the part that sits inside the grip, and wait five minutes before treating a visible area. Some clear coats react unpredictably, and you’d rather find that out somewhere nobody will ever see.
The Step-by-Step Method: Heat, Lift, Solvent, Clean
This is the sequence to follow, in order, without skipping steps to save time.
- Apply heat. Hold the hair dryer four to six inches from the sticker on low or medium heat for 30 to 60 seconds. Touch the label periodically; once it feels warm and slightly pliable rather than stiff, it’s ready.
- Start the peel. Work a plastic scraper or old credit card under one corner at the lowest angle you can manage, almost parallel to the shaft. Pull slowly rather than yanking, reheating for another 15 to 20 seconds if the label starts to resist or tear.
- Apply solvent to the residue. Once the sticker itself is off, you’re usually left with a tacky adhesive ghost. Dab a small amount of your chosen solvent onto a cloth, not directly onto the shaft, and press it against the residue for 30 seconds before rubbing in small circles.
- Rinse and dry. Wipe the treated area with a damp cloth to lift dissolved adhesive and any solvent film, then dry it completely with a fresh microfiber cloth.
That final drying step isn’t a formality. Leftover moisture or oily film changes how the shaft feels in your hands on the next swing, and it can attract dust and grip debris that re-creates the sticky problem you just solved.
Pro Tip: Work in short sections rather than trying to heat and peel an entire label at once. A three-inch decal comes off far more cleanly in two passes than in one rushed pull.

Which Solvent Should You Use for Adhesive Residue?
Not every solvent behaves the same way, and picking the wrong one for the job either wastes your time or introduces risk you didn’t need to take.
- Goo Gone (citrus-based remover): It’s a fast, generally safe first choice for finished shaft surfaces, and most golfers keep a bottle around for exactly this reason. Keep it off rubber grips, where citrus oils can soften and degrade the material over repeated use.
- WD-40: It penetrates adhesive bonds aggressively and often clears residue that citrus removers can’t touch. The trade-off is an oily film that has to be washed off afterward, or you’ll end up with a slick spot exactly where your hands need grip.
- Isopropyl alcohol: This is the best finishing pass. It evaporates cleanly without leaving film, which makes it the right tool for the last wipe-down rather than the first attack on stubborn glue.
- Cooking oil or peanut butter: Slower, but genuinely gentle. If you’re working on a finish you don’t fully trust, or you’re out of commercial solvents, a light coating left to sit for several minutes can loosen adhesive without any chemical risk.
The escalation only goes one direction: start mild, move to something stronger only if the gentler option genuinely fails after a fair attempt. Jumping straight to the strongest solvent on the shelf is how minor residue turns into a bigger cleanup problem, and it’s rarely necessary. If a solvent hasn’t budged the residue after two honest attempts, that’s the signal to stop and reconsider your method rather than reach for something harsher.
Does Shaft Material Change How You Should Clean It?
Graphite and steel don’t tolerate the same treatment, and treating them identically is where most avoidable damage happens.
- Graphite shafts: Use lower heat settings and shorter bursts than you would on steel. Acetone and high heat both risk damaging the clear coat and the epoxy bond at the ferrule, so avoid soaking that area even with milder solvents.
- Steel or chrome shafts: More forgiving of heat and general handling, but still no metal scrapers or abrasive pads. Chrome scratches more easily than its tough appearance suggests.
- Grips: Keep citrus removers and alcohol away from rubber grip material, since both can dry it out or cause swelling over repeated exposure. Heat and mechanical peeling alone usually handle any sticker or tag near the grip.
- Clubhead finishes and painted areas: Always test a new solvent on a hidden spot first. Painted logos and cosmetic finishes react differently than bare shaft surfaces, and a five-minute test saves a permanent mistake.
What About Stubborn Residue, Lead Tape, or Hosel Labels?
Some jobs don’t fit the standard sequence cleanly, and it helps to know the edge cases before you improvise something risky.
- Hardened, baked-on residue: A Magic Eraser can work as a cautious last resort. The melamine foam lifts adhesive through gentle micro-abrasion, but press lightly, since heavier pressure can dull a high-gloss finish over repeated passes.
- Delicate or unknown finishes: A long soak with cooking oil, left for one to two hours, softens even stubborn adhesive without any chemical risk. It takes patience, not effort.
- Old adhesive near the hosel: Clean around lead tape and hosel labels with short solvent applications rather than a long soak, since pooled solvent can seep into places you don’t want it.
- When to call a technician: If a finish looks cloudy, bubbled, or discolored after any of these methods, stop immediately. That’s a job for a club tech, not another round of solvent.
What Do You Do When Something Goes Wrong?
Most problems here have a quick, low-risk fix.
- Sticker tears mid-peel: Reheat the remaining piece for another 15 to 20 seconds and restart the peel from a fresh corner rather than fighting the torn edge.
- Residue won’t fully lift: Repeat the solvent application, or switch from citrus remover to isopropyl alcohol for a stronger finishing pass.
- Finish looks dull or hazy after cleaning: Stop treatment immediately, test the reaction on a hidden spot, and consult a professional repair resource if the haze doesn’t buff out with a dry microfiber cloth.
- Nothing’s working after two full attempts: That’s the point to hand it to a technician rather than escalate to acetone or abrasive pads out of frustration.
Pro Tip: If you’re genuinely unsure whether a stain is finish damage or just leftover solvent film, let the shaft sit dry for ten minutes before judging it. Film often looks worse wet than it actually is.
How Do You Clean Up and Restore the Club’s Finish?
The last stage is easy to rush, and rushing it is exactly how a great cleanup job turns into a slippery grip on your next range session.
- Wash any area treated with WD-40 or cooking oil in warm, soapy water, since oil-based solvents leave a film that affects both feel and safety if left untreated.
- Follow with a light isopropyl alcohol wipe for a final degrease if any tackiness remains.
- Buff the whole shaft with a dry microfiber cloth and inspect closely under good light for scratches or dulled spots.
- Store clubs somewhere dry to prevent rust on steel shafts and to keep dust from settling into any leftover tackiness. A quick look at broader club care routines pays off well beyond this one cleanup.
Why Careful Label Removal Matters More Than Golfers Think
Most golfers treat sticker removal as an afterthought, something to handle in thirty seconds with whatever’s nearby. That instinct is exactly backward. A shaft’s finish is a thin, permanent layer, and every scrape from a metal blade or every splash of acetone leaves a mark you’ll be looking at for the life of the club. The methods that actually work, heat, patience, and the right solvent, take maybe five extra minutes compared to brute force. That’s a trade worth making every time.
Golf Blab builds its educational content around exactly this kind of practical, no-nonsense equipment care, alongside resources on how to grip a golf club and other maintenance fundamentals that keep your set performing the way it should. Once a shaft is clean, it’s also the ideal moment to think about what goes on next, since a fresh surface is what makes a custom label sit flat and last through a full season instead of peeling at the edges within weeks.
Get the cleaning right, and everything you add to that shaft afterward, label, grip, or fresh coat of care, has a better surface to hold onto.
— Michael Marini
Give Your Freshly Cleaned Clubs a Label That Actually Lasts
A shaft stripped of old sticker residue is the best possible surface for something new, and that’s exactly where Custom Golf Club Labels from Golf Blab come in. Unlike a factory decal that peels and fades within a season, these labels are built for golfers who want their identity on the shaft without sacrificing the clean finish underneath. Priced at $29.99 one-off, they’re a straightforward way to mark your bag, your set, or a gift with something that outlasts a single round. Pair them with a Golf Blab Under Armor Golf Hat or a Golf Blab Adidas Sport Polo for the full setup, or browse the Golf Blab shop for gift cards and gear. Once your shafts are clean, check the materials and place your order while the surface is prepped and ready.
Sources
These sources back the methods covered above, each focused on a different piece of the process. Golf covers citrus-based solvent safety and grip precautions. CaddieHQ details the gentle-to-strong escalation approach. Golf Hire Ireland outlines the heat-and-peel timing. GolfWRX forum discussions reflect real technician and hobbyist consensus on tools to trust and tools to avoid.
- Golf
- How to Take Stickers Off Golf Clubs — CaddieHQ
- 7 Ways to Remove Stickers From Golf Clubs Safely — Golf Hire Ireland
- Sticky situation: best way to remove labels from golf shafts — TopGolfe
FAQ
How Do I Remove Labels From Golf Club Shafts?
Heat the label with a hair dryer for 30 to 60 seconds, then peel it slowly at a low angle using a plastic scraper. Follow with a citrus-based remover or isopropyl alcohol to clear any leftover adhesive, then wash and dry the shaft completely.
Does WD-40 Remove Sticker Residue?
Yes, WD-40 penetrates and dissolves adhesive bonds effectively, often clearing residue that gentler solvents can’t. It leaves an oily film behind, so a wash with warm soapy water afterward is necessary to restore proper grip feel.
Should I Take the Stickers Off My Golf Clubs?
That’s a personal call, though many golfers remove factory stickers to clean up the shaft’s appearance or make room for a custom label. If you do, use the heat-and-peel method rather than scraping with anything metal to keep the finish intact.
Will Dawn Dish Soap Remove Sticker Residue?
Warm water mixed with a mild dish soap works well as a gentle first attempt on light residue, and it’s a safe starting point before reaching for stronger solvents. For stubborn adhesive that soap alone won’t touch, move up to isopropyl alcohol or a citrus-based remover.